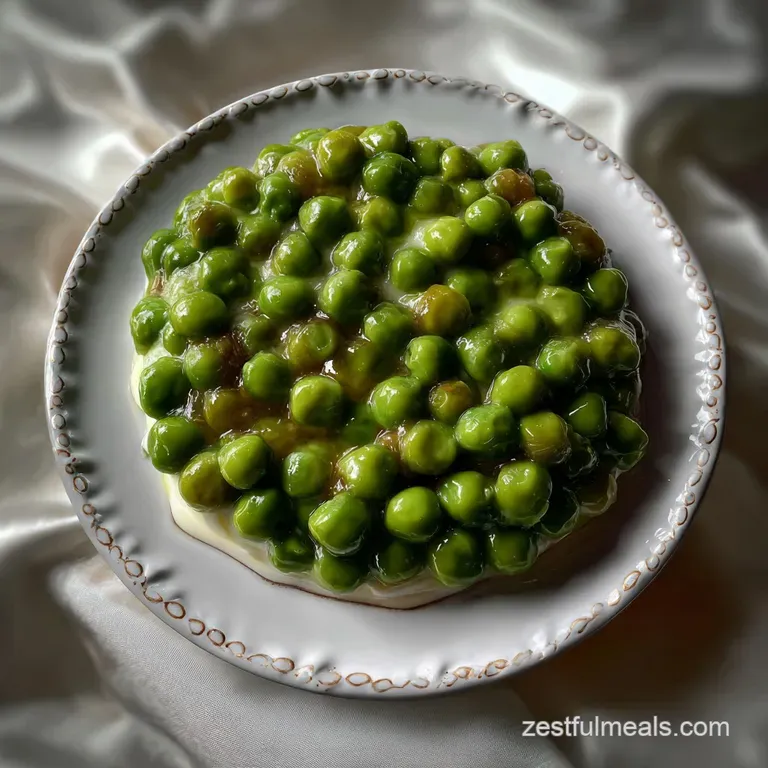
Silky Cream Peas Recipe with Buttery Sauce
- Time: Active 5 minutes, Passive 15 minutes, Total 20 minutes
- Flavor/Texture Hook: Silky, buttery sauce with sweet, snapping pops of green
- Perfect for: Weeknight dinners, holiday sides, or comforting picky eaters
- Traditional Comfort with a Southern Cream Peas Recipe
- Why Families Love These Peas
- Planning Your Kitchen Timeline
- Essential Pantry Staples Needed
- Simple Tools for Success
- Cooking the Perfect Side Dish
- Avoiding Lumpy White Sauce
- Flavor Variations for Everyone
- Storing and Reheating Leftovers
- What to Serve Alongside
- Common Pea Questions Answered
- Recipe FAQs
- 📝 Recipe Card
Traditional Comfort with a Southern Cream Peas Recipe
Nothing beats the sound of a bubbling pot on a Tuesday night when the kids are hungry and the budget is tight. I remember my grandmother standing over a cast iron pot, stirring a white sauce until it was thick enough to coat the back of her wooden spoon. This cream peas recipe is exactly that kind of memory in a bowl.
It is simple, fast, and uses ingredients you likely already have in your pantry. We often get caught up in trying to make side dishes complicated, but sometimes, the most comforting thing you can put on the table is a bowl of peas swathed in a rich, buttery sauce.
Why do we keep coming back to this dish? It is the ultimate "pantry pull." When I haven't had time to hit the store, a bag of frozen peas and a carton of milk save the day. It is a lifesaver for busy families who need something green on the plate that the kids will actually eat without a fuss.
My youngest usually picks around vegetables, but when they are tucked into this velvety sauce, she asks for seconds. It is a humble dish, sure, but it feels like a warm hug during a hectic week.
We are going to walk through how to get that sauce perfectly smooth every single time. No lumps, no thin "soupy" texture, just pure comfort. Whether you are serving this alongside a Sunday roast or just a simple piece of grilled chicken, it holds its own.
Let's get into how we make this magic happen in under twenty minutes.
Why Families Love These Peas
The beauty of this side dish lies in its balance. You have the natural sweetness of the peas playing against the savory, salty notes of the white sauce. It is a combination that has stood the test of time for a reason.
The Science of Why it WorksStarch Gelatinization: When flour is heated with butter and then whisked into milk, the starch granules swell and burst, creating a stable network that thickens the liquid into a sauce.
Flavor Synergy: The tiny pinch of sugar and nutmeg acts as a bridge, enhancing the natural sugars in the peas while the fat in the milk carries the savory spice notes across the palate.
- Cost Effective: We use basic staples like flour, butter, and frozen peas to keep the price per serving incredibly low.
- Speed: Unlike roasting vegetables which can take 40 minutes, this is done in 20 minutes flat.
- Texture: The sauce creates a "shatter proof" coating that stays silky even as it cools slightly on the plate.
- Adaptability: It is easy to scale up for a potluck or down for a quiet lunch for two.
Planning Your Kitchen Timeline
Success in the kitchen usually comes down to timing. You don't want your sauce to sit too long while the peas are still thawing, and you definitely don't want the peas to turn mushy while you wait for the sauce to thicken.
| Feature | Fast Method (Frozen) | Classic Method (Fresh) |
|---|---|---|
| Prep Time | 5 minutes | 20 minutes (shelling) |
| Texture | Consistent snap | Variable tenderness |
| Best For | Quick weeknights | Seasonal spring dinners |
This velvety texture reminds me of the base in a Simple Tomato Soup recipe, where getting the thickness just right is the key to the whole experience.
Three Step Execution Plan
- The Base (Minutes 0-7): Melt your butter and whisk in the flour to create a blonde roux. This is where you build the foundation of flavor.
- The Emulsion (Minutes 7-12): Slowly stream in your milk. If you pour it all at once, you'll get lumps. Whisk constantly until it looks like heavy silk.
- The Finish (Minutes 12-20): Fold in the frozen peas. They will chill the sauce momentarily, so let them simmer gently until they are heated through and the sauce returns to a bubble.
Essential Pantry Staples Needed
I always tell my friends to check their expiration dates on spices before starting. Old black pepper loses its bite, and nutmeg that has been sitting for three years won't give you that warm aroma we are looking for.
Component Analysis
| Ingredient | Science Role | Pro Secret |
|---|---|---|
| Unsalted Butter | Fat medium for roux | Use high fat European style for a richer mouthfeel |
| Whole Milk | Liquid base/protein | Never use skim; the fat is needed to emulsify the starch |
| Frozen Peas | Structural heart | Don't thaw them first; they stay firmer if cooked from frozen |
- Substitute
- Ghee. It adds a toasted, nutty flavor but keep an eye on the salt.
- Substitute
- Cornstarch (use half the amount). Note: This creates a more translucent, glossy sauce rather than an opaque cream.
- 1.5 cups (355ml) Whole Milk
- The body of the sauce. Why this? Fat content is crucial for that velvety "cling" on the peas.
- Substitute
- Brown Sugar Creamer recipe is too sweet for this, but you can use half and half for an even richer Southern style creamed peas.
- 1/8 tsp (0.5g) Ground Nutmeg
- The "hidden" ingredient that makes people ask for the recipe.
- 1/2 tsp (2g) Granulated Sugar
- Highlights the natural sweetness of the legumes.
Simple Tools for Success
You don't need a professional kitchen to pull this off, but the right pan makes a difference. I prefer using a Lodge 3 quart Enameled Cast Iron Dutch Oven or a heavy bottomed saucepan.
The heavy bottom prevents the milk from scorching on the bottom, which is a common disaster when using thin, cheap pans.
You will also want a reputable silicone whisk. Metal whisks can sometimes scrape the bottom of non stick pans or create a metallic sound that drives me crazy. A good whisk is essential for breaking up those flour clumps in the early stages.
Honestly, don't even bother with a spoon for the sauce making part; the whisk is your best friend here.
Chef's Tip: To deepen the flavor, let the butter flour mixture (the roux) cook for an extra 60 seconds until it smells like toasted shortbread. Just don't let it turn brown!
Cooking the Perfect Side Dish

Let's crack on with the cooking. Follow these steps closely, and you will have a side dish that looks like it came from a high end diner but tastes like home.
- Melt the fat. Place 3 tbsp (42g) Unsalted Butter in your saucepan over medium heat. Wait until it sizzles and the foaming subsides.Note: This ensures the water has evaporated so the flour can toast properly.
- Create the roux. Sprinkle in 3 tbsp (24g) All purpose Flour. Whisk constantly for about 1 minute. Look for a pale gold color and a nutty aroma.
- Incorporate the liquid. Slowly pour in 1.5 cups (355ml) Whole Milk in a thin stream. Whisk vigorously during the pour to prevent lumps.
- Thicken the base. Continue cooking over medium heat, stirring occasionally. Stop when the sauce thickens enough to coat a spoon.
- Season the sauce. Stir in 1/2 tsp (3g) Kosher Salt, 1/4 tsp (1g) Black Pepper, and 1/8 tsp (0.5g) Nutmeg.
- Add the greens. Pour in the 16 oz (450g) Frozen Sweet Peas directly from the freezer. Note: No need to defrost; the residual heat from the sauce will do the work.
- Sweeten the deal. Add 1/2 tsp (2g) Granulated Sugar. This balances the earthy notes of the peas.
- Simmer gently. Let the mixture come back to a gentle bubble for 3-5 minutes. Watch for the peas to turn bright green and plump.
- Check the consistency. If the sauce is too thick, splash in a tablespoon of milk. If too thin, simmer for another minute.
- Final Taste. Adjust the salt if necessary and serve immediately while the sauce is still velvety.
Avoiding Lumpy White Sauce
We have all been there. You are whisking away, but suddenly there are little white "islands" of flour floating in your milk. It is frustrating, but it is also very fixable. Usually, this happens because the milk was added too quickly or the heat was too high.
Why Your Sauce Separates
If you see the butter floating on top and the milk looks watery, your emulsion has broken. This usually happens if the sauce gets too hot or if you use low-fat milk that doesn't have enough protein to hold the fat in place.
| Problem | Cause | Fix |
|---|---|---|
| Lumpy Sauce | Milk added too fast | Use a blender or mesh strainer to smooth it out |
| Gummy Texture | Too much flour/overcooked | Whisk in a splash of warm milk to loosen |
| Bland Flavor | Lack of salt/acid | Add a tiny pinch more salt or a drop of lemon juice |
Fixing a Lumpy Sauce
If you find yourself with a lumpy mess, don't throw it out! Simply pour the sauce through a fine mesh sieve into a clean bowl. Press the lumps through with a spoon to incorporate them, then return the smooth liquid to the pan. It's a quick save that prevents waste and keeps dinner on track.
Rescuing Over Thickened Gravy
Sometimes we get distracted by a phone call or a kid needing help with homework, and the sauce boils down too much. If it looks like paste, simply whisk in more milk, one tablespoon at a time, until it returns to a silky state. It's a forgiving process as long as you don't burn the bottom.
Flavor Variations for Everyone
Once you master the basic cream peas recipe, you can start playing with the flavors. My kids love it when I add a bit of crunch, but my husband prefers a bit of heat.
- Southern style creamed peas: Add 1/4 cup of cooked, crumbled bacon at the very end. The smokiness is incredible with the sweet peas.
- Creamed peas and corn recipe: Swap half of the peas for frozen sweet corn. This adds a beautiful color contrast and extra texture.
- Cheesy version: Stir in 1/2 cup of sharp cheddar cheese right before serving. (But honestly, don't even bother with low-fat cheese here; it won't melt correctly).
- Herbed version: Add 1 tbsp of fresh chopped dill or chives. This gives it a "springtime" feel that pairs perfectly with fish.
Decision Shortcut: If you want Extra Richness, use half and half instead of whole milk. If you want Crunch, top with toasted Panko breadcrumbs or fried onions. If you want Brightness, add 1 tsp of lemon zest just before serving.
Storing and Reheating Leftovers
This dish is best eaten fresh because the sauce can continue to thicken as it sits. However, if you have leftovers, they make a great lunch the next day.
- Fridge: Store in an airtight container for up to 3 days. The sauce will "set" in the cold, so it will look like a solid block when you take it out.
- Freezer: I don't recommend freezing the finished dish. The dairy in the sauce tends to separate and become grainy when thawed and reheated.
- Reheating: Place the leftovers in a small saucepan over low heat. Add a splash of milk (about 1-2 tablespoons) and stir constantly. This will help the sauce "relax" and return to its original velvety state. Avoid the microwave if possible, as it can cause the peas to explode or the sauce to break.
Zero Waste Tip: If you have just a small amount of creamed peas left, stir them into a pot of Simple Tomato Soup recipe or use them as a filling for a quick pot pie.
What to Serve Alongside
Because this dish is creamy and slightly sweet, it needs a partner that offers some acidity or a crisp texture. It's a classic companion to a Sunday roast or fried chicken. For a full meal, serve these alongside a Chicken and Shrimp recipe for a real feast.
I also love serving these with a simple meatloaf or even as a topping for mashed potatoes. If you're looking for a breakfast for-dinner vibe, they actually go surprisingly well next to Fluffy Pancakes From recipe and some salty sausage. The contrast of the sweet pancakes and the savory cream sauce is a fun twist that my family enjoys once in a while.
Common Pea Questions Answered
There are a few myths floating around about cooking with peas that we should clear up right now.
Myth: Frozen peas are less nutritious than fresh. Truth: Most frozen peas are flash frozen within hours of being picked. This locks in the vitamins and sugars, whereas "fresh" peas in the grocery store may have been sitting on a truck for days, causing their sugars to turn into bland starch.
Myth: You have to boil the peas before adding them to the sauce. Truth: Please don't do this! Boiling them separately makes them mushy and loses flavor. Adding them frozen directly to the hot sauce allows them to steam gently, maintaining that perfect "pop" when you bite into them.
- 1. Roux Check
- The flour/butter mixture should bubble for at least 60 seconds to remove the raw flour taste.
- 2. Heat Check
- Never let the milk reach a rolling boil; a gentle simmer is all you need to thicken it safely.
- 3. Pea Check
- Frozen peas only need 3 to 5 minutes to become tender. Any longer and they lose their vibrant green color.
This "cream peas recipe" is a testament to the fact that you don't need fancy ingredients to make something special. It's about the technique the gentle whisking, the careful seasoning, and the patience to let the sauce thicken.
Trust me on this, once you make these from scratch, those canned "cream style" vegetables will never taste the same again. Happy cooking!

Recipe FAQs
how to make cream peas?
Use a simple roux made from butter and flour. Melt the butter, whisk in the flour to form a roux, and then slowly whisk in milk until the sauce thickens enough to coat the back of a spoon before adding the peas.
how to make creamed peas using canned peas?
Yes, but they require special handling. Drain the liquid completely and rinse the canned peas well to remove excess sodium and canning flavor; then, add them in the last minute of simmering only, as they are already fully cooked and prone to turning mushy.
how to make creamed peas with frozen peas?
Add them directly from the freezer into the hot sauce. Do not thaw them first, as this releases too much water into your sauce; the residual heat in the thickened cream base will cook them perfectly in about 3 to 5 minutes.
how to make creamed peas on toast?
Yes, serve immediately over buttered toast points. This transforms the side dish into a satisfying open faced sandwich, similar to how a savory topping works well over biscuits; consider using a richer sauce base, perhaps using half and half instead of just milk, to support the bread.
how to make cream peas on the stove?
The entire dish is made on the stovetop using a medium heat saucepan. Start by creating the roux, whisking in the milk slowly to ensure a smooth emulsion, and then simmer until thick before adding the seasonings and the peas.
What's the secret to a lump free cream sauce?
Whisk continuously while slowly incorporating the milk into the hot roux. If you pour the milk in too quickly, the flour clumps up instantly. If you want to learn more about creating stable emulsions, see how the same principle of careful liquid addition works in our Easy Chicken Salad Sandwich: Creamy & Crunchy recipe.
Can I use alternative milk instead of whole milk?
No, whole milk is highly recommended for texture. Skim or low-fat dairy products lack the necessary fat content needed to properly emulsify the starch from the roux, which results in a thin or broken sauce.
For guaranteed thickness, stick to 2% or whole milk; if you were aiming for a richer, heavier base, you could try incorporating half and-half.
Cream Peas Recipe Silky Side

Ingredients:
Instructions:
Nutrition Facts:
| Calories | 246 calories |
|---|---|
| Protein | 9.6 grams |
| Fat | 11.9 grams |
| Carbs | 25.8 grams |
| Fiber | 5.1 grams |
| Sugar | 11.3 grams |
| Sodium | 348 milligrams |
