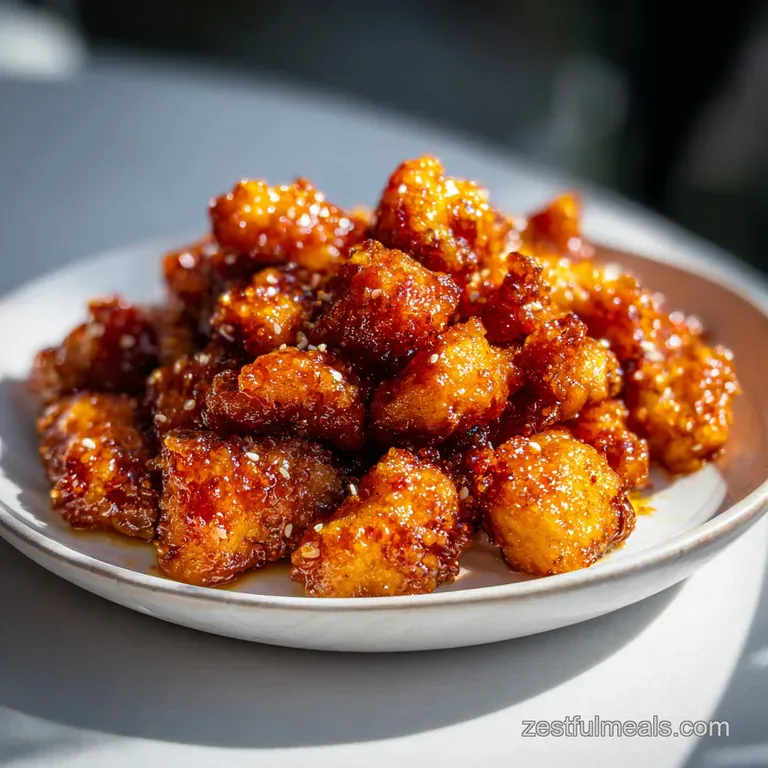
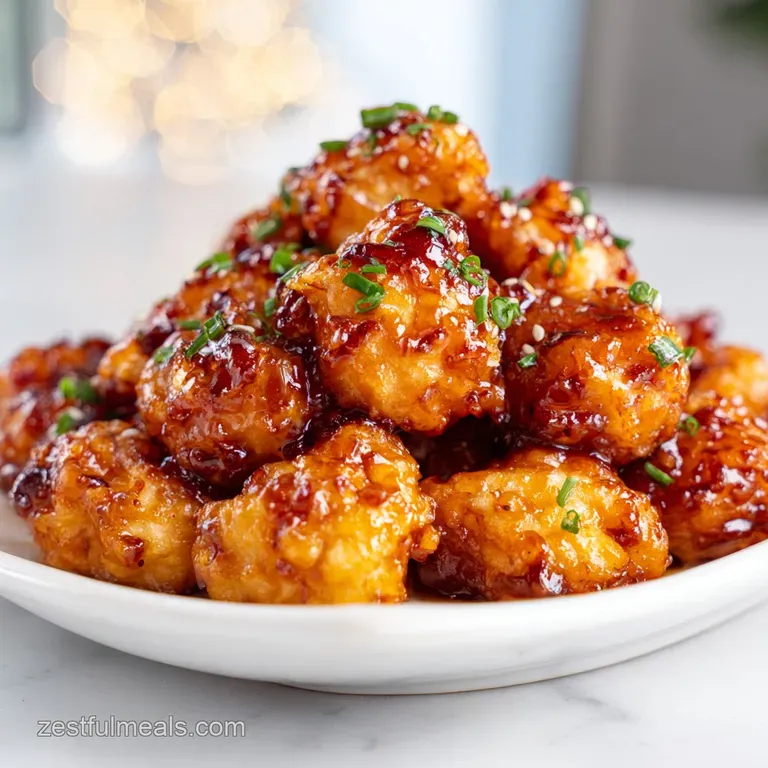
Crispy Honey Garlic Chicken Bites
- Time: Active 10 minutes, Passive 10 minutes, Total 20 minutes
- Flavor/Texture Hook: Shatter crisp exterior with a velvety, sweet and savory glaze
- Perfect for: Hectic weeknights when you need a kid approved win on a budget
- Creating the Perfect Weeknight Crispy Honey Garlic Chicken Bites
- The Science Behind the Perfect Shatter Crisp Crust
- Ingredient Deep Dive Analysis
- Shopping List for Crispy Honey Garlic Chicken Bites
- Essential Tools for Best Results
- From Prep to Plate Instructions
- Avoiding Common Cooking Pitfalls
- Adjusting for Different Batch Sizes
- Flavor Myths and Reality
- Storage and Zero Waste Tips
- Serving Ideas for a Complete Meal
- High in Sodium
- Recipe FAQs
- 📝 Recipe Card
Creating the Perfect Weeknight Crispy Honey Garlic Chicken Bites
Picture this: it is 5:45 PM on a Tuesday. The kids are practically vibrating with hunger, the fridge looks uninspiring, and you are about thirty seconds away from ordering expensive takeout that usually arrives soggy anyway. I have been there more times than I can count.
That's exactly how this version of chicken bites was born. I wanted that specific, crackly texture of restaurant style poultry but without the deep fryer mess or the forty minute wait.
When that first batch of honey and garlic hits the hot oil, the aroma is so intense it usually brings my family wandering into the kitchen before I even call them for dinner.
The real magic happens when the cold butter swirls into the hot honey sauce at the very end. It transforms a simple syrup into a glossy, rich coating that clings to every nook and cranny of the chicken. I remember the first time I tried making these with just flour it was a total disaster.
The coating turned into a gummy paste the second the sauce touched it. I realized I had to rethink the physics of the crunch. Since then, we have made this recipe probably fifty times, tweaking the starch ratios until it was foolproof for any home cook.
You are going to love how the 1.5 lbs of chicken breast stretches to feed four people, especially when served over a big bowl of fluffy rice. It is one of those rare dishes where the "budget" version actually tastes more premium than the "expensive" one. We are skipping the fancy oils and using standard avocado oil or whatever high smoke point fat you have in the pantry. If you are looking for more quick poultry ideas, you might also like my Sticky Garlic Chicken recipe for those nights when twenty minutes is all you have.
The Science Behind the Perfect Shatter Crisp Crust
To get that restaurant quality finish, we have to look at how moisture interacts with heat. It isn't just about frying; it is about managing evaporation and protein structures.
- The Starch Hybrid: Using a 0.5 cup of cornstarch mixed with 2 tbsp of flour creates a superior barrier. Cornstarch is pure starch with no gluten, which prevents the coating from becoming tough or bread like, while the flour adds just enough structure to hold the seasoning.
- Flash Searing: Cooking at high heat with 3 tbsp of avocado oil triggers the Maillard reaction almost instantly. This browns the sugars in the chicken and the starch, creating flavor compounds you just cannot get with over low heat simmering.
- Cold Fat Emulsion: Adding 1 tbsp of cold butter to the warm sauce at the end creates a temporary emulsion. This thickens the glaze without needing a heavy cornstarch slurry, giving you a velvety mouthfeel that isn't gloopy.
| Chicken Thickness | Internal Temp | Rest Time | Visual Cue |
|---|---|---|---|
| 1 inch cubes | 165°F | 2 minutes | No pink, juices run clear |
| 0.5 inch strips | 165°F | 1 minute | Opaque throughout |
| 1.5 inch chunks | 165°F | 3 minutes | Firm to the touch |
Getting the temperature right is the difference between juicy bites and rubbery ones. Since we are working with small 1 inch cubes, they cook incredibly fast usually in about 3 to 4 minutes per side.
I always tell my friends to pull the pan off the heat a few seconds early because the residual heat in the glaze will finish the job.
Ingredient Deep Dive Analysis
| Ingredient | Science Role | Pro Secret |
|---|---|---|
| Cornstarch | Moisture Absorber | Draws out surface moisture for a drier, crispier fry. |
| Raw Honey | Hygroscopic Sweetener | Attracts moisture to create a tacky, clingy sauce. |
| Rice Vinegar | Acid Balance | Breaks down the sugar heaviness and brightens the garlic. |
| Avocado Oil | High Smoke Point | Allows for searing at 400°F without the oil breaking down. |
Choosing the right ingredients makes a massive difference in the final texture. For instance, rice vinegar provides a much softer acidity than white distilled vinegar, which can sometimes taste too sharp in a delicate honey sauce. If you want to try a different flavor profile entirely, my Creamy Herb Chicken recipe uses similar heat techniques but with a completely different sauce base.
Shopping List for Crispy Honey Garlic Chicken Bites
- 1.5 lbs chicken breast: Cut these into 1 inch cubes. Why this? Lean protein that absorbs the honey glaze perfectly without being greasy.
- Substitute: Chicken thighs work well but require 2 extra minutes of cook time.
- 0.5 cup cornstarch: The secret to the crunch.
- Substitute: Potato starch is a 1:1 swap for an even crispier shell.
- 2 tbsp all purpose flour: Provides the "glue" for the starch.
- Substitute: Use a 1:1 gluten-free flour blend if needed.
- 1 tsp kosher salt & 0.5 tsp black pepper: Essential seasoning.
- 1 tsp garlic powder: Adds an extra layer of savory depth to the breading.
- 3 tbsp avocado oil: For over high heat frying.
- Substitute: Any neutral oil like canola or vegetable oil.
- 0.33 cup raw honey: The base of our sticky glaze.
- Substitute: Maple syrup works, but the sauce will be slightly thinner.
- 4 cloves garlic, minced: Fresh is non negotiable here.
- 1 tsp fresh ginger, grated: Adds a subtle zing.
- 2 tbsp low sodium soy sauce: For that deep umami flavor.
- Substitute: Liquid aminos or Tamari for a gluten-free option.
- 1 tbsp rice vinegar: Balances the sweetness.
- 1 tbsp unsalted butter, cold: This makes the sauce glossy.
- 1 tbsp toasted sesame seeds & 2 scallions: For the final crunch and freshness.
Essential Tools for Best Results
You don't need a kitchen full of gadgets for this one, which is why it's a budget favorite. I highly recommend a large cast iron skillet or a heavy bottomed stainless steel pan. These materials hold heat much better than thin non stick pans, ensuring your chicken actually sears rather than steams.
A microplane or fine grater is also a lifesaver for the fresh ginger and garlic. It turns them into a paste that melts into the sauce instantly, preventing any big, bitter chunks of raw garlic.
Finally,, a pair of long kitchen tongs is better than a spatula for flipping the individual bites to ensure every side gets that golden brown crust.
From Prep to Plate Instructions
- Prep the chicken. Pat the 1.5 lbs of chicken breast completely dry with paper towels. Note: Excess moisture is the enemy of crispiness.
- Mix the coating. In a large bowl, whisk together the 0.5 cup cornstarch, 2 tbsp flour, salt, pepper, and garlic powder.
- Dredge the bites. Toss the chicken cubes in the starch mixture until every piece is white and fully coated.
- Heat the pan. Add the 3 tbsp avocado oil to your skillet over medium high heat until the oil shimmers and barely smokes.
- Sear the poultry. Place chicken in the pan, leaving space between pieces. Cook for 3-4 minutes until the bottom is golden and releases easily.
- Flip and finish. Turn the pieces and cook for another 3 minutes until the exterior is shatter crisp. Remove chicken to a plate.
- Sauté the aromatics. Wipe the pan if needed, then add the minced garlic and ginger for 30 seconds until fragrant but not brown.
- Simmer the sauce. Pour in the 0.33 cup honey, 2 tbsp soy sauce, and 1 tbsp rice vinegar. Let it bubble for 1 minute until it starts to thicken.
- Emulsify the glaze. Drop in the 1 tbsp cold butter and whisk until the sauce looks velvety and glossy.
- Toss and serve. Return the chicken to the pan, tossing quickly to coat. Garnish with sesame seeds and sliced scallions.
Avoiding Common Cooking Pitfalls
Why Your Chicken Is Soggy
The most common reason for a soft coating is "crowding the pan." If you put too many pieces in at once, the temperature of the oil drops, and the chicken starts to steam in its own juices rather than fry. It is always better to work in two batches.
Also, make sure your oil is truly hot before the first piece hits the pan. You should hear a loud sizzle immediately.
Why the Sauce Is Bitter
If your garlic turns dark brown or black, it will ruin the entire sauce with a burnt, acrid flavor. Garlic only needs about 30 to 45 seconds to release its oils. If the pan is too hot after frying the chicken, take it off the heat for a minute before adding the aromatics.
| Problem | Root Cause | Solution |
|---|---|---|
| Floury taste | Raw starch | Cook chicken 1 min longer or use slightly more oil. |
| Sauce won't stick | Too much moisture | Simmer sauce longer before adding chicken back. |
| Chicken is tough | Overcooking | Pull chicken at 160°F; it reaches 165°F in the sauce. |
Common Mistakes Checklist
- ✓ Pat the chicken bone dry before dredging (this is the most important step!).
- ✓ Shake off excess starch so the coating isn't too thick and pasty.
- ✓ Don't move the chicken for the first 2 minutes to let the crust set.
- ✓ Use low sodium soy sauce to prevent the dish from becoming a salt bomb.
- ✓ Add the butter at the very end it must be cold to emulsify correctly.
Adjusting for Different Batch Sizes
When you are cooking for a crowd, doubling this recipe is easy, but you must be careful with the liquid ratios. If you double the 1.5 lbs of chicken, don't just double the honey and soy sauce blindly. Use about 1.5x the sauce ingredients first, then add more if it looks too dry.
This prevents the chicken from swimming in liquid, which would destroy that crunch we worked so hard for.
For a smaller dinner for two, you can easily halve the recipe. Use a smaller skillet (8 inch or 10 inch) so the sauce doesn't evaporate too quickly. Since we are using 1 egg's worth of binding isn't required here, the scaling is very straightforward.
Just remember that smaller batches cook slightly faster because the pan stays hotter.
Flavor Myths and Reality
One big misconception is that you need a deep fryer for "crispy" results. In reality, a shallow fry with a high-quality starch blend like ours creates a thinner, more delicate crust that actually holds sauce better than a heavy beer batter. Another myth is that honey will burn instantly.
While honey does have a high sugar content, adding it after the chicken is cooked and mixing it with soy sauce and vinegar raises its burning point, giving you plenty of time to glaze.
Some people think you should marinate the chicken in the sauce first. Don't do it! The acid in the vinegar and the salt in the soy sauce will draw moisture out of the meat, making it impossible to get a crisp exterior. Always season the meat dry, fry it, and then apply the sauce at the very end for the best results.
Storage and Zero Waste Tips
Storage: These bites are best eaten fresh. However, you can store leftovers in an airtight container in the fridge for up to 3 days. To reheat, avoid the microwave it will turn the coating into a rubbery mess.
Instead, pop them into an air fryer at 350°F for 4-5 minutes or a toaster oven until they sizzle again.
Zero Waste: Don't toss those scallion ends! Place the white roots in a small jar of water on your windowsill, and they will regrow in about a week. If you have leftover starch mixture, you can actually store it in a small jar for your next fry up, provided no raw chicken touched the main supply.
Any leftover ginger can be peeled and frozen in a freezer bag; it is actually easier to grate when it is frozen solid!
Serving Ideas for a Complete Meal
These Crispy Honey Garlic Chicken Bites are traditionally served over a bed of jasmine or basmati rice. The rice acts like a sponge for all that extra honey garlic glaze. If you want to keep things lighter, they are fantastic inside lettuce wraps with some shredded carrots and cucumbers for extra crunch.
For a veggie side, I usually steam some broccoli or snap peas right in the same pan after the chicken is done. The greens pick up the lingering flavors of the sauce. If you find yourself with extra chicken and want a different vibe tomorrow, check out my Broiled Chicken Thighs recipe which offers a similar crispy skin but with a more savory, charred finish. This recipe is all about flexibility and making the most of what you have in the kitchen.

High in Sodium
885 mg mg of sodium per serving (38% of daily value)
The American Heart Association recommends limiting sodium intake to about 2,300mg per day for adults. This recipe exceeds 30% of that limit.
Tips to Reduce Sodium in Your Honey Garlic Chicken
-
Reduce Added Salt-25%
Eliminate or drastically reduce the 1 tsp of kosher salt. Taste the dish after cooking and add a pinch only if needed.
-
Low-Sodium Soy Sauce-20%
Ensure you are using low-sodium soy sauce, and reduce the amount used to 1 tbsp. You can also consider using coconut aminos as a lower sodium alternative.
-
Adjust Honey-10%
Consider using slightly more raw honey to enhance the sweetness and flavor, compensating for the reduction in sodium. A little more honey can go a long way!
-
Fresh Herbs & Spices
Experiment with sodium free herbs and spices like red pepper flakes, paprika, or dried cilantro to enhance the flavor profile without adding sodium. These will bring extra complexity to the meal.
Recipe FAQs
What is the secret to keeping the coating shatter crisp after adding the glaze?
Use a precise starch-to-flour ratio. The cornstarch provides the shatter, while the small amount of flour helps the coating adhere to the chicken, resisting sogginess when the wet sauce is added.
Can I substitute the avocado oil with olive oil for frying the chicken bites?
No, stick to a high smoke point oil. Olive oil has a lower smoke point, which means it will start to burn and impart a bitter flavor before the chicken is fully cooked.
How do I achieve that glossy, velvety texture in the final honey garlic sauce?
Whisk in cold butter right at the end. Adding cold butter off the heat creates a temporary emulsion that thickens the sauce into a glossy glaze without needing a heavy cornstarch slurry.
Is it true that marinating the chicken in soy sauce beforehand improves tenderness?
False. Applying salty liquids like soy sauce before the breading draws moisture out, which is the primary cause of a soggy coating during frying.
How to correctly reheat leftovers to retain maximum crispness?
Use a dry heat method, like an air fryer. Reheat at 350°F for 4-5 minutes; the microwave turns the coating rubbery by steaming the crust.
What side dish pairs best with the intense sweet and savory profile of this recipe?
Serve over steamed white rice to soak up the sauce. This dish pairs excellently with simple, fresh vegetables that can handle the strong flavor, like those prepared in our Garlic Herb Roasted recipe.
Why is my garlic turning bitter when I make the sauce glaze?
The pan was too hot when adding the aromatics. Garlic burns quickly; remove the pan from the heat for 30 seconds before adding the minced garlic and ginger to sauté them until just fragrant.
Crispy Honey Garlic Bites
Ingredients:
Instructions:
Nutrition Facts:
| Calories | 578 kcal |
|---|---|
| Protein | 53.2 g |
| Fat | 19.2 g |
| Carbs | 44.5 g |
| Fiber | 0.8 g |
| Sugar | 23.6 g |
| Sodium | 885 mg |
