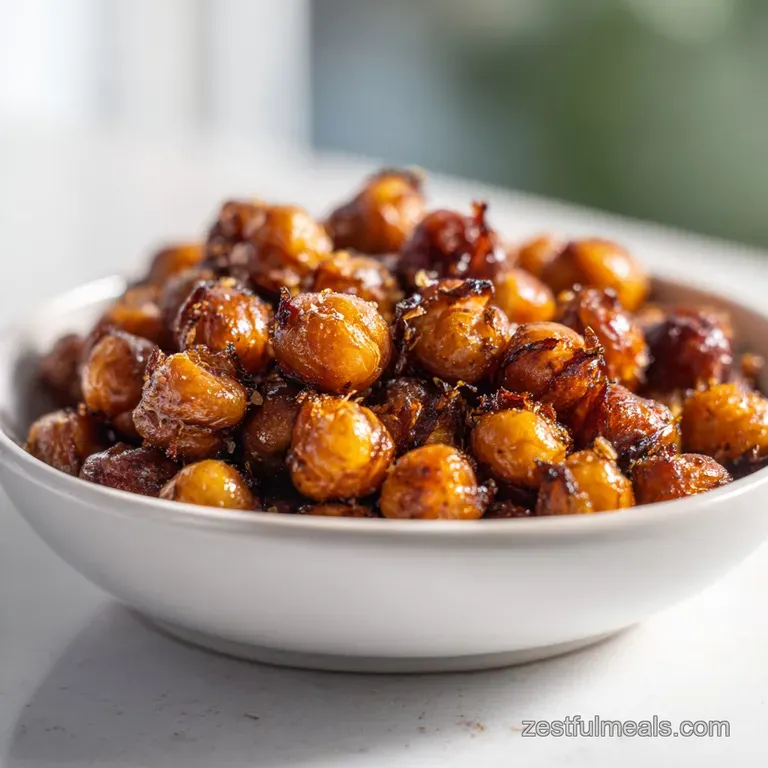
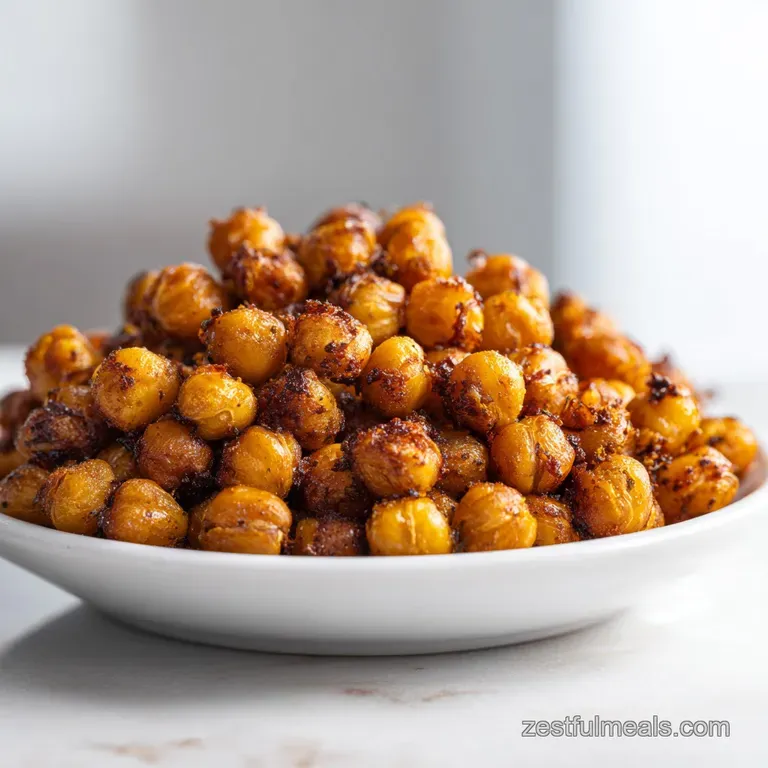
Crispy Roasted Chickpeas Recipe: Two-Stage Roast
- Time: Active 15 minutes, Passive 45 minutes, Total 1 hour
- Flavor/Texture Hook: Smoky, salty, and shatter crisp
- Perfect for: School lunches, healthy snacking, or salad toppers
Reasons Your Family Will Love This
I’ve tried a million snacks for my family, but this one sticks because it hits that salty, crunchy craving without costing five dollars a bag. When you’re staring at a pantry on a Tuesday night wondering what to give the kids that isn't a processed cracker, this is your answer.
It’s incredibly cheap, especially since we’re just using two cans (15 oz each) of basic garbanzo beans.
The Secret of Surface Evaporation
Mechanism: Residual water on the bean surface creates steam in the oven, which softens the skin rather than crisping it. By drying them thoroughly and roasting "naked" first, we ensure the heat fries the exterior instead of steaming the interior.
We often think that more oil equals more crunch, but that’s a mistake I made for years. If you coat a wet chickpea in oil, you’re essentially sealing the water inside. The water heats up, turns to steam, and you end up with a bean that’s soft and sad.
We want the heat to have direct access to the chickpea’s starch.
Another reason this works so well is the spice timing. If you’ve ever had chickpeas that taste bitter or burnt, it’s likely because the spices were on them for the whole forty five minutes. Spices like paprika and garlic powder have very low burn points.
By adding them at the very end, we keep the flavors bright and bold without that acrid, charred aftertaste. This is a big win for picky eaters who are sensitive to bitter flavors.
Method Comparison for Busy Cooks
| Method | Time | Texture | Best For |
|---|---|---|---|
| Standard Oven | 45 minutes | Uniformly crunchy | Large batches/Meal prep |
| Air Fryer | 20 minutes | Extra shatter crisp | Quick after school snacks |
| Stovetop | 15 minutes | Chewier center | Immediate salad topping |
If you’re looking for something more substantial to pair with these, they actually go surprisingly well alongside my Baked Chicken Wings recipe. Both have that satisfying crunch that makes a weeknight meal feel a bit more special without extra effort.
Essential Pantry Staples for Crunch
We are keeping things very simple here. You don’t need a trip to a specialty grocery store; everything you need is probably sitting in your cupboard right now. The base is 2 cans (15 oz each) of chickpeas, and from there, it’s just about building the right flavor profile.
I always go for high-quality extra virgin olive oil because the flavor really carries through in a simple roast like this.
Component Analysis
| Ingredient | Science Role | Pro Secret |
|---|---|---|
| Chickpeas | Starch Structure | Use canned for consistent moisture levels and easier peeling. |
| Olive Oil | Heat Conduction | Don't skimp on the 2 tablespoons; it creates the "frying" effect. |
| Sea Salt | Moisture Draw | Fine salt sticks better to the tiny crevices than coarse flakes. |
| Smoked Paprika | Flavor Depth | Adds a "bacon like" smokiness that kids find irresistible. |
The spices are where you can really have some fun, but stick to the measurements first to get the balance right. You'll need 1 teaspoon of fine sea salt, 1 teaspoon of smoked paprika, 0.5 teaspoon of garlic powder, 0.5 teaspoon of ground cumin, and 0.25 teaspoon of cayenne pepper for a tiny kick.
If your family isn't big on heat, you can totally leave the cayenne out, but it adds a nice warmth that rounds out the cumin.
Substitutes and Smart Swaps
| Original Ingredient | Substitute | Why It Works |
|---|---|---|
| Extra Virgin Olive Oil | Avocado Oil | Higher smoke point; very neutral flavor profile. |
| Smoked Paprika | Chili Powder | Adds earthiness. Note: Result will be less smoky and more "taco" flavored. |
| Garlic Powder | Onion Powder | Provides a savory, allium punch without the specific garlic bite. |
| Cayenne Pepper | Black Pepper | Gentler heat that is more kid friendly for sensitive palates. |
When choosing your oil, remember that we are roasting at 400°F (200°C). While extra virgin olive oil is great, avocado oil is a fantastic budget friendly alternative if you buy it in bulk.
It has a higher smoke point, which means you’re even less likely to deal with any smoky kitchen mishaps. Trust me, I've set off the smoke alarm more than once trying to get things "extra" crispy.
Simple Tools for Better Results
One thing I love about this recipe is that it doesn't require a sink full of dishes. For a busy parent, that's the ultimate goal. You really only need a large rimmed baking sheet I prefer the heavy duty ones because they distribute heat more evenly.
If you use a thin, flimsy tray, you might find the chickpeas on the edges burning while the ones in the middle stay soft.
Chef's Tip: Use a clean kitchen towel instead of paper towels to dry the beans. It absorbs way more moisture and you aren't wasting paper. Just make sure it’s a lint free one!
You'll also want a large bowl for tossing the beans with the oil and spices later, and a spatula for giving them a good shake halfway through. Some people suggest using parchment paper, and while it makes cleanup easier, roasting them directly on the metal pan actually gives you a better crunch.
The direct contact with the hot metal helps fry the skins. If you’re worried about sticking, don't be the oil we add later takes care of that.
Mastering the Golden Roast Steps
Right then, let's get into the actual cooking. The biggest mistake people make is rushing the drying phase. If you skip this, you might as well just eat the beans straight from the can.
- Rinse the beans. Drain the 2 cans of chickpeas and rinse them thoroughly in a colander under cold water until the foam disappears.
- Dry them completely. Spread the chickpeas on a clean kitchen towel and pat them dry. Note: This is the most important step for achieving that shatter crisp texture.
- Preheat your oven. Set it to 400°F (200°C) and ensure the rack is in the center.
- The naked roast. Place the dry, unseasoned chickpeas on a large baking sheet and bake for 20 minutes until they look matte and feel slightly firm.
- Prepare the oil. While they roast, whisk 2 tablespoons of olive oil with the salt, paprika, garlic powder, cumin, and cayenne in a large bowl.
- Apply the coating. Remove the tray, pour the warm chickpeas into the bowl, and toss until every bean is glistening.
- The final crisp. Return the coated chickpeas to the tray and bake for another 20 to 25 minutes until they are golden brown and rattle when shaken.
- The cooling phase. Turn off the oven, crack the door open, and let them sit inside for 10 minutes. Note: This "cures" the crunch as the remaining internal steam escapes.
Once they are out, don't be tempted to eat them immediately. I know, the smell is incredible, but they actually get crispier as they cool down. If you eat them hot, the centers might still feel a tiny bit soft. Give them five minutes on the counter and you'll notice a massive difference in the "shatter" factor.
Fixing Texture and Flavor Issues
Even with the best instructions, things can go sideways. I once left a batch in too long because I got distracted by a phone call, and they turned into little bitter pebbles. On the flip side, I've pulled them out too early and had them go soggy by lunchtime.
It’s all about watching for those visual cues I mentioned.
Troubleshooting Your Chickpeas
| Problem | Root Cause | Solution |
|---|---|---|
| Soggy/Chewy | Excess moisture | Roast them longer without oil first; ensure they are dry before starting. |
| Bitter Flavor | Burnt spices | Always add spices after the initial roast; check oven calibration. |
| Uneven Cooking | Overcrowding | Use a larger pan or two trays; beans should not be touching. |
If you find that your chickpeas are still a bit soft in the middle after the full cook time, don't panic. Just pop them back in for five minute increments. Every oven is different, and sometimes canned beans carry more water than others.
Common Mistakes Checklist
- ✓ Skipping the "naked roast" (the 20 minutes without oil is non negotiable)
- ✓ Using too much oil (it can actually make them heavy and greasy)
- ✓ Putting the spices on at the very beginning (they will burn and turn bitter)
- ✓ Storing them in a sealed plastic bag while they are still warm (steam will ruin the crunch)
- ✓ Forgetting to shake the pan halfway through the second roast
If you're making these as part of a larger meal prep session, they're a great "background" recipe. You can have them roasting while you prep something else, like a Crazy Good Casserole recipe for dinner. It makes the kitchen feel productive without you having to stand over a stove the whole time.
Creative Seasoning and Spice Swaps
Once you’ve mastered the basic smoky version, you can start experimenting with what’s in your spice rack. My kids love a "cool ranch" version where I swap the paprika and cumin for dried dill, onion powder, and a little buttermilk powder. It tastes just like the chips but with way more fiber and protein.
To Achieve Uniform Golden Color
The key to that beautiful even color is the toss. When you take the beans out of the oven to add the oil, make sure you aren't just drizzling it on. You need to really work that oil and spice mixture into the beans. I use a big metal bowl and give them a vigorous toss.
This ensures that the oil gets into every little nook and cranny of the chickpea skin, which acts like a tiny deep fryer once it goes back into the oven.
For a Mediterranean Profile
If you want something that feels a bit more "gourmet" but stays on budget, try using dried oregano, lemon zest, and a pinch of cinnamon. It sounds weird, but the cinnamon adds a warmth that makes the chickpeas taste incredibly savory.
Just remember to add the lemon zest right at the very end, after they come out of the oven, so the oils don't turn bitter in the heat.
Decision Shortcut: Choosing Your Flavor
- If you want "Taco Style": Use 1 tablespoon of taco seasoning instead of the individual spices.
- If you want "Sweet & Salty": Use cinnamon and sugar with a heavy pinch of salt.
- If you want "Zesty": Use lime juice and chili powder, but add the lime at the very end.
Smart Keeping and Warming Tips
Storage is where most people lose the battle. You spend an hour getting them perfectly crispy, and then by the next morning, they're soft again. The enemy is humidity. If you live in a damp climate, this is especially tricky.
Storage: Store at room temperature in a glass jar with the lid slightly ajar for the first 24 hours. This allows any tiny bit of remaining moisture to escape. After that, you can seal it tight.
They will stay good for about 3 to 4 days, though they are best in the first 48 hours.
Zero Waste: Don't throw away that liquid from the chickpea can! It’s called aquafaba. You can whip it up just like egg whites to make vegan mayo or even chocolate mousse. I usually keep mine in a small jar in the fridge for up to two days if I know I'm going to be baking soon.
Also, if you have any "dud" chickpeas that didn't get crispy enough, grind them up in a food processor and use them as a protein packed "breading" for chicken or tofu.
Freezing: I generally don't recommend freezing these. The texture of a roasted chickpea relies on it being dry. The freezing and thawing process introduces moisture, which will turn your crispy snack back into a mushy bean. It's better to just make what you'll eat in a few days.
If they do go soft, just throw them back into a 350°F (180°C) oven for five minutes to refresh the crunch.
Delicious Ways to Enjoy Them
While they are fantastic by the handful, I love finding new ways to work them into our family meals. They are the ultimate "texture booster." Think about anywhere you’d usually want a crunch tacos, creamy soups, or even over avocado toast.
As a "Better Than Croutons" Topping
Traditional croutons are mostly empty carbs and oil. These chickpeas provide that same satisfying crunch but with a massive boost of protein (11.1g per serving!) and fiber. I love dropping them into a bowl of creamy tomato soup right before serving.
They don't get soggy as fast as bread does, so you get that "snap" in every spoonful.
The Ultimate Snack Bowl
If you're having people over or just having a family movie night, mix these with some roasted nuts and maybe a few pretzels. It creates a high end trail mix that feels much more sophisticated than a bag of chips. Because they are budget friendly, you can make a massive batch without breaking the bank.
Actually, if you're looking for another quick bite that hits those savory notes, check out my Crispy Honey Garlic recipe. It’s another one of those dishes that proves you don't need a huge budget to make something that feels like a treat. Between the chickpeas and the honey garlic bites, you'll have the best snack spread on the block.
At the end of the day, this crispy roasted chickpeas recipe is about taking a humble can of beans and turning it into something special. It takes a little patience during that first roast, but once you hear that rattle on the pan, you’ll know it was worth every minute. Happy snacking!

Recipe FAQs
What's the secret to super crispy chickpeas?
Thorough drying and a two-stage roasting process. You must remove as much surface moisture as possible before the first roast, then add the oil/seasoning for the final crisping stage.
How to make crispy roast chickpeas?
Bake them dry first, then toss with oil and spices. Spread rinsed, patted dry chickpeas on a sheet pan and roast at 400°F for 20 minutes naked, then toss with oil and seasonings and roast another 20-25 minutes until golden.
How long do chickpeas take to get crispy in the oven?
Typically 40 to 45 minutes total, plus resting time. This is broken down into an initial 20-minute dry roast followed by a 20-25 minute oil-coated roast.
Should you boil chickpeas before roasting them?
No, stick to canned or fully cooked chickpeas for this method. Boiling introduces excess water, which steams the skins during roasting and prevents true crispness.
Why do my roasted chickpeas turn out soft?
The most common cause is residual moisture or storing them incorrectly. If they are soft immediately, they needed more time in the oven; if they softened later, they were stored in an airtight container while still warm.
Can I use an air fryer for crispier results?
Yes, the air fryer achieves excellent crispness faster. Cook them at 380°F for about 15-20 minutes, shaking the basket frequently to ensure uniform browning.
Is it true you should add spices before the first roast?
No, this is a common misconception that leads to bitter beans. Spices burn easily at high heat; always apply them after the initial moisture evaporating roast, mixed with the oil.
Crispy Roasted Chickpeas Recipe

Ingredients:
Instructions:
Nutrition Facts:
| Calories | 266 calories |
|---|---|
| Protein | 11.1g |
| Fat | 10.2g |
| Carbs | 34.1g |
| Fiber | 9.6g |
| Sugar | 1.2g |
| Sodium | 615mg |
