Chocolate Protein Bars Recipe: Fudgy & No Chalk
- Time: Active 15 minutes, Passive 1 hours, Total 1 hours 15 mins
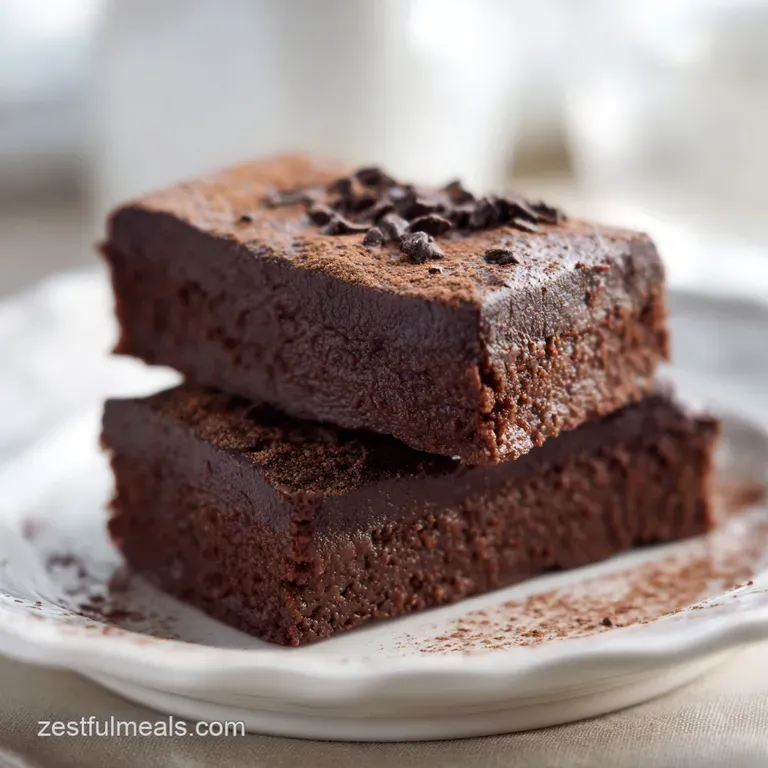
- Flavor/Texture Hook: Rich, dark cocoa notes with a velvety, fudge like interior and a chocolate shell that provides a satisfying snap.
- Perfect for: Post workout recovery, meal prep snacks, or a guilt free late night treat for the chocolate obsessed.
- Crafting the Ultimate Chocolate Protein Bars Recipe
- The Science of Protein Hydration and Texture
- Component Analysis and Ingredient Roles
- The Essential Components for Fudgy Bars
- Required Tools for Professional Results
- The Step-By-Step Fudgy Bar Method
- Fixing Common Protein Bar Failures
- Customizing Macros for Your Diet
- Maintaining Freshness and Storage Secrets
- Serving Suggestions and Flavor Pairings
- Chocolate Protein Bars Recipe FAQs
- 📝 Recipe Card
Crafting the Ultimate Chocolate Protein Bars Recipe
I'll never forget the first time I tried to make my own protein snacks. I followed a random recipe online, and the result was essentially a cocoa flavored brick that required a glass of water for every single bite.
It was discouraging, but it taught me a vital lesson: protein powder is a fickle ingredient that behaves more like a sponge than a flour. After months of adjusting the ratio of maple syrup to oat flour, I finally landed on this specific method that actually feels like a treat rather than a chore to eat.
The moment you press this dark, fragrant mixture into the pan, you'll notice it isn't crumbly or dry. It has a slight sheen from the nut butter, promising a silky mouthfeel. When you finally bite through that chilled chocolate coating into the soft center, you'll realize why we never settle for the store-bought versions wrapped in plastic.
Those usually taste like chemicals and "calculated" sweetness, but this home cooked version smells like real, deep dark chocolate and earthy oats.
We're going for a specific balance here. It's not just about hitting macros; it's about making something you genuinely look forward to eating at 3:00 PM when the workday feels like it’s dragging.
Trust me, once you see how the dark cocoa powder marries with the maple syrup, you’ll be hooked on the process just as much as the flavor.
The Science of Protein Hydration and Texture
Protein Saturation: Whey and vegan protein powders act as hydrocolloids, meaning they absorb several times their weight in liquid, so we must overshoot the moisture initially to prevent a "chalky" finish.
Crystalline Stability: Using maple syrup instead of granulated sugar provides invert sugar properties, which keeps the bars pliable and prevents the "gritty" texture often found in dry protein snacks.
Emulsification Bond: The fats in the peanut butter act as a bridge between the dry powders and the liquid syrup, creating a stable emulsion that stays firm at room temperature without weeping oil.
| Target Outcome | Prep Variation | Chill Time | Final Texture |
|---|---|---|---|
| Soft Fudge | 4 tbsp almond milk | 45 mins | Pliable and chewy |
| Firm Snap | 2 tbsp almond milk | 2 hours | Dense and candy like |
| Protein Truffle | Roll into balls | 30 mins | Ultra soft center |
Selecting the right method depends entirely on your patience. If you want a bar that survives a commute in a gym bag, lean toward the longer chill time. However, if you're eating these straight from the fridge at home, that "Soft Fudge" variation is a massive win for your taste buds.
Component Analysis and Ingredient Roles
Understanding why we use specific ingredients is the first step to never having a kitchen failure again. We aren't just tossing things in a bowl; we're building a structural snack.
| Ingredient | Science Role | Pro Secret |
|---|---|---|
| Oat Flour | Provides structural "crumb" | Sift it first to avoid tiny flour clumps in your bars. |
| Peanut Butter | Primary fat and binder | Use a "drippy" natural version for easier mixing and better sheen. |
| Protein Powder | Bulk and nitrogen source | Whey casein blends create a creamier bar than 100% whey isolates. |
| Sea Salt | Flavor modulator | It suppresses bitterness in cocoa and highlights the maple notes. |
Each of these elements serves a purpose. The oat flour provides the complex carbohydrates that keep you full, while the cocoa powder ensures that the "chocolate" flavor is deep and structural, not just a surface level suggestion.
The Essential Components for Fudgy Bars
Before you start, make sure your ingredients are at room temperature. Cold nut butter is a nightmare to incorporate into dry protein powder, and you'll end up overworking the mixture until it becomes tough.
- 1.5 cups (120g) Chocolate Protein Powder: Use a brand you actually like the taste of. Why this? It's the primary flavor driver and structural base of the entire bar.
- 1 cup (100g) Oat flour: You can make this by pulsing rolled oats in a blender. Why this? It provides a soft, cake like texture that absorbs moisture better than almond flour.
- 0.25 cup (25g) Unsweetened dark cocoa powder: Look for "Dutch processed" for a smoother flavor. Why this? It intensifies the chocolate profile without adding extra sugar.
- 0.5 cup (125g) Creamy peanut butter: Almond butter is a great swap if you prefer a milder taste. Why this? The fats provide the "fudge" factor and keep the bars from being dry.
- 0.33 cup (80ml) Maple syrup: Honey works too, but maple is easier to stir. Why this? It acts as the "glue" while providing a rich, complex sweetness.
- 3 tbsp (45ml) Unsweetened almond milk: Add this one tablespoon at a time. Why this? It hydrates the protein powder just enough to make it moldable.
- 0.25 tsp (1.5g) Sea salt: Don't skip this. Why this? It balances the sweetness and makes the chocolate taste "expensive."
- 0.5 cup (90g) Dark chocolate chips: For the topping.
- 1 tsp (5g) Coconut oil: To help the chocolate melt smoothly.
If you find yourself running low on the base ingredients for this No Bake Chocolate recipe, don't worry most of these are pantry staples you likely already have.
Required Tools for Professional Results
You don't need a high end lab, but a few specific tools make this process seamless. I used to try mixing this with a fork, and let me tell you, your forearms will regret it.
- 8x8 inch square baking pan: This provides the perfect thickness for 10 generous bars.
- Parchment paper: Essential for lifting the bars out of the pan once they've set.
- Large mixing bowl: Give yourself plenty of space to work the dough.
- Rubber spatula: Perfect for folding the wet ingredients into the dry powders without leaving anything behind.
- Small microwave safe bowl: For melting the chocolate topping.
Chef's Tip: Grease the pan slightly before laying down the parchment paper. This "glues" the paper to the corners, preventing it from sliding around while you're trying to press the sticky dough into the edges.
The step-by-step Fudgy Bar Method
The secret here is the "press." If you don't pack the mixture tightly into the pan, the bars will crumble the second you try to slice them. We want a dense, compressed block.
- Line the pan. Place parchment paper in an 8x8 pan, leaving an inch of overhang on the sides for easy removal later.
- Whisk dry ingredients. Combine 1.5 cups chocolate protein powder, 1 cup oat flour, 0.25 cup cocoa powder, and 0.25 tsp sea salt in your large bowl. Note: This ensures no salt pockets remain in the final product.
- Incorporate the binders. Add 0.5 cup peanut butter and 0.33 cup maple syrup to the dry mix.
- Add liquid slowly. Stir in the almond milk one tablespoon at a time until a thick, dough like consistency forms. Note: It should feel like stiff playdough, not batter.
- Press the base. Transfer the mixture to the pan and use the back of a spoon (or another piece of parchment) to press it until the surface is flat and even.
- Melt the glaze. Heat 0.5 cup chocolate chips and 1 tsp coconut oil in 30 second bursts in the microwave until the mixture is glossy and liquid.
- Spread the coating. Pour the melted chocolate over the base and tilt the pan to coat every corner evenly.
- Initial chill. Place the pan in the freezer for 15 minutes until the chocolate starts to dull in color.
- Final set. Move the pan to the fridge for at least 1 hour until the bars feel firm to the touch.
- Slice and store. Lift the block out using the parchment "handles" and slice into 10 even bars using a warm, sharp knife.
If you enjoy the process of making these, you'll love the similar rhythmic nature of preparing a Chocolate Chip Cookies recipe, which shares that same satisfying mix and set flow.
Fixing Common Protein Bar Failures
Most people give up on homemade bars because of texture issues. Usually, it's a simple fix involving the ratio of powder to liquid. If your bars look like wet sand, they need more syrup. If they look like soup, you need more oat flour.
Crumbling Texture Issues
This usually happens when the protein powder hasn't been fully hydrated or the bars weren't pressed firmly enough into the pan. Protein powder is extremely thirsty, and if it doesn't get enough moisture from the maple syrup or milk, it will remain powdery and brittle.
| Problem | Root Cause | Solution |
|---|---|---|
| Bars fall apart | Not enough binder/liquid | Add 1 extra tbsp of maple syrup or nut butter next time. |
| Coating is too hard | No oil in chocolate | Always add coconut oil to the glaze to keep it slightly soft. |
| Texture is gritty | Cheap protein powder | Use a blend that contains casein for a smoother mouthfeel. |
Sticky Surface Management
If your bars are so sticky you can't pick them up, the ratio of liquid to dry ingredients is off, or they haven't chilled long enough. Make sure you aren't using a "runny" honey that has a high water content.
- ✓ Always use a kitchen scale for the protein powder (grams are more accurate than scoops).
- ✓ Press the mixture with significant force into the corners of the pan.
- ✓ Let the bars sit at room temperature for 5 minutes before slicing a cold chocolate top.
- ✓ Wipe your knife blade between every single cut for clean, professional edges.
- ✓ Keep your hands slightly damp if the dough is sticking to you while pressing.
Customizing Macros for Your Diet
One of the best things about this chocolate protein bars recipe is how forgiving it is. You can swap the nut butter, change the sweetener, or even add "mix ins" to change the texture.
| Original Ingredient | Substitute | Why It Works |
|---|---|---|
| Peanut Butter | Sunflower Seed Butter | Keeps it nut free while maintaining the necessary fat content. |
| Maple Syrup | Liquid Allulose | Reduces the sugar count significantly. Note: May result in a slightly softer bar. |
| Oat Flour | Almond Flour | Lower carb option. Note: The bars will be much more fragile and oily. |
If you decide to go the low carb route with almond flour, you'll need to reduce the almond milk by half, as almond flour doesn't "drink" liquid the way oats do. It's a bit of a trade off, but it keeps the macros in check for those on specific plans.
Maintaining Freshness and Storage Secrets
Because these don't have the preservatives found in commercial bars, they will soften if left on the counter for too long. Treat them more like fudge than a granola bar.
Fridge Storage: Keep the sliced bars in an airtight container for up to 7 days. Use parchment paper between layers to prevent them from fusing together.
Freezer Method: These freeze beautifully for up to 3 months. I actually prefer eating them straight from the freezer; the texture becomes incredibly dense and chewy, almost like a frozen candy bar.
Zero Waste Tip: If you have leftover "dust" in the bottom of your oat flour bag or crumbs from slicing the bars, don't toss them! Stir them into your morning yogurt or oatmeal for a protein packed chocolate crunch. You can even melt a little extra chocolate and turn the crumbs into "protein truffles."
Serving Suggestions and Flavor Pairings
These bars are fantastic on their own, but if you want to turn them into a full snack experience, there are a few ways to level up. A pinch of flaky sea salt on top of the chocolate glaze right before it sets is a game changer for cutting through the richness.
For a post workout recovery boost, pair a bar with a few slices of tart apple. The acidity of the fruit cuts through the heavy fats of the peanut butter perfectly. If you're feeling fancy, you can drizzle a little extra nut butter over the top right before serving.
I've also found that these bars make a great base for a "deconstructed" dessert. Crumble one over a bowl of Greek yogurt with a few raspberries. The tartness of the berries and the creaminess of the yogurt turn a simple protein bar into a gourmet treat that feels much more indulgent than it actually is.
It's all about how you present it even if you're just eating it standing over the kitchen counter after a long day.

Chocolate Protein Bars Recipe FAQs
Is eating a protein bar every day ok?
It depends entirely on the ingredients. Daily consumption of highly processed bars full of sugar alcohols can be detrimental; homemade bars, like this recipe, are better as they are made with whole food sources like oat flour and real sweeteners.
What are common protein bar mistakes when making them at home?
Using protein powder straight from the container without accounting for hydration. Protein powder acts like a sponge, so if you don't add sufficient binder (like nut butter or syrup), the final product will be dry and crumble.
What's the healthiest protein bar you can eat?
The healthiest bar is one you control the sugar content of. This recipe uses natural maple syrup, which is superior to artificial sweeteners found in many commercial bars, and the healthy fats from peanut butter provide satiety.
What protein bar does Jennifer Aniston eat?
There is no single confirmed brand she eats daily, but she favors clean, organic sources. Many celebrities focus on high protein, low sugar options, which is why making your own with quality ingredients, similar to how you manage ratios when baking Banana Brown Sugar recipe, is often recommended.
How can I make these bars chewy instead of hard and brittle?
Reduce the chilling time and ensure ample liquid binder is incorporated. Brittle bars result from insufficient moisture binding the protein powder; aim for a stiff dough consistency, not a loose crumb, before pressing into the pan.
Can I substitute the oat flour for almond flour?
Yes, but you must reduce the added liquid by half. Almond flour is less absorbent than oat flour, and over hydrating it will result in an overly oily bar base.
How do I prevent the chocolate coating from cracking when I slice the bars?
Warm your slicing knife under hot water between each cut. This technique, often used for precise slicing in delicate pastries, ensures the cold chocolate shell doesn't shatter under pressure.
Fudgy Chocolate Protein Bars
Ingredients:
Instructions:
Nutrition Facts:
| Calories | 242 kcal |
|---|---|
| Protein | 14.5 g |
| Fat | 11.4 g |
| Carbs | 24.7 g |
| Fiber | 2.1 g |
| Sugar | 12.8 g |
| Sodium | 58 mg |
