Best Brownie Recipe: Fudgy Dark Chocolate
- Time: Active 10 minutes, Passive 25 minutes, Total 35 mins
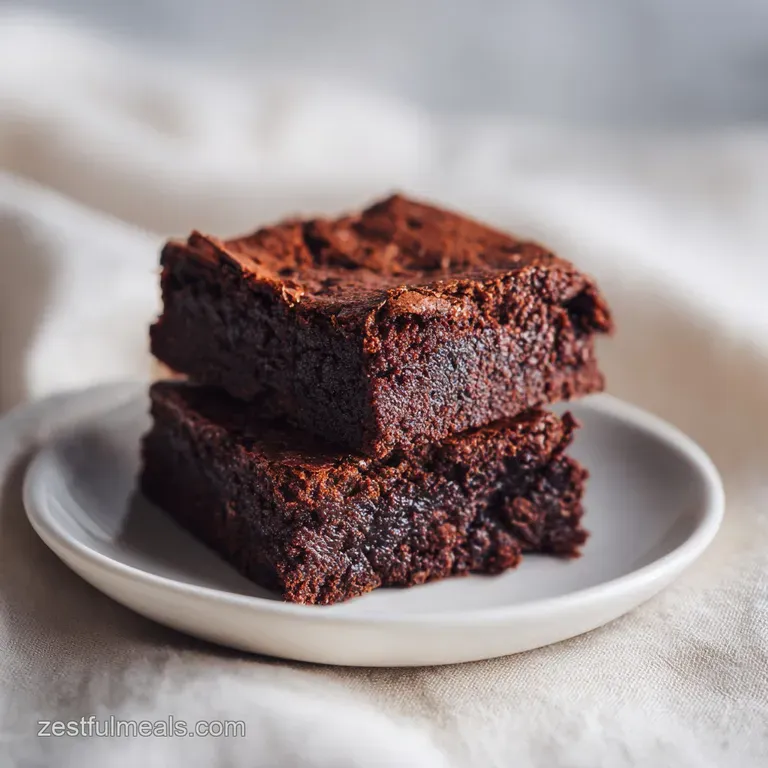
- Flavor/Texture Hook: Velvety center with a glass like shatter top
- Perfect for: High impact entertaining on a modest grocery budget
- Best Brownie Recipe for Deliciously Fudgy Treat with Dark Chocolate
- Strategic Methods for Fudgy Results
- The Essential Ingredient Analysis
- Pantry Staples and Smart Substitutions
- Simple Tools for Better Baking
- Precision Steps for Perfect Crinkle
- Solving Common Brownie Texture Issues
- Creative Ways to Customize Flavor
- Adjusting the Batch Size
- Debunking Baking Misconceptions
- Keeping Your Brownies Fresh Longer
- Simple Ways to Plate Desserts
- Recipe FAQs
- 📝 Recipe Card
Best Brownie Recipe for Deliciously Fudgy Treat with Dark Chocolate
I still remember the first time I actually got the "crinkle" right. I was standing in my tiny kitchen, peering through the oven glass, heart racing because I’d spent my last twenty dollars on a bar of high-quality dark chocolate.
I had failed so many times before, ending up with brownies that were either basically chocolate bread or a greasy puddle. But then, it happened the surface began to fracture like thin ice on a pond, and the smell of toasted cocoa and browned butter filled the room.
This brownie recipe delivers the best deliciously fudgy treat with dark chocolate I've ever pulled from my oven.
We’ve all been there, staring at a box mix because it feels safer, but trust me, the homemade version is cheaper and ten times more satisfying once you know the tricks. I’ve made every mistake possible using cold eggs, over beating the flour, and the ultimate sin: over baking.
Those failures taught me that great brownies aren't about luck; they're about the relationship between sugar and protein. You’re about to learn exactly how to get that velvety, decadent center every single time without needing a culinary degree or a massive budget.
We are going to skip the fancy gadgets and focus on what actually matters: the order of operations. This isn't a "toss it all in a bowl" situation, but it’s not complicated either. We’ll use simple pantry staples to create a result that looks like it came from a high end bakery.
By the time we’re done, you’ll be the person everyone begs to bring dessert to the party. Let's get into the mechanics of why this works so well.
Strategic Methods for Fudgy Results
The Shatter Top Science: Dissolving the sugars completely into the eggs creates a meringue like layer that rises to the top, forming that iconic paper thin, crackly crust.
Protein Management: By using a minimal amount of all purpose flour and folding it in gently, we prevent gluten development, ensuring the texture remains dense and fudgy rather than airy or tough.
Fat Saturation: Melting the chocolate directly into the warm butter allows the fats to emulsify, creating a silky base that coats the sugar crystals for a smoother mouthfeel.
The Moisture Seal: Dutch process cocoa powder is used because its neutralized acidity allows it to blend seamlessly with fats, providing a deep color and moisture rich crumb.
| Method Type | Total Time | Final Texture | Best For |
|---|---|---|---|
| Fast Method | 30 mins | Softer, more "lava" like | Last minute cravings |
| Classic Method | 35 mins | Dense, chewy, defined edges | Bake sales and gifting |
| Chilled Method | 4 hours | Truffle like, very firm | Elegant plated desserts |
To get that intense, professional flavor, you have to embrace the bitterness of the dark chocolate. If you find yourself wanting to experiment with different shapes or themes, you might find my Fudgy Football Brownie recipe a fun variation for your next gathering. The base logic remains the same, but the presentation changes the whole vibe.
The Essential Ingredient Analysis
| Ingredient | Science Role | Pro Secret |
|---|---|---|
| Dark Chocolate (70%) | Provides structural fat and intense flavor | Chop into uneven bits; small shards melt, large chunks create pools. |
| Large Eggs | Acts as the primary leavening agent | Use room temperature eggs so they emulsify properly with the fats. |
| Dutch Cocoa | Adds depth and prevents a "dry" mouthfeel | Always sift it; cocoa clumps are the enemy of a smooth batter. |
| Espresso Powder | Enhances the perception of chocolate notes | It won't taste like coffee; it just makes the chocolate taste "darker." |
The magic of this recipe lies in the balance. While the dark chocolate provides the soul, the sugars are what provide the body. Granulated sugar helps create those crisp edges, while the light brown sugar adds the moisture and chew that defines a true "fudgy" treat.
Pantry Staples and Smart Substitutions
- 200g dark chocolate (60-70% cacao): Bittersweet chocolate chips. Why this? High cacao percentage ensures a rich, non cloying sweetness.
- 115g unsalted butter: Salted butter (just omit the extra sea salt). Why this? European style butter has less water, leading to a denser brownie.
- 200g granulated sugar: Caster sugar. Why this? Fine grains dissolve faster, helping create the crinkle top.
- 50g light brown sugar: Dark brown sugar. Why this? Molasses in brown sugar provides that essential "chew."
- 3 large eggs: Flax eggs (though the texture will be significantly more dense). Why this? Eggs provide the lift and the structural "protein web."
- 1 tbsp pure vanilla extract: Vanilla bean paste. Why this? Vanilla rounds out the sharp edges of the dark cocoa.
- 65g all purpose flour: 1 to-1 gluten-free baking flour. Why this? Low flour count keeps the recipe in the fudgy territory.
- 30g Dutch process cocoa powder: Natural cocoa powder (will be slightly more acidic). Why this? Alkalized cocoa gives that classic "Oreo" dark color.
- 1 tsp espresso powder: Instant coffee granules. Why this? Coffee amplifies chocolate's chemical compounds without adding bulk.
- 0.5 tsp fine sea salt: Table salt (use slightly less). Why this? Salt cuts through the fat and brightens the sugar.
Chef's Tip: Freeze your butter for 10 minutes before dicing it into the chocolate. The cold fat hits the warm chocolate and creates a more stable emulsion as it melts together over the double boiler.
Simple Tools for Better Baking
You don't need a high tech kitchen to master this. I usually reach for a standard 8x8 inch metal baking pan because metal conducts heat more evenly than glass. If you use glass, you’ll likely need to add 5 minutes to the bake time, but be careful the edges can get tough before the middle is set.
A whisk is your best friend here. While a stand mixer is great, I find I have more control doing the final fold by hand. This prevents me from over working the flour, which is the most common reason brownies turn out like cake.
You’ll also need parchment paper; don't skip the "sling" method, where you let the paper hang over the edges for easy removal.
Precision Steps for Perfect Crinkle
- Prep the oven. Heat to 350°F (180°C) and line an 8x8 inch pan with parchment paper. Note: Using a "sling" makes lifting the brownies out effortless.
- Melt the fats. Combine 200g dark chocolate and 115g butter in a heat proof bowl. Note: Set over simmering water until velvety and glossy.
- Whip the eggs. Beat 3 large eggs with 200g granulated sugar and 50g light brown sugar. Note: Whisk for 3-5 mins until the mixture is pale and doubled in volume.
- Emulsify the base. Slowly pour the melted chocolate mixture into the egg mixture. Note: Stir constantly to prevent the heat from scrambling the eggs.
- Add aromatics. Fold in 1 tbsp vanilla extract and 1 tsp espresso powder. Note: The espresso powder should dissolve completely into the wet base.
- Sift the dry. Sieve 65g all purpose flour, 30g cocoa powder, and 0.5 tsp sea salt together. Note: Sifting removes cocoa lumps that won't bake out later.
- The gentle fold. Use a spatula to incorporate the dry ingredients into the wet. Note: Stop until no white streaks of flour remain; do not over mix.
- Bake with precision. Pour batter into the pan and bake for 25 minutes. Note: Remove until the edges are set but the center still wobbles slightly.
- The long rest. Place the pan on a wire rack and let cool completely for 2 hours. Note: The brownies continue cooking from residual heat during this time.
Solving Common Brownie Texture Issues
Fixing Cakey Textures
If your brownies feel more like chocolate sponge than fudge, you’ve likely incorporated too much air after adding the flour or used too much flour. Next time, weigh your flour with a scale rather than using a measuring cup, which can pack the flour down.
Also, ensure you stop whisking the moment the flour disappears.
Dull and Matte Tops
The lack of a shiny, crackly top usually means the sugar didn't fully dissolve into the eggs. You really have to beat those eggs and sugar together until they look like thick, pale ribbons. This creates the "meringue" that rises to the surface.
Also, ensure your butter and chocolate mixture is still warm when it hits the eggs.
Greasy Bottom Fixes
A greasy brownie often happens when the emulsion breaks, usually because the chocolate mixture was too hot or the butter wasn't fully integrated. Melting them slowly over a double boiler rather than in the microwave helps keep the fat stable.
| Problem | Root Cause | Solution |
|---|---|---|
| Hard, Chewy Edges | Over baking or glass pan | Reduce time by 5 mins or switch to a light colored metal pan. |
| Batter is Grainy | Sugar didn't dissolve | Whisk eggs and sugar longer before adding chocolate. |
| Brownies Fall Apart | Cut while too warm | Let them cool for at least 2 hours to set the structure. |
Common Mistakes Checklist
- ✓ Never use cold eggs; they will seize the melted chocolate.
- ✓ Stop baking when the middle still has a slight jiggle.
- ✓ Don't skip the espresso powder; it's the secret to professional depth.
- ✓ Use a plastic knife to cut the brownies for perfectly clean edges.
- ✓ Always sift your cocoa powder to avoid bitter, dry clumps.
Creative Ways to Customize Flavor
If you're feeling adventurous, you can easily tweak this base. I love adding a handful of toasted walnuts for a "Midnight Crunch," or swirling in two tablespoons of salted tahini before baking. The bitterness of the tahini plays beautifully against the dark chocolate.
If you find this recipe a bit too intense, you can always lighten the mood with a topping. A thin layer of Chocolate Buttercream Frosting recipe can turn these into a true decadent "bakery style" square. Just make sure the brownies are 100% cold before frosting, or you'll have a melted mess.
1. Salted Tahini Swirl
Dollop small spoonfuls of tahini across the raw batter and use a toothpick to marble them. The sesame notes provide an earthy contrast to the 70% cacao.
2. The Midnight Crunch
Fold in 50g of crushed pretzels or cacao nibs at the very end. The pretzels add a salty snap that breaks up the richness of the fudge.
3. gluten-free Adaptation
Replace the all purpose flour with almond flour. Note: This will result in an even moister, almost truffle like texture that is best served chilled.
Adjusting the Batch Size
Scaling Down (½ Batch): Use a loaf pan instead of an 8x8 square. Reduce the baking time to about 18-20 minutes. Since the recipe calls for 3 eggs, whisk one egg in a small bowl and use exactly half of it by weight or volume to get your 1.5 eggs.
Scaling Up (2x Batch): Use a 9x13 inch pan. Increase the baking time to 35-40 minutes. Do not double the salt; use only 1.5x the amount to avoid an overly savory result. Ensure your oven is fully preheated, as a larger cold mass will drop the oven temperature more significantly.
| Servings | Pan Size | Bake Time | Sugar Total |
|---|---|---|---|
| 8 People | 9x5 Loaf Pan | 20 mins | 125g |
| 16 People | 8x8 Square | 25 mins | 250g |
| 32 People | 9x13 Rect. | 38 mins | 500g |
For those looking for a healthier alternative that still hits that chocolate craving, my Chocolate Protein Bars Recipe is a great way to use similar flavors in a meal prep friendly format. It's less about the "shatter top" and more about sustained energy, but the dark chocolate vibes are still very much present.
Debunking Baking Misconceptions
"Toothpick testing" is actually a bad idea for fudgy brownies. If the toothpick comes out clean, your brownies are already over baked and will be dry once they cool. You want a few moist crumbs clinging to the pick.
Another myth is that you need expensive "baking chocolate." While high-quality chocolate is better, a standard 70% dark chocolate bar from the grocery store candy aisle often has fewer stabilizers than "baking chips," leading to a much better melt and a superior crinkle top.
Keeping Your Brownies Fresh Longer
Storage: Keep these in an airtight container at room temperature for up to 4 days. If you like them extra chewy, store them in the fridge; the cold sets the fats and makes them feel like solid fudge.
Freezing: These freeze beautifully. Wrap individual squares in plastic wrap and then foil. They stay fresh for up to 3 months. To eat, let them thaw on the counter for 30 minutes, or pop them in the microwave for 10 seconds for a "just baked" warmth.
Zero Waste: If you end up with edges that are too hard or scraps from leveling the tops, don't toss them! Pulse them in a food processor and use the crumbs as a topping for vanilla ice cream, or mix them into a batch of Sugar Cookie Dough recipe for a "brownie stuffed" cookie experience.
Simple Ways to Plate Desserts
To make these look like they cost $12 at a bistro, it's all about the cut. Use a ruler to measure out exactly 2 inch squares. Wipe your knife with a warm, damp cloth between every single cut. This prevents the fudgy middle from dragging across the top, keeping that crinkle crust pristine.
Serve a single square in the center of a white plate with a tiny pinch of flaky sea salt on top. The salt crystals catch the light and emphasize the dark color of the chocolate. If you want to go all out, a small dollop of unsweetened whipped cream or a single raspberry provides the perfect acidic contrast to the heavy, rich chocolate.
Trust me, less is more when the brownie is this good.

Recipe FAQs
Can I substitute semi sweet chocolate for the dark chocolate?
No, for a true fudgy treat, stick to 60-70% dark chocolate. Semi sweet contains significantly more sugar, which will alter the structure and make the final product taste overly sweet rather than deep and complex.
Why are my brownies turning out cakey instead of fudgy?
You likely over mixed the batter after adding the flour. Over mixing develops gluten, leading to a tougher, airier texture; gently fold dry ingredients just until streaks disappear.
How do I achieve that thin, shiny, crackly crust?
Vigorously whip the eggs and sugar together until pale and voluminous. This action dissolves the sugar and incorporates necessary air, forming a thin meringue layer on top as it bakes.
Is it true that cutting warm brownies results in a better texture?
No, cutting warm brownies guarantees a messy, gooey failure. You must allow the brownies to cool completely, ideally for two hours, so the internal structure sets before slicing with a warm, clean knife.
How long should I bake the brownies for the fudgiest result?
Bake for 25 minutes at 350°F, removing them when the center still slightly wobbles. If a toothpick comes out clean, you have already overbaked them; aim for moist crumbs clinging to the toothpick.
What is the purpose of adding espresso powder?
It enhances the perceived depth of the chocolate flavor, not the coffee flavor. This is a standard technique for increasing the intensity of dark cocoa, similar to how acid balances sweetness in our 5Minute Fruit Smoothie Bowl recipe.
Can I substitute butter with oil for a lighter texture?
No, substituting oil will ruin the texture needed for this recipe. Butter provides essential solids and structure when melted with chocolate; oil only adds liquid fat, resulting in a greasy, flat brownie lacking the characteristic chew.
Fudgy Dark Chocolate Brownies
Ingredients:
Instructions:
Nutrition Facts:
| Calories | 222 kcal |
|---|---|
| Protein | 2.6 g |
| Fat | 11.3 g |
| Carbs | 25.6 g |
| Fiber | 1.6 g |
| Sugar | 20.6 g |
| Sodium | 75 mg |
