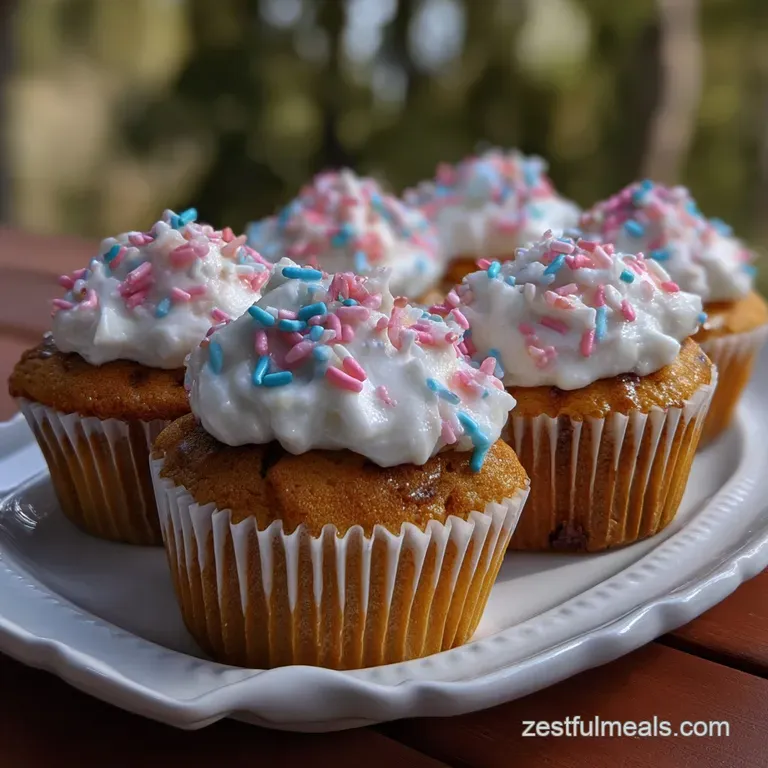
Gender Announcement Cupcakes with Silky Core
- Time: Active 25 minutes, Passive 20 minutes, Total 45 minutes
- Flavor/Texture Hook: Soft vanilla crumb with a silky, hidden buttercream core
- Perfect for: Budget conscious baby showers and gender reveal parties
- Simple Gender Announcement Cupcakes For Your Big Reveal
- Science Behind The Moist Reveal Crumb
- Component Analysis For Better Baking
- Affordable Ingredients For A Stunning Result
- Basic Tools For A Professional Finish
- Foolproof Method For Hidden Color Centers
- Fixing Common Cupcake Baking Failures Fast
- Creative Ways To Customize Your Reveal
- Keep Your Cupcakes Fresh For Days
- Display Ideas For Your Celebration Party
- Expert Answers For Better Baking Results
- Recipe FAQs
- 📝 Recipe Card
Simple Gender Announcement Cupcakes For Your Big Reveal
There is a specific kind of magic that happens when you pull a tray of golden, fragrant treats out of the oven. The kitchen fills with that warm, sugary aroma that instantly makes everything feel like a celebration.
But when you are making gender announcement cupcakes, the stakes feel a little higher than your average Tuesday bake. I remember the first time I tried to hide a secret inside a cake.
I was so worried the blue frosting would bleed through the yellow crumb that I ended up overbaking the poor things into hockey pucks. We aren't going to let that happen to you.
This recipe is designed for those of us who want that "wow" moment without spending fifty dollars at a boutique bakery. I’ve spent years figuring out how to get professional results using simple, supermarket ingredients. You don't need a fancy degree or expensive gadgets to pull this off.
What you need is a solid plan and a few tricks to make sure that "pink or blue" stays hidden until the big moment. We are going to use a method that creates a tight, sturdy crumb that handles a filling like a pro.
We are focusing on a budget smart approach here. I’m a big believer that you don't need imported vanilla beans to make people smile. By using smart techniques like the reverse creaming method, we can make standard gender announcement cupcakes taste like they came from a high end shop.
It’s about working with what you have and focusing on the small details that prevent common baking fails. Let's get into the kitchen and make something memorable.
Science Behind The Moist Reveal Crumb
Fat Coating Mechanism: By mixing the 113g of unsalted butter directly into the 190g of all purpose flour first, we coat the flour proteins in fat.
This prevents excessive gluten formation when we add the liquid, resulting in a velvety texture that doesn't crumble when you cut it.
Protein Structure Stability: Using one large egg white in addition to a whole egg adds structural integrity without the extra fat of a second yolk. This creates a lighter, whiter cake that makes the hidden color pop more vividly when revealed.
Leavening Gas Expansion: The 1.5 tsp of baking powder reacts twice, first when moistened and again when hitting the heat of the oven. This creates uniform air pockets that are strong enough to support the weight of the hidden frosting center.
Maillard Reaction Control: Keeping the sugar at 200g provides enough sweetness while ensuring the edges don't brown too quickly. This keeps the exterior pale and pretty, which is exactly what you want for a celebration dessert.
Component Analysis For Better Baking
| Ingredient | Science Role | Pro Secret |
|---|---|---|
| All Purpose Flour (190g) | Provides the structural framework via gluten | Use a kitchen scale for accuracy; "cups" can vary by 20% |
| Granulated Sugar (200g) | Weakens gluten for tenderness and retains moisture | Whisk with the flour to break up any tiny lumps |
| Unsalted Butter (113g) | Shortens gluten strands to create a "short" crumb | Keep it at 65°F (cool room temp) for better aeration |
| Whole Milk (120ml) | Provides hydration and fat for a silky mouthfeel | Room temperature milk emulsifies faster into the batter |
Affordable Ingredients For A Stunning Result
- 1.5 cups All purpose flour (190g): Store brands like Great Value work perfectly here. Why this? Provides the necessary structure for holding the surprise filling without being too heavy. (Substitute: Cake flour for an even finer, more delicate texture).
- 1 cup Granulated sugar (200g): Standard white sugar is best. Why this? It provides sweetness and helps with the browning of the cupcake tops. (Substitute: Caster sugar for faster dissolving).
- 1.5 tsp Baking powder: Ensure it is fresh by checking the date. Why this? This is the primary lift for our cupcakes, making them fluffy. (Substitute: 0.5 tsp baking soda plus 1 tsp cream of tartar).
- 0.5 tsp Salt: Fine sea salt or table salt. Why this? It balances the sweetness and enhances the vanilla profile. (Substitute: Kosher salt, but double the volume).
- 0.5 cup Unsalted butter, softened (113g): Land O'Lakes is a reliable choice. Why this? Fat provides flavor and the "melt in-your mouth" quality. (Substitute: Salted butter, but omit the extra 0.5 tsp salt).
- 1 large Egg + 1 large Egg white: Room temperature works best. Why this? The extra white adds strength for the filling hole. (Substitute: 3 tablespoons of aquafaba for a similar protein lift).
- 0.5 cup Whole milk (120ml): Full fat is preferred for richness. Why this? Liquid activates the leavening and hydrates the flour proteins. (Substitute: 120ml of buttermilk for a tangier, softer crumb).
- 2 tsp Pure vanilla extract: Use the real stuff if you can. Why this? It’s the primary flavor profile of the entire cupcake. (Substitute: Vanilla bean paste for those beautiful black specks).
- 0.5 cup Vanilla frosting (filled): store-bought or a small portion of the topping. Why this? Tinted with gel food coloring to reveal the gender. (Substitute: Small chocolate candies or sprinkles).
- 1 cup Unsalted butter, slightly chilled (225g): For the buttercream topping. Why this? Chilled butter allows for a more stable, pipeable frosting. (Substitute: Vegetable shortening for a higher melting point in summer).
- 3.5 cups Powdered sugar (440g): Sifted for smoothness. Why this? Provides the bulk and sweetness of the crown. (Substitute: Use a homemade blend of granulated sugar and cornstarch if desperate).
- 2 tbsp Heavy cream: For thinning the frosting. Why this? Adds a luxurious, creamy finish to the buttercream. (Substitute: Half and half or whole milk).
- 1 tsp Clear vanilla extract: For the topping. Why this? Keeps the frosting bright white so the colored center is a surprise. (Substitute: Standard vanilla if you don't mind a slight ivory tint).
Basic Tools For A Professional Finish
To get the best out of this announcement cupcakes recipe, you don't need a commercial kitchen. I use my KitchenAid Artisan Stand Mixer for the batter because it handles the reverse creaming method beautifully.
If you don't have one, a Hamilton Beach Hand Mixer works just as well. You will definitely want a USA Pan 12 Cupcake Tin because the heat distribution is incredibly even, preventing burnt bottoms.
For the "hidden" part, a simple apple corer is my secret weapon. It removes a perfect cylinder of cake every time. If you don't have one, a small paring knife works, but it’s a bit more fiddly.
For the frosting, a Wilton 1M piping tip gives you that classic bakery swirl that hides the hole you just made.
Foolproof Method For Hidden Color Centers
Phase 1 Foundations
- Heat the oven to 350°F (175°C) and line your Lodge Cast Iron Baking Pan or standard tin with paper liners.
- Combine the dry ingredients (flour, sugar, baking powder, salt) in your mixer bowl and whisk on low for 30 seconds to aerate.
- Add the softened 113g butter piece by piece while the mixer is on low. Beat for 2 minutes until it looks like damp sand. Note: This is the reverse creaming method that ensures a tender crumb.
- Whisk the egg, egg white, milk, and vanilla in a separate jug until combined.
- Pour half the liquid into the flour mixture and beat on medium for 1 minute to build structure.
- Add the remaining liquid and beat for another 30 seconds until the batter is silky and smooth.
- Divide the batter into the 12 liners, filling them about two thirds full.
- Bake for 18 to 20 minutes until a toothpick comes out clean and the tops spring back.
- Cool completely on a wire rack for at least 1 hour before attempting to fill.
Phase 2 Coring
- Prepare the reveal filling by tinting your 0.5 cup of frosting with either pink or blue gel food coloring.
- Remove the centers of the cooled cupcakes using an apple corer, going about halfway down. Do not go all the way to the bottom.
- Fill the cavities with the tinted frosting using a small spoon or a piping bag.
- Trim the cake plugs you removed so only the "top" remains, and place it back over the filling to seal it.
Phase 3 Crown
- Cream the 225g chilled butter for the topping for 5 minutes until it turns pale and fluffy.
- Add the powdered sugar in two batches, mixing on low at first to avoid a sugar cloud.
- Pour in the heavy cream and clear vanilla and beat on high for another 2 minutes until it looks like a stiff cloud.
- Pipe a high swirl over each cupcake, ensuring the "plug" is completely covered.
Fixing Common Cupcake Baking Failures Fast
Why Your Cupcake Tops Sunk
If your cupcakes look like little craters, you likely opened the oven door too early. The sudden drop in temperature causes the air bubbles to collapse before the cake structure has set. Another culprit is expired baking powder.
The Crumbly Core Fix
If your cake falls apart when you try to core it, the cupcakes are probably still too warm. Heat makes the crumb fragile. Always wait until they are stone cold. If they are still crumbly, try chilling them in the fridge for 20 minutes before coring; the cold fat will stabilize the structure.
| Problem | Cause | Fix | Pro Tip |
|---|---|---|---|
| Liners Peeling | Moisture buildup | Remove from tin immediately after 5 mins | Use greaseproof liners for best results |
| Dry Texture | Overbaking | Check 2 mins before timer ends | Pull at an internal temp of 205°F |
| Color Bleeding | Liquid food dye | Switch to gel based colors | Chill the filling before inserting |
Creative Ways To Customize Your Reveal
For a Zesty Twist
If you want to move away from standard vanilla, add the zest of two lemons to the dry ingredients. Use a lemon curd tinted with food coloring for the center reveal. The acidity of the lemon cuts through the sweetness of the buttercream beautifully.
For a dairy-free Celebration
You can easily make this this recipe dairy-free for guests with allergies. Swap the butter for a high-quality vegan butter stick (like Miyoko's) and use unsweetened almond or soy milk. For the frosting, use vegetable shortening or a vegan butter alternative.
The results are surprisingly close to the original.
Candy Versus Frosting
- Frosting Center: Provides a creamy surprise that blends with the cake texture.
- Candy Center: Use M&Ms or sprinkles for a "pinata" effect that spills out when bitten.
- Jam Center: Best for a fruity profile, but ensure it's thick so it doesn't soak into the cake.
Chef's Tip: Freeze your butter for 10 minutes before creaming it for the frosting. This keeps the friction from the mixer from melting the fat, resulting in a much more stable buttercream that won't wilt in a warm room.
Keep Your Cupcakes Fresh For Days
Storage: These announcement cupcakes stay moist for up to 3 days when kept in an airtight container at room temperature. If your kitchen is very warm, move them to the fridge, but let them sit out for 30 minutes before serving so the buttercream softens.
Freezing: You can freeze the unfilled cupcakes for up to 2 months. Wrap them individually in plastic wrap and place them in a freezer bag. Thaw at room temperature before coring and filling. I don't recommend freezing fully assembled cupcakes as the frosting can lose its texture.
Zero Waste Tip: Don't throw away those little cake "plugs" you cut out! Crumble them up, mix with a spoonful of leftover frosting, and roll them into tiny cake balls. It’s a great snack for the baker while you wait for the party to start.
Display Ideas For Your Celebration Party
Setting the stage for gender announcement cupcakes is half the fun. I like to use a tiered white stand to give the cupcakes some height. You can alternating pink and blue liners, even though the cake inside is neutral, to keep people guessing.
Chef's Tip: Add a tiny pinch of espresso powder to your vanilla batter. It won't taste like coffee, but it deepens the vanilla flavor and makes the cake taste "expensive" on a budget.
Oven vs Stovetop (Steaming) Comparison
| Method | Texture Result | Time |
|---|---|---|
| Standard Oven | Golden, slightly crusty top with traditional crumb | 20 minutes |
| Stovetop (Steamed) | Ultra moist, pale, almost pudding like texture | 25 minutes |
Expert Answers For Better Baking Results
Corer Versus Knife
An apple corer is the superior choice for gender announcement cupcakes because it creates a uniform space for the filling. A paring knife often results in "V" shaped holes that hold less frosting and can make the cupcake structurally weak.
If you must use a knife, work slowly and try to keep the walls of the hole vertical.
Homemade Versus Box Mix
While a box mix is a great time saver, this homemade recipe provides a much sturdier crumb. Box mixes are designed to be "extra moist," which often means they are too soft to hold a heavy filling without falling apart.
The reverse creaming method used here gives you that professional, dense yet-soft texture that a box just can't replicate.
Gel Versus Liquid Food Coloring
Always choose gel coloring for the center of this recipe. Liquid coloring adds too much moisture to the frosting, which can cause it to leak into the surrounding cake.
Gel is highly concentrated, meaning you only need a tiny drop to get a vibrant pink or blue that won't compromise the frosting's stability.
- If you want a cleaner reveal, use a small spoon to "pack" the filling so there are no air gaps.
- If you want a softer bite, replace 2 tablespoons of the milk with heavy cream.
- If you want perfect domes, fill your liners exactly 2/3 full; any more and they will spill over the edges.
Making these gender announcement cupcakes is a labor of love, but the look on everyone's faces when they see that color is worth every second. By following the science of the reverse creaming and using budget smart substitutions, you've created a centerpiece that is as impressive as it is delicious.
Trust the process, watch your oven timer, and enjoy the big reveal!

Recipe FAQs
What is the maximum time I can bake these cupcakes ahead of time?
Yes, up to 24 hours ahead. You should bake the base cupcakes a day in advance, cool them completely, and store them airtight.
Fill and frost them the morning of the event for the freshest flavor, as the filling can slightly soften the crumb over long periods.
Should I use liquid or gel food coloring for the hidden core?
Always use gel food coloring. Liquid coloring introduces excess moisture into the buttercream filling.
This moisture can bleed into the surrounding cake or cause the frosting structure to fail, compromising the hidden effect.
Why are my cupcake tops sinking after I pull them out of the oven?
No, this is usually due to opening the oven door too soon. A sudden temperature change collapses the delicate air bubbles before the structure sets.
Also, expired baking powder will not provide enough lift, leading to a weak structure that cannot support itself.
Can I use a standard box mix instead of this recipe?
No, homemade is strongly recommended for this design. Box mixes are often too soft or "moist" to handle the coring process effectively.
This recipe uses reverse creaming to create a sturdier, velvety crumb capable of holding a filling without crumbling.
What tool is best for removing the center core?
An apple corer is the best tool for consistency. It removes a perfect, uniform cylinder about halfway down the cupcake.
While a small paring knife works, it is more difficult to keep the hole shape consistent and clean for filling.
Can I freeze these announcement cupcakes after they are assembled?
No, it is best not to freeze the fully assembled cupcakes. Freezing assembled cakes often damages the structure of the buttercream topping.
You can freeze the unfilled, baked bases for up to two months, thawing them before you core and fill them.
My cake is crumbly when I try to scoop out the center, what should I do?
Yes, chilling the cooled cupcakes will help stabilize them. Crumbly texture usually means they are still slightly too warm, making the fat too soft.
Place the cooled cupcakes in the refrigerator for about 20 minutes before attempting to core them; this firms up the crumb.
Gender Announcement Cupcakes Recipe

Ingredients:
Instructions:
Nutrition Facts:
| Calories | 524 kcal |
|---|---|
| Protein | 2.9 g |
| Fat | 26.8 g |
| Carbs | 71.2 g |
| Fiber | 0.4 g |
| Sugar | 56.1 g |
| Sodium | 162 mg |
