How to Season Canned Green Beans

- Time: Active 5 minutes, Passive 10 minutes, Total 15 minutes
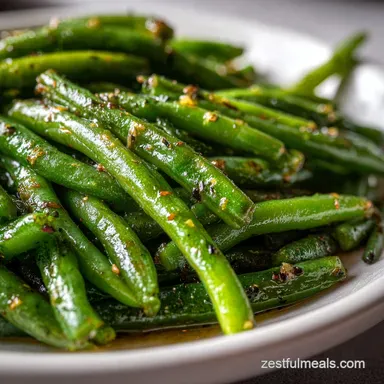
- Flavor/Texture Hook: Velvety, savory glaze with a tender crisp bite
- Perfect for: Busy weeknight dinners, budget-friendly holiday sides, or beginner meal prep
- Simple Guide: How to Season Canned Green Beans
- Fast Recipe Logistics and Timing
- Core Pantry Ingredients for Success
- Essential Tools for Sizzling Results
- Follow These Steps for Flavor
- How to Avoid Mushy Beans
- Creative Flavor Tweaks for Everyone
- Keeping Leftovers Fresh and Tasty
- Simple Plating Ideas for Families
- Recipe FAQs
- 📝 Recipe Card
Listen, we have all been there. It is 6:00 PM, the kids are asking when dinner is ready, and you are staring at two lonely cans of green beans in the pantry. Normally, they come out of the can tasting like the metal they were stored in, with a texture that is... well, less than inspiring.
I used to just microwave them with a pat of butter, but honestly, that never quite hit the mark for my family.
The secret I found is treating them like a fresh ingredient rather than a processed one. We are going to drain away that "can funk" and replace it with a savory, concentrated broth that clings to every bean.
It is the quickest way to make a 50 cent can of vegetables taste like something you'd find at a Southern Sunday brunch.
We are going to focus on layers of flavor here. We start with a fat source for richness, add aromatics for depth, and finish with a tiny splash of acid to wake everything up. This isn't just about hiding the fact that they came from a can; it is about highlighting the convenience while making them taste genuinely homemade.
Simple Guide: How to Season Canned Green Beans
The reason this method beats the microwave every single time comes down to basic chemistry. When you simmer the beans in a seasoned liquid, you are actually performing a mini braise. This allows the seasoning to penetrate the bean rather than just sitting on the surface.
The Science of Why it WorksAcidity Neutralization: The apple cider vinegar reacts with the alkaline metallic salts left over from the canning process, brightening the overall flavor.
Emulsification: The butter and chicken broth combine at a simmer to create a velvety glaze that coats the vegetables instead of pooling at the bottom of the pan.
Why Simmering Improves Flavor Profile
When we simmer these beans, we are reducing the liquid, which concentrates the solutes. This means every drop of chicken broth and Worcestershire sauce becomes a flavor powerhouse.
Unlike fresh beans that need careful timing to avoid overcooking, canned beans are already soft, so we are essentially "marinating" them under heat.
Acidity Fixes Metallic Can Tastes
That "tinny" flavor we all hate is a result of the preservation process. Adding apple cider vinegar provides a sharp contrast that tricks your taste buds into focusing on the savory garlic and onion instead of the metal.
It’s a trick I learned when I was trying to save a budget friendly Thanksgiving meal years ago.
Component Deep Dive
| Ingredient | Science Role | Pro Secret |
|---|---|---|
| Unsalted Butter | Provides fat for flavor carry and a velvety mouthfeel. | Brown it slightly first for a nutty, toasted aroma. |
| Chicken Broth | Acts as a savory solvent to distribute spices evenly. | Use low sodium to control the final seasoning level. |
| ACV | Neutralizes metallic pH and brightens heavy flavors. | Add this at the very end to keep the zing fresh. |
You might find that similar techniques are used in my Cream Peas Recipe, where we focus on building a rich, flavorful base for simple pantry vegetables. The goal is always to make budget ingredients feel like a treat for the whole family.
Fast Recipe Logistics and Timing
This recipe is designed for the high speed lane. Because we are using canned goods, we don't have to worry about snapping ends or washing dirt off the beans. It is a straight to the pan situation that saves at least 15 minutes of prep time compared to fresh varieties.
If you are wondering about the difference between cooking these on the stove versus the oven, the stovetop wins for speed and control. The direct heat allows for faster evaporation of the liquid, which is exactly what we want for a thick glaze.
| Method | Texture Result | Total Time |
|---|---|---|
| Stovetop | Velvety glaze with tender crisp beans | 15 minutes |
| Oven Roast | Shriveled and concentrated (often too dry) | 30 minutes |
Chef's Tip: For a deeper savory note without using bacon, add a tiny pinch of smoked paprika or even a drop of liquid smoke. It tricks the brain into thinking these have been simmering with a ham hock all day.
Core Pantry Ingredients for Success
To get the best results when learning how to season canned green beans, you need to be specific with your spices. Using powders instead of fresh garlic or onion here is actually better it prevents burning in the short cook time and coats the beans more evenly.
- 2 cans (411g each) canned green beans: Use cut or whole, but avoid "French style" for this specific simmer method.
- 28g (2 tbsp) unsalted butter: Why this? Controls salt levels while providing the necessary fat for a silky sauce.
- Substitute: 30ml Olive Oil. Note: Lacks the creamy mouthfeel but is heart healthy and vegan.
- 2.5g (1/2 tsp) garlic powder: Why this? Distributes instantly into the broth for consistent flavor.
- Substitute: 1 clove fresh garlic. Note: Sauté in butter for 30 seconds before adding beans.
- 2.5g (1/2 tsp) onion powder: Why this? Adds sweetness and depth without the texture of raw onions.
- Substitute: 1 tsp dried onion flakes. Note: Adds a bit of texture and bite to the sauce.
- 60ml (1/4 cup) chicken broth: Why this? The liquid base for our savory reduction.
- Substitute: Vegetable broth. Note: Keep it light to avoid over powering the beans.
- 1.5g (1/2 tsp) freshly cracked black pepper: Why this? Adds a subtle heat that cuts through the rich butter.
- Substitute: White pepper. Note: Offers a more floral, less aggressive heat.
- 2.5ml (1/2 tsp) Worcestershire sauce: Why this? The "secret weapon" for umami and fermented depth.
- Substitute: Soy sauce. Note: Adds saltiness and color but lacks the vinegar tang.
- 5ml (1 tsp) apple cider vinegar: Why this? Vital for cutting the metallic "can" aftertaste.
- Substitute: Lemon juice. Note: Brighter and more citrusy; use sparingly.
Essential Tools for Sizzling Results
You do not need a fancy kitchen to make these work. In fact, a simple wide skillet is better than a deep pot because it allows the liquid to evaporate faster. This is all about the sizzle and reduction!
- Colander: Essential for rinsing the beans to remove the excess sodium and "can juice."
- 12 inch Skillet: The wide surface area helps the chicken broth reduce into a glaze quickly.
- Silicone Spatula: Perfect for stirring the beans gently so they don't break apart or turn to mush.
If you ever find yourself working with frozen beans instead of canned, the process changes slightly to keep them from getting watery. You can check out my tips on How To Cook recipe for keeping those green beans from going limp in the pan.
Follow These Steps for Flavor

Now, let's get into the cooking flow. This is a 3 step timeline: Prep, Build, and Finish. Follow these closely to ensure your beans don't end up as a soup.
- Drain and Rinse. Empty the cans into a colander and rinse under cold water until the water runs clear. Note: This removes the metallic tasting starch and excess salt.
- Melt Butter. Place your skillet over medium high heat and add the 28g of butter. Wait for it to sizzle and foam.
- Add Aromatics. Whisk the garlic powder, onion powder, and black pepper into the melted butter for 10 seconds.
- Sauté Beans. Add the rinsed beans to the skillet. Cook for 2 minutes until the skins start to slightly blister.
- Deglaze Pan. Pour in the 60ml of chicken broth and the Worcestershire sauce.
- Simmer Down. Reduce heat to medium. Let the liquid bubble for 5 to 7 minutes until only a tablespoon of liquid remains.
- Final Seasoning. Stir in the apple cider vinegar.
- Glaze Check. Toss the beans gently until they are glossy and coated in the reduced sauce.
- Rest. Remove from heat and let sit for 1 minute before serving.
Chef's Tip: To get a truly "shatter crisp" contrast, top the finished beans with a handful of fried onions (the kind you use for casserole) right before serving.
How to Avoid Mushy Beans
The biggest fear when figuring out how to season canned green beans is the "mush factor." Since canned beans are already cooked, every minute on the stove counts. If you walk away to help a kid with homework, you might come back to a pile of green paste.
Why Beans Turn to Mush
The cell walls of green beans are made of pectin. In canned vegetables, this pectin is already partially broken down. High heat for a short time is better than low heat for a long time. You want to evaporate the liquid fast so the beans don't spend too long soaking in the hot broth.
Fixing Overly Salty Green Beans
Canned goods are notorious for high sodium. If you skip the rinsing step, your final dish might be inedible. If they still taste too salty after cooking, add a tiny pinch of sugar or another splash of vinegar to distract the palate.
| Problem | Root Cause | Solution |
|---|---|---|
| Soggy Texture | Simmered for too long in too much liquid. | Drain half the broth and turn up the heat. |
| Metallic Taste | Did not rinse beans or forgot the acid. | Add an extra teaspoon of vinegar or lemon juice. |
| Bland Flavor | Seasonings didn't bond to the fat. | Add another pat of butter and toss over high heat. |
If you want X, do Y:If you want a smoky flavor, add 2g of smoked paprika with the garlic powder. If you want a Southern texture, simmer for an extra 5 minutes with a lid on (they will be softer).
If you want a spicy kick, add a pinch of red pepper flakes to the butter.
Creative Flavor Tweaks for Everyone
While the base recipe is a classic, you can easily pivot based on what is in your fridge. My kids personally love it when I add a little sweetness to the mix to balance the savory notes.
Creating Southern Style Texture
To get that traditional Southern vibe, you’ll want to add some fatback or bacon. If you don't have those, the Worcestershire sauce does a lot of the heavy lifting. You can also simmer them for about 15 minutes if your family prefers that very soft, "cooked all-day" texture common in the South.
Plant Based Swaps That Work
Making this vegan is incredibly easy. Swap the butter for a high-quality vegan butter or coconut oil, and use vegetable broth instead of chicken broth. Just make sure your Worcestershire sauce is a vegan version, as many brands contain anchovies.
Myths Debunked:"Canned beans have no nutrients." False. The canning process locks in most minerals and vitamins, though some Vitamin C is lost in the heat. They are a perfectly healthy way to get greens on the table.
"You must cook them for hours for flavor." Absolutely not. That only applies if you are trying to break down tough fresh beans. With canned, 10 minutes is plenty to infuse flavor.
Keeping Leftovers Fresh and Tasty
Leftover green beans are actually great because they continue to "pickle" in the seasoning overnight. I often make a double batch just to have some for lunch the next day.
- Fridge: Store in an airtight container for up to 4 days.
- Freezer: I don't recommend freezing these after seasoning. The cell walls are already fragile from canning, and freezing will turn them into mush upon thawing.
- Reheating: Use a skillet over medium heat with a splash of water to loosen the glaze. Avoid the microwave if you want to keep any semblance of texture.
Zero Waste Tip: Don't throw away that little bit of liquid left in the pan! It's basically a concentrated vegetable "jus." Pour it over mashed potatoes or use it as a base for a quick gravy.
Simple Plating Ideas for Families
You’ve done the work to make them taste great, so give them a little visual love too. Since green beans can look a bit "drab" or olive colored, a little contrast goes a long way.
- Use a bright white bowl. The dark green beans will pop against a light colored dish.
- Add a fresh element. Even though the beans are cooked, a sprinkle of fresh parsley or even some toasted sesame seeds adds a "fresh" visual cue to the brain.
- The Height Trick. Don't just spread them flat on a plate. Pile them into a mountain in the center of a serving dish. It looks much more intentional and appetizing.
If you are looking for a great dip to serve alongside these as part of a larger veggie platter, my Vegetable Dip with recipe is a fantastic, velvety option that uses similar herb profiles. It makes the whole meal feel cohesive and planned rather than thrown together.
Scaling for Big Families
- To double (4 cans): Use a very large pan or two skillets. If you crowd the pan too much, the beans will steam instead of sautéing, and you won't get that concentrated glaze.
- To halve (1 can): Reduce the broth by half but keep the butter at 1 tablespoon. You need that minimum amount of fat to coat the pan and the beans properly.
There you have it! That is exactly how I transform a basic pantry staple into a side dish that actually earns its spot on the dinner table. It’s fast, it’s cheap, and it’s a total life saver on those nights when you just need one more thing to round out the meal.
Give it a shot tonight I bet nobody will even guess they came from a can!

Recipe FAQs
How do you add flavor to canned green beans?
Simmer them in a seasoned broth with aromatics. Draining and rinsing the beans removes the metallic taste. Then, sauté them briefly in butter with garlic and onion powder, deglaze with chicken broth and Worcestershire sauce, and reduce until a glaze forms.
What seasonings go well on green beans?
Garlic powder, onion powder, and black pepper are foundational. For extra depth, Worcestershire sauce adds umami, and a splash of apple cider vinegar at the end brightens the flavors and cuts through any metallic notes. For a smoky twist, try a pinch of smoked paprika.
What should I season canned beans with?
Start with fat and aromatics, then build savory notes. Melt unsalted butter, add garlic powder, onion powder, and pepper. Then, add the drained beans, chicken broth, and Worcestershire sauce, simmering until reduced to a glaze.
How to doctor up canned greens?
Transform them with a quick simmer and flavorful reduction. Rinse the beans, then sauté in butter with spices. Deglaze with chicken broth and Worcestershire sauce, then reduce the liquid to coat the beans in a rich glaze. Finish with a splash of apple cider vinegar.
Can I just microwave canned green beans?
No, microwaving alone won't add significant flavor. While quick, it doesn't allow for flavor infusion or liquid reduction. For a tastier result, a short simmer on the stovetop is much more effective to create a savory glaze.
How do I avoid mushy canned green beans?
Drain and rinse them thoroughly, then simmer quickly. Canned beans are already soft, so a short, active simmer on the stovetop helps evaporate excess liquid and create a glaze without overcooking them into paste. Avoid prolonged simmering at low heat.
What's the secret to making canned green beans taste good?
It's all about creating a savory glaze through reduction. Draining and rinsing is key, followed by sautéing in fat with aromatics, then simmering with broth and Worcestershire sauce until the liquid reduces to a thick, flavorful coating. If you enjoyed mastering the technique of building flavor through reduction here, see how a similar principle applies to achieving shatter crisp vegetables in our Quick Shrimp Stir Fry: Shatter Crisp Veggies.
Season Canned Green Beans
Ingredients:
Instructions:
Nutrition Facts:
| Calories | 82 kcal |
|---|---|
| Protein | 1.5 g |
| Fat | 5.9 g |
| Carbs | 5.8 g |
| Fiber | 2.6 g |
| Sugar | 1.8 g |
| Sodium | 420 mg |
