Sourdough Discard Garlic Pull Apart Bread
- Time: Active 85 minutes, Passive 30 minutes, Total 115 minutes
- Flavor/Texture Hook: Shatter crisp parmesan edges with a velvety, garlic infused crumb
- Perfect for: Budget-friendly hosting, weekend baking, or cleaning out the fridge
- Creating the Best Sourdough Discard Garlic Pull Apart Bread
- Why This Technique Works So Well
- Component Analysis and Ingredient Roles
- Sourcing Elements for Your Sourdough Discard Bread
- The Basic Tools for Stress Free Dough
- Turning Sticky Dough into Golden Garlic Layers
- Solving Common Baking Failures Before They Happen
- Adjusting the Recipe for Different Needs
- Budget Swaps and Smart Ingredient Alternatives
- Debunking Sourdough Discard Fallacies
- Keeping Your Loaf Fresh and Reducing Waste
- Making Your Pull Apart Bread Look Professional
- Recipe FAQs
- 📝 Recipe Card
Creating the Best Sourdough Discard Garlic Pull Apart Bread
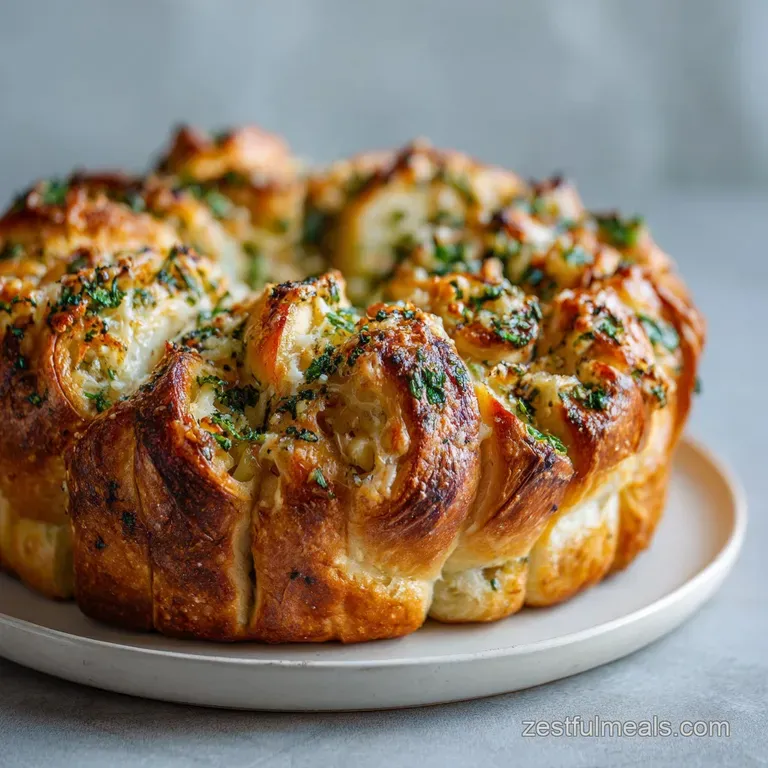
The first time I pulled a loaf of this sourdough discard garlic pull apart bread out of the oven, the aroma of roasting garlic and toasted parmesan didn't just fill the kitchen, it practically knocked on the neighbors' doors. There is something deeply ancestral about the scent of fermenting dough meeting sizzling fat.
It reminds me of the old stories about "Monkey Bread," which actually traces back to Hungarian arany galuska, but instead of the sweet, cinnamon heavy version most people know, this is the savory, rebellious cousin.
We are taking that tradition of "little bits of dough" and giving it a modern, no waste spin by using that jar of starter sitting in the back of your fridge.
I remember feeling so guilty every time I poured my sourdough discard down the drain. It felt like throwing away liquid gold, or at least a lot of potential flavor. Then I realized that the discard isn't just "old" flour and water; it is a flavor packed tenderizer.
In this recipe, the acidity of the discard works wonders on the gluten in the all purpose flour, creating a crumb that is far more complex than anything you could get from a packet of yeast alone.
This isn't just a side dish; it’s a centerpiece that demands to be torn apart by hand while it’s still steaming.
We’re going for a specific texture here. We want the outside to have a distinct shatter when you bite into it, while the inside remains silky and soft. To get there, we don't just roll the dough into balls. We stack it.
By cutting the dough into squares and standing them up vertically in the pan, we create dozens of little "pockets" for the garlic butter to pool. When the heat hits, that butter fries the edges of the dough squares, creating a texture that is half bread, half pastry.
It is a brilliant way to use up ingredients you already have while making something that looks like it came from a high end bakery.
Why This Technique Works So Well
- Lactic Acid Tenderization: The fermented discard contains lactic acid which breaks down tough gluten bonds in all purpose flour, resulting in a velvety interior.
- Vertical Heat Exposure: Stacking the dough vertically allows the oven's heat to circulate between the layers, ensuring the "middle" of the loaf actually cooks through instead of becoming a gummy mess.
- Dual Leavening Boost: Using instant yeast alongside the sourdough discard ensures a reliable, rapid rise while the discard provides the complex, tangy flavor profile usually reserved for long fermented loaves.
- Fat Barrier Physics: The garlic herb butter acts as a barrier between dough layers, preventing them from fusing back into a solid block so they "pull apart" effortlessly after baking.
| Method | Time | Texture | Best For |
|---|---|---|---|
| Fresh Discard Dough | 115 minutes | Silky and complex | Maximum flavor and "wow" factor |
| Shortcut (store-bought) | 45 minutes | Chewy and simple | Last minute guests or quick snacks |
| Overnight Cold Rise | 12 hours | Ultra tangy and airy | Stress free morning baking |
Choosing the right method depends on your schedule, but using the sourdough discard garlic pull apart bread method outlined here offers the best balance of cost efficiency and professional results.
The acidity in the sourdough discard acts as a natural preservative, meaning this bread stays soft longer than store-bought versions.
Component Analysis and Ingredient Roles
| Ingredient | Science Role | Pro Secret |
|---|---|---|
| Sourdough Discard | Adds acidity and enzyme activity | Use it cold from the fridge to help control the dough temperature. |
| All Purpose Flour | Provides the structural framework | Don't swap for bread flour; the lower protein keeps the "pull" tender. |
| Instant Yeast | Ensures a consistent, 60 minutes rise | Store in the freezer to keep the yeast dormant and fresh for months. |
| Warm Whole Milk | Softens the crumb with fats | Ensure it hits 110°F exactly to wake up the yeast without killing it. |
While some recipes call for expensive specialty flours, this bread is designed to be budget smart. We rely on the fermentation of the discard to do the heavy lifting for the flavor and texture, which means you can stick to your standard pantry staples without sacrificing quality.
Sourcing Elements for Your Sourdough Discard Bread
To get the best results, you'll need these specific items. I’ve included swaps just in case your pantry is looking a little bare, but keep in mind that the fats are what make this dish truly decadent.
- 200g sourdough discard (100% hydration, unfed)
- Substitute: 100g flour + 100g water + 1 tsp lemon juice. Why this? Mimics the hydration and acidity levels needed for the specific crumb texture.
- 350g all purpose flour
- Substitute: Bread flour. Why this? Higher protein creates a chewier, more bread like structure rather than a soft pull.
- 120ml warm whole milk
- Substitute: Unsweetened almond milk. Why this? Provides moisture but lacks the milk solids that help with browning.
- 50g unsalted butter, melted and cooled
- Substitute: Neutral oil (like canola). Why this? Oil provides moisture but won't offer the same rich, buttery aroma.
- 25g granulated sugar
- Substitute: Honey or maple syrup. Why this? Feeds the yeast and aids in the browning of the crust.
- 7g instant yeast
- Substitute: Active dry yeast (requires proofing). Why this? Instant yeast allows for a faster rise without a separate hydration step.
- 8g fine sea salt
- Substitute: Table salt (use 6g). Why this? Essential for regulating yeast activity and enhancing the savory garlic notes.
- 85g unsalted butter, softened
- Substitute: Salted butter (reduce added sea salt). Why this? This is the "glue" that holds the garlic and herbs to the dough.
- 5 cloves fresh garlic, finely minced
- Substitute: 1.5 tsp garlic powder. Why this? Fresh garlic provides a sharp, pungent bite that mellows into sweetness during baking.
- 15g fresh parsley, finely chopped
- Substitute: 1 tbsp dried parsley. Why this? Fresh parsley adds a vibrant "green" note that cuts through the rich butter.
- 40g grated parmesan cheese
- Substitute: Sharp cheddar or Pecorino. Why this? Parmesan creates a salty, umami rich crust that gets crispy in the oven.
- 1 pinch red pepper flakes
- Substitute: Black pepper. Why this? Adds a tiny hint of back of-the throat warmth to the garlic butter.
The Basic Tools for Stress Free Dough
You don't need a professional bakery setup to make this sourdough discard garlic pull apart bread, but a few specific tools will make your life much easier. I always reach for my stand mixer (like a KitchenAid) because kneading enriched dough by hand can get pretty sticky and frustrating.
If you are doing it by hand, just be prepared for a workout!
A good 9x5 inch loaf pan is non negotiable here. If you use a pan that's too large, the dough squares will flop over and lose their vertical structure. If it's too small, the dough might overflow and make a mess of your oven floor. I also highly recommend a pizza cutter.
Trying to cut soft, buttered dough with a regular knife often leads to dragging and tearing. A rolling wheel slices through like butter, keeping those edges clean and ready for stacking.
If you are looking for something to serve alongside this loaf, it pairs perfectly with my Brussels Sprouts recipe for a full garlic themed dinner. Having a digital thermometer is also a game changer. It takes the guesswork out of the internal temperature, ensuring you never pull out a loaf that’s still raw in the center.
Turning Sticky Dough into Golden Garlic Layers
- In the bowl of a stand mixer, combine 120ml warm milk (approx 110°F), 25g sugar, and 7g instant yeast. Let sit for 5-10 minutes until frothy and smelling like bread. Note: This ensures your yeast is actually alive before you add the rest of the ingredients.
- Add the 200g sourdough discard, 50g of melted butter, 350g all purpose flour, and 8g sea salt to the yeast mixture. Mix with a dough hook on medium speed until a smooth, elastic dough forms and clears the sides of the bowl.
- Transfer dough to a greased bowl, cover with plastic wrap, and let rise in a warm spot for 60 minutes until doubled in size and puffy.
- In a separate bowl, cream together the 85g softened butter, 5 minced garlic cloves, 15g chopped parsley, 40g grated parmesan, and a pinch of red pepper flakes until it looks like a thick, green flecked paste.
- Punch down the risen dough and roll it out on a lightly floured surface into a large rectangle, approximately 12x20 inches and about 1/4 inch thick.
- Using a pastry brush, spread the garlic herb butter mixture evenly over the entire surface of the dough, leaving a tiny 1/4 inch border at the edges.
- Cut the dough into 8-10 equal squares using a pizza cutter. Stack the squares on top of each other and place the stack vertically into a greased 9x5 inch loaf pan so it looks like a filing cabinet of dough.
- Preheat oven to 350°F (175°C). Let the loaf rest for 15 minutes while the oven heats up to allow the layers to slightly expand.
- Bake for 30 minutes until the top is mahogany colored and the internal temperature reaches 190°F. Note: Using a thermometer prevents the common "gummy middle" disaster.
- Let the bread cool in the pan for 10 minutes before removing it to let the butter redistribute into the crumb.
Solving Common Baking Failures Before They Happen
The Middle Stays Gummy or Raw
This is the most common issue with pull apart breads. Because we are stacking layers, the heat has to work harder to reach the very center. If the top is getting too dark but the middle is still doughy, tent the pan with aluminum foil.
This reflects the direct heat from the top while allowing the internal temperature to keep rising. Always use a thermometer to hit that 190°F mark.
The Bread is Too Sour or Tangy
Sourdough discard acidity can vary wildly. If your starter has been sitting in the fridge for a month, it will be much more acidic than a week old discard. This can sometimes inhibit the yeast or make the bread taste too sharp.
To balance this, you can add a tiny pinch of baking soda (about 1/4 teaspoon) to the dry ingredients to neutralize some of the acid.
| Problem | Root Cause | Solution |
|---|---|---|
| Dough won't rise | Milk was too hot or yeast is old | Check yeast in warm water/sugar first; milk must be 110°F. |
| Layers fused together | Not enough butter or squares too thin | Spread butter generously; ensure squares are 1/4 inch thick. |
| Garlic tastes bitter | Garlic burnt on the top | Mince garlic very finely so it melts into the butter/dough. |
Chef's Tip: If you want an extra crispy crust, sprinkle an additional tablespoon of parmesan cheese over the top of the loaf 5 minutes before the baking time is up. The cheese will melt and then fry against the hot dough.
Common Mistakes Checklist
- ✓ Use a kitchen scale for the 200g discard; volume measurements are wildly inaccurate for sourdough.
- ✓ Don't skip the 10 minute rest in the pan after baking; it prevents the bread from falling apart too early.
- ✓ Ensure your butter is truly "softened" (room temp), not melted, for the filling, or it will leak out.
- ✓ Avoid over flouring your work surface during rolling, or the layers won't stick to each other properly.
- ✓ Pat your fresh parsley dry after washing to prevent adding extra moisture to the butter.
Adjusting the Recipe for Different Needs
Scaling this sourdough discard garlic pull apart bread is relatively straightforward, but you need to be careful with the pan sizes. If you want to make a double batch (2x), do not try to put it all in one giant pan. It’s better to make two separate 9x5 loaves.
This ensures the heat distribution remains consistent and you don't end up with a burnt exterior and raw interior. For the spices and salt, use a 1.5x multiplier instead of doubling them exactly to prevent the flavor from becoming over seasoned.
If you are scaling down for a smaller household (0.5x), you can use a small 6x3 inch mini loaf pan. You will need to reduce the baking time by about 20%, so start checking the temperature at 22 minutes.
If you are halving the egg (though this recipe doesn't use one, many enriched doughs do), beat the egg first and then weigh out half. For this specific recipe, the discard and milk provide the moisture, so halving those is simple.
Budget Swaps and Smart Ingredient Alternatives
You don't need a huge budget to make this bread taste like a million dollars. If parmesan is too pricey, you can use a dry Monterey Jack or even a sharp white cheddar. The key is using a cheese with a low moisture content so it browns instead of just turning into a greasy puddle. For a fun twist, you can serve this with a Garlic Herb Veggie Dip for the ultimate appetizer spread.
| Goal | Adjustment | Outcome |
|---|---|---|
| Vegan Option | Sub plant butter/milk + 1 tbsp flax | Slightly less rise but still flavorful. |
| Extra Savory | Add 1 tsp onion powder to dough | Deepens the umami profile significantly. |
| Everything Bagel | Swap parsley for "Everything" seasoning | Adds crunch and a familiar, salty pop. |
The budget smart angle here is utilizing the sourdough discard, which is essentially a free ingredient you'd otherwise toss. By pairing it with basic all purpose flour and pantry staples like sugar and dried spices, you're creating a high value item for pennies on the dollar.
Debunking Sourdough Discard Fallacies
One common misconception is that sourdough discard has no "leavening power." While it's true that "unfed" discard isn't as active as a peak starter, it still contains live wild yeast and bacteria.
In this recipe, we use instant yeast as the primary engine for the rise, but the discard still contributes to the structure and "puffy" nature of the dough through its residual gases and acidity.
Another myth is that you can only use "fresh" discard from that day. You can actually use discard that has been in the fridge for up to two weeks. The longer it sits, the more "sour" it becomes, which actually improves the flavor of the pull apart bread.
Just make sure there isn't any fuzzy mold or a bright pink/orange tint on the starter before using it.
Keeping Your Loaf Fresh and Reducing Waste
Storage: This bread is best eaten the day it is made, but it will keep in an airtight container at room temperature for up to 2 days. If you want to keep it longer, wrap it tightly in foil and then plastic wrap, and freeze for up to 3 months.
To reheat, pop it into a 350°F oven for 10 minutes (covered with foil) until the butter sizzles again. Avoid the microwave, as it will make the crust chewy rather than crispy.
Zero Waste: If you find yourself with leftover scraps of dough after cutting your squares, don't throw them away! Roll them into tiny balls, toss them in any remaining garlic butter, and bake them in a muffin tin.
These "garlic knots" are the perfect snack for the baker while the main loaf is finishing up. If the bread goes stale, it makes the most incredible savory bread pudding or garlic croutons for a Caesar salad.
Just cube it up, toss with a little extra olive oil, and bake at 300°F until completely dry and crunchy.
Making Your Pull Apart Bread Look Professional
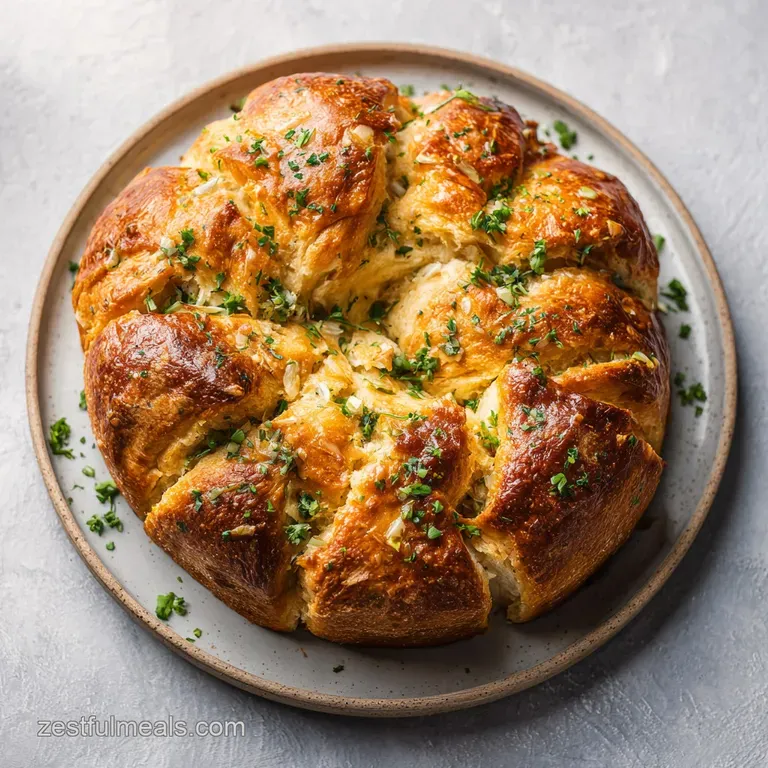
Presentation is everything with a pull apart loaf. When you are stacking your squares in the pan, don't worry about them being perfectly aligned. A little bit of offset actually creates more "peaks" that catch the heat and turn golden brown.
After the bread comes out of the oven, I like to give it one last tiny sprinkle of fresh parsley and a dusting of parmesan. The residual heat will melt the cheese just enough to make it stick.
If you are serving this for a party, leave it in the loaf pan and bring it to the table with a bread knife, or better yet, just let people dig in with their hands. The visual of the layers being "peeled" away is part of the experience. It shows off that beautiful, silky crumb we worked so hard to create.
It’s an encouraging sight for any home cook to see their creation disappear in minutes, and trust me, this one always does.

Recipe FAQs
Can I use active sourdough starter instead of discard?
Yes, you can substitute active starter for discard. The dough will rise faster, so keep a close eye on the volume during the 60-minute proofing stage to ensure it doesn't over proof.
Why is my bread leaking butter in the oven?
The butter was likely too warm or melted during assembly. Use softened, room temperature butter when creating the garlic herb spread to ensure it stays between the dough layers instead of running out into the pan.
How to ensure the pull apart layers separate easily?
Apply the butter mixture sparingly and avoid over flouring your work surface. Excess flour creates a barrier that prevents the dough squares from bonding with the butter, while careful stacking ensures the distinct layers remain separate after baking.
How to tell when the bread is perfectly baked?
Look for a mahogany colored top and verify an internal temperature of 190°F. Using a thermometer is the most reliable way to ensure the center is fully cooked without relying solely on the 30-minute bake time.
Is it true the dough must rise for more than 60 minutes?
No, this is a common misconception. The dough reaches sufficient volume for this recipe in exactly 60 minutes in a warm spot, provided your environment is around 75°F.
How to incorporate more savory flavors?
Increase the amount of grated parmesan cheese inside the folds. If you enjoyed balancing the intense saltiness of the cheese here, apply that same flavor profile to our creamy garlic sauce recipe for a similar experience.
Why should I let the bread rest after baking?
The 10-minute rest prevents the internal structure from collapsing or becoming gummy. Allowing the steam to redistribute within the loaf helps the crumb set properly before you start pulling it apart.
Sourdough Discard Garlic Bread

Ingredients:
Instructions:
Nutrition Facts:
| Calories | 301 kcal |
|---|---|
| Protein | 7.1 g |
| Fat | 12.9 g |
| Carbs | 38.5 g |
| Fiber | 1.4 g |
| Sugar | 2.8 g |
| Sodium | 374 mg |
