Quick Air Fryer Baked Potato with Sea Salt
- Making a Quick and Delicious Air Fryer Baked Potato with Sea Salt
- Understanding the High Velocity Air Crisp Method
- Simple Reasons to Love This Potato Recipe
- Essential Quick and Delicious Recipe Specifications
- Component Analysis and Ingredient Roles
- Gathering Your Fresh Ingredients and Substitutes
- Essential Cooking Tools for Success
- Managing the Step by Step Cooking Process
- Fixing Common Texture and Cooking Issues
- Adjusting the Recipe for Different Needs
- Debunking Common Baked Potato Myths
- Reliable Storage and Zero Waste Strategies
- Choosing the Perfect Complements
- High in Sodium
- Recipe FAQs
- 📝 Recipe Card
Making a Quick and Delicious Air Fryer Baked Potato with Sea Salt
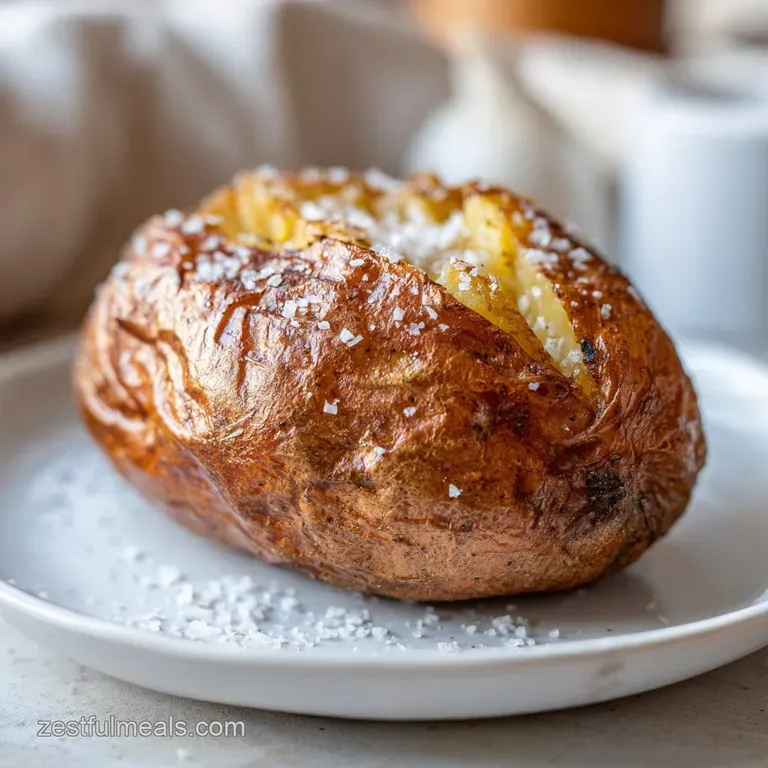
The first time I heard that "shatter" of the potato skin, I knew I was never going back to the oven. You know that specific sound the one where the fork tines hit a salty, oil crisped exterior and it just gives way to a cloud of steam? That’s the dream.
For years, I dutifully waited sixty or seventy minutes for my big convection oven to do its thing, usually resulting in a skin that was more leather than lace. Then I started experimenting with my air fryer, and the game changed.
Discover a supremely fluffy and flavorful Quick and Delicious Air Fryer Baked Potato with Sea Salt, ready in minutes. Honestly, I used to think the air fryer was just for reheating fries or making wings, but it's actually the ultimate potato machine.
It circulates hot air so efficiently that the skin dehydrates and crisps up almost instantly while the inside stays like a velvety cloud. If you've been struggling with soggy skins or centers that feel more like mash than fluff, we've got some ground to cover.
We're going to keep things efficient here because I know you're probably hungry and looking for a way to get dinner on the table without the fuss. This isn't about some intricate, multi step process. It's about using the right fat, the right salt, and the right airflow to get that steakhouse quality at home.
Whether you're using a basket style or a Ninja air fryer, the principles are the exact same. Let's get into the mechanics of why this works so much better than the old school way.
Understanding the High Velocity Air Crisp Method
Getting that perfect texture isn't an accident; it's a result of how the air fryer handles moisture. Unlike a traditional oven where the air can get stagnant, the constant movement in an air fryer prevents the potato from "steaming" itself. If you're looking for something to pair this with, the saltiness of the potato goes incredibly well with a Garlic Parmesan Crusted recipe for a balanced, high protein meal.
- Surface Dehydration: The high speed fan strips moisture from the skin rapidly, allowing the oil to "fry" the surface instead of just soaking in.
- Starch Gelatinization: The intense heat converts the potato's internal starches into a soft, fluffy texture faster than radiant heat ever could.
- Convection Efficiency: Small space cooking means the temperature stays stable even when you open the basket to check on things.
- Osmotic Pressure: Using coarse sea salt doesn't just add flavor; it draws out the final bits of surface water for maximum crunch.
The Physics of the Crunch
The air fryer uses a concentrated heat source and a powerful fan to create a "mini windstorm" of hot air. This mechanism forces moisture to evaporate from the potato skin at an accelerated rate, creating that characteristic crackle while the internal temperature reaches the 210°F (99°C) sweet spot for fluffiness.
| Cooking Method | Total Time | Skin Texture | Energy Use |
|---|---|---|---|
| Standard Oven | 60-70 mins | Leathery/Soft | High |
| Microwave | 8-10 mins | Soggy/Wet | Low |
| Air Fryer | 40-45 mins | Crispy/Shatter thin | Medium Low |
It's clear that for anyone who values both time and texture, the air fryer is the winner. The microwave is faster, sure, but you sacrifice the entire experience of the crispy skin. The oven takes forever and heats up your whole kitchen. The air fryer sits right in that "Goldilocks" zone of efficiency.
Simple Reasons to Love This Potato Recipe
I love this recipe because it’s a "set it and forget it" situation that actually delivers high end results. You don't need to be a professional chef to master the air-fried Baked Potatoes Recipe; you just need to follow a few basic rules about prep.
It’s perfect for those nights when you’re exhausted but want something that feels like a real, comforting meal.
One of the biggest wins here is the consistency. Because the basket is small, the heat is incredibly even. You won't end up with one side of the potato charred and the other side raw. Plus, if you're meal prepping, you can throw four of these in at once and have the base for lunches all week long.
They reheat surprisingly well in the air fryer too, regaining that crunch in just about 5 minutes.
But what about the toppings? That’s where you can really have some fun. This recipe is a blank canvas. While we're going with the classic butter and sour cream, the salty skin holds up to almost anything you throw at it. If you're in the mood for something different, these potatoes are a great alternative to the Frozen Sweet Potatoes recipe when you want that classic Russet starchiness.
Essential Quick and Delicious Recipe Specifications
When we talk about an Air Fryer Baked Potato Quick method, we need to be specific about the numbers. I've tested these at various temperatures, and 400°F (200°C) is the absolute sweet spot.
Any lower and the skin doesn't crisp; any higher and the outside burns before the middle is soft.
- Prep time:5 minutes
- Cook time:45 minutes
- Total time:50 minutes
- Yield: 4 servings
- Optimal Temp:400°F (200°C)
Chef's Note: If your potatoes are exceptionally large (over 300g), add 5-10 minutes to the cook time. Always use a fork to test for "no resistance" in the center.
Component Analysis and Ingredient Roles
Choosing the right potato is half the battle. You want a high starch variety, which is why Russets are the undisputed kings of the baked potato world. Their low moisture content is exactly what allows them to get so fluffy. I once tried this with red potatoes and... let's just say it was a waxy disaster.
Stick to the Russets.
| Ingredient | Science Role | Pro Secret |
|---|---|---|
| Russet Potatoes | High starch content | Scrub them hard to remove excess dirt and thin the skin. |
| Extra Virgin Olive Oil | Heat conductor | Rub it in thoroughly; it creates the "fried" skin effect. |
| Coarse Sea Salt | Moisture extractor | Use coarse salt so it doesn't all dissolve into the skin. |
| Unsalted Butter | Fat/Flavor carrier | Add it while the potato is steaming hot to emulsify with the starch. |
Make sure you're using fresh black pepper too. The pre ground stuff loses its punch, and you really want that sharp bite to cut through the richness of the butter and sour cream. It’s those tiny details that move a dish from "fine" to "I need the recipe."
Gathering Your Fresh Ingredients and Substitutes
Here is everything you need to pull this off. I’ve included some swaps because I know how it is when you realize the pantry is half empty right as you start cooking.
- 4 medium Russet potatoes (approx. 250g each). Why this? Russets have the perfect starch to moisture ratio for a fluffy interior.
- Substitute: Yukon Gold (will be creamier/waxier, less fluffy).
- 1 tbsp extra virgin olive oil. Why this? High smoke point and adds a subtle fruity richness to the skin.
- Substitute: Avocado oil or melted ghee.
- 1.5 tsp coarse sea salt. Why this? The large grains provide texture and a sharp "pop" of flavor.
- Substitute: Kosher salt (use slightly more).
- 0.5 tsp freshly cracked black pepper. Why this? Essential for heat and depth.
- Substitute: White pepper for a milder, earthy heat.
- 2 tbsp unsalted butter. Why this? Allows you to control the salt level while adding creaminess.
- Substitute: Vegan butter or a drizzle of truffle oil.
- 1 tbsp sour cream. Why this? Provides the necessary acidity to balance the heavy starch.
- Substitute: Plain Greek yogurt.
- 1 tsp fresh chives. Why this? Adds a bright, oniony finish and a pop of color.
- Substitute: Thinly sliced green onion tops.
| Original Ingredient | Substitute | Why It Works |
|---|---|---|
| Extra Virgin Olive Oil | Duck Fat | Extreme richness and a higher smoke point for even crispier skin. |
| Sour Cream | Greek Yogurt (full fat) | Nearly identical tang and texture with more protein. |
| Sea Salt | Garlic Salt | Adds a savory, aromatic layer. Note: Reduce the pepper if using this. |
Using the right fat really does change the outcome. While olive oil is my go to for weeknights, using duck fat or even bacon grease takes the skin to a whole different level. It’s a bit more indulgent, but if you’re making these for a special Sunday dinner, it’s worth the extra effort.
Essential Cooking Tools for Success
You don't need a kitchen full of gadgets for this, but a few specific tools make the process much smoother. The most important, obviously, is your air fryer. Whether it's a dedicated basket unit or a toaster oven style, just make sure the heating element is clean so it doesn't smoke.
- Air Fryer: A 5 quart or larger basket style is ideal for 4 potatoes.
- Scrub Brush: Essential for getting the grit out of the "eyes" of the potato.
- Fork: For piercing the skin to allow steam to escape.
- Small Bowl: To mix the oil and salt for even coating.
- Internal Meat Thermometer: The "secret weapon" for perfect doneness.
If you don't have a scrub brush, a clean scouring pad works in a pinch. Just don't skip the cleaning step. Potatoes grow in dirt, and there's nothing that ruins a Quick and Delicious Air Fryer Baked Potato with Sea Salt faster than a mouthful of grit.
Managing the step-by-step Cooking Process
Alright, let's get cooking. This process is all about the "Triple S": Scrub, Steam holes, and Seasoning. Don't rush the drying phase wet potatoes will steam, not fry.
- Scrub the potatoes. Use cold running water and a brush to remove all debris. Note: This ensures the skin is pleasant to eat.
- Dry completely. Pat each potato with a kitchen towel until the skin feels matte and bone dry.
- Pierce the skin. Use a fork to poke 6-8 sets of holes all over each potato. Note: This prevents the potato from exploding due to internal steam pressure.
- Coat with oil. Rub the olive oil over the skin until every millimeter is glistening.
- Season generously. Roll the potatoes in the sea salt and pepper until the grains cling to the oil.
- Arrange in basket. Place the potatoes in the air fryer, ensuring they aren't touching.
- Cook at 400°F (200°C). Set the timer for 40 minutes.
- Flip halfway. At the 20 minute mark, turn the potatoes until the bottom side is now facing up.
- Check for doneness. Continue cooking for 5-10 more minutes until the skin is brown and the center feels soft when squeezed.
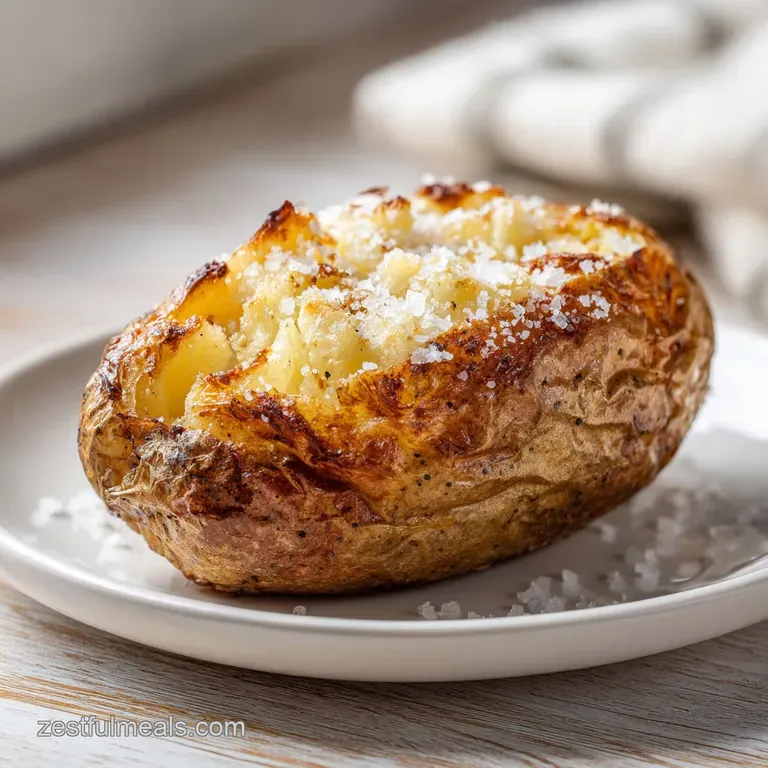
- Slice and fluff. Cut a slit down the middle, squeeze the ends together, and fluff the inside with a fork until it looks like white clouds.
Chef's Tip: Freeze your butter for 10 minutes then grate it over the hot potato instead of using a slab. It melts instantly and distributes much more evenly into the crevices!
Fixing Common Texture and Cooking Issues
Even with the best instructions, things can go sideways. The most common complaint is a potato that is "hard" in the middle. Usually, this just means it hasn't reached the magic internal temperature. If you have an instant read thermometer, look for 205°F to 212°F.
That is the point where the starch granules fully swell and burst, giving you that airy texture.
Why Your Potato Skin is Tough
If the skin feels more like leather than a crisp shell, it’s usually because of two things: either you didn't use enough oil, or you cooked it at too low a temperature for too long. The oil is the medium that fries the skin. Without it, you're just dehydrating the peel into parchment.
Avoiding the Soggy Bottom
This happens when potatoes are crowded. If air can't reach the bottom of the potato, it sits in its own moisture. Always leave at least an inch of space between each spud. If you have a small air fryer, it's better to cook in two batches than to cram them all in at once.
| Problem | Root Cause | Solution |
|---|---|---|
| Hard center | Undercooked | Cook for another 5-10 mins. Aim for 210°F internal temp. |
| Shriveled skin | Too much salt early | Lightly mist with oil halfway through to rehydrate the surface. |
| Burnt exterior | Temp too high | Lower to 375°F (190°C) and extend time by 5 minutes. |
Common Mistakes Checklist:
- ✓ Skipping the "dry" step (wet potatoes = chewy skin).
- ✓ Forgetting to poke holes (the potato will literally burst).
- ✓ Using fine table salt (it disappears and doesn't provide crunch).
- ✓ Leaving the potatoes in the basket after the timer goes off (they will steam and lose crispness).
- ✓ Not flipping them (the bottom will stay pale and soft).
Adjusting the Recipe for Different Needs
Scaling this recipe is pretty straightforward because potatoes are individual units. However, keep in mind that the more potatoes you add to the basket, the more "thermal mass" there is. This means the air fryer has to work harder to maintain the temperature.
- For 1-2 Potatoes: Reduce the cook time by about 5 minutes. The air will circulate much faster with more empty space.
- For 6-8 Potatoes: You will likely need to work in batches. If you try to stack them, they won't crisp. Keep the first batch warm in a 200°F oven while the second batch cooks.
- Baking for a crowd: If you are doubling the recipe, don't double the salt and pepper linearly. Start with 1.5x the amount and adjust to taste, otherwise, it can become overwhelming.
One thing to watch out for when scaling down is the oil. You still need enough to thoroughly coat the surface. Don't skimp just because you're only making one! The physics of the "fry" remain the same regardless of how many are in the basket.
Debunking Common Baked Potato Myths
There's a lot of bad advice floating around out there. One of the biggest offenders is the "foil wrap" method. Wrapping a potato in foil doesn't "bake" it; it steams it. You end up with a wet, papery skin and a dense interior. If you want a real baked potato, the skin must be exposed to the air.
Another myth is that you shouldn't eat the skin because it's "dirty." As long as you scrub them well, the skin is actually the most nutritious part, packed with fiber and potassium. Plus, in an air fryer, it becomes the most delicious part! Finally, don't believe that all potatoes are the same.
A Red Bliss or a Fingerling will never give you the fluff of a Russet, no matter how long you cook it.
Reliable Storage and Zero Waste Strategies
If you happen to have leftovers (which rarely happens in my house), they store quite well. The key is to let them cool completely before putting them in a container. If you seal them while they are still warm, the residual steam will turn the skin into mush.
- Storage: Keep in an airtight container in the fridge for up to 4 days.
- Freezing: You can freeze baked potatoes! Wrap them tightly in plastic and then foil. They stay good for 2-3 months.
- Reheating: Don't use the microwave. Put them back in the air fryer at 350°F (180°C) for 5-7 minutes. They will crisp right back up.
- Zero Waste: If you find the insides are gone but you have the skins left, don't toss them! Cut the skins into strips, spray with a little more oil, and air fry for 3 minutes. You’ve got "potato skin fries" that are better than chips.
I also love using leftover potato flesh for a quick hash the next morning. Just dice it up and toss it in a pan with some onions. Since it's already cooked, it browns in minutes and stays incredibly creamy on the inside.
Choosing the Perfect Complements
This potato is a powerhouse on its own, but it really shines when paired with the right main dish. Because it’s so rich and starchy, I like to serve it with something that has a bit of acidity or a sharp crust. For a really easy weeknight meal, I often serve these alongside my Air Fryer Pizza recipe for a "pub style" dinner that the kids absolutely love.
If you’re going for something a bit more sophisticated, a simple roasted chicken or a pan seared steak is the way to go. The fluffiness of the potato acts as a sponge for any pan juices or gravy. Or, if you want to keep it vegetarian, try it with a big garden salad dressed in a sharp lemon vinaigrette.
The contrast between the hot, salty potato and the cold, crisp greens is one of my favorite flavor profiles.
Ultimately, this Quick and Delicious Air Fryer Baked Potato with Sea Salt is about bringing back a classic side dish and making it better and faster. It’s proof that sometimes, the best kitchen upgrades aren't about complicated new recipes, but about using the tools we have to perfect the basics.
Happy air frying!

High in Sodium
885 mg mg of sodium per serving (38% % of daily value)
The American Heart Association recommends limiting sodium intake to about 2,300mg per day for most adults.
Tips to Reduce Sodium in Your Baked Potato:
-
Reduce Added Salt-25%
Cut the coarse sea salt in half, from 1.5 tsp to 0.75 tsp. This significantly lowers the overall sodium content without drastically impacting the flavor. You can always add a pinch at the end if needed.
-
Unsalted is Best-10%
Ensure that the butter you are using is truly unsalted. Even slight variations in butter salt content can contribute significantly to the overall sodium.
-
Low-Sodium Sour Cream-10%
Consider using a low-sodium sour cream alternative, or even plain Greek yogurt for a tangy flavor with significantly less sodium. Be sure to read the nutrition labels.
-
Spice it Up!
Experiment with sodium free herbs and spices! Garlic powder, onion powder, smoked paprika, and dried oregano can add depth of flavor without adding any sodium.
Recipe FAQs
How to make perfect baked potatoes in an air fryer?
Toss them in oil and coarse sea salt, then cook at 400°F (200°C). Pierce the skin 6-8 times with a fork to allow steam to escape, and flip them halfway through the 40-minute cook time for even crisping.
Why soak potatoes in water before air frying?
No, never soak them. Soaking introduces moisture, which causes the skin to steam rather than crisp up in the air fryer's high heat environment.
Can you put sea salt in potatoes?
Yes, coarse sea salt is highly recommended. It draws out surface moisture for a superior crunch and provides superior textural flavor compared to fine table salt.
How to make delicious air fryer potatoes?
Thoroughly dry the scrubbed skin, coat completely with oil, and use coarse salt. The quality of the skin preparation is key to a delicious result, much like the dry environment needed for our Potato Flake Sourdough Starter recipe.
What internal temperature should an air fryer baked potato reach?
Aim for 205°F to 212°F (96°C to 100°C) internally. This high heat level ensures that the starches fully gelatinize, resulting in that classic fluffy, cloud like interior texture.
Is it true that wrapping the potato in foil makes it bake better?
No, this is a common misconception. Wrapping in foil traps steam, leading to a soft, leathery skin instead of the desired shatteringly crisp exterior from the air fryer’s convection heat.
Can I use Russet potatoes, or should I use Yukon Golds?
Stick with Russets for the best texture. Russets have a higher starch content which creates the fluffiest center, whereas Yukon Golds will result in a creamier, slightly denser texture.
Air Fryer Baked Potato Sea Salt
Ingredients:
Instructions:
Nutrition Facts:
| Calories | 279 kcal |
|---|---|
| Protein | 5.8 g |
| Fat | 10.1 g |
| Carbs | 43.5 g |
| Fiber | 5.2 g |
| Sugar | 1.8 g |
| Sodium | 885 mg |
