Chocolate Peppermint Dream Cake
- Time: Active 25 minutes, Passive 35 minutes, Total 1 hour
- Flavor/Texture Hook: Rich, fudgy dark chocolate paired with airy, cool peppermint clouds and a snappy chocolate ganache.
- Perfect for: Holiday parties, Christmas dessert centerpieces, or impressing your fellow baking enthusiasts.
- Bake This Chocolate Peppermint Dream Cake
- The Science of Fudgy Crumbs
- Selecting High Quality Baking Elements
- Standard Kitchen Tools for Success
- Step by Step Assembly Guide
- Fixing Common Baking Failure Points
- Flavor and Texture Customization Ideas
- Preserving Freshness and Moisture Levels
- Ideal Serving and Pairing Suggestions
- Recipe FAQs
- 📝 Recipe Card
Bake This Chocolate Peppermint Dream Cake
The sharp crack of a candy cane snapping between your fingers is the official sound of the holiday season in my kitchen. Whenever I pull this chocolate peppermint dream cake out of the oven, the air fills with that heavy, intoxicating scent of dark cocoa and refreshing mint.
It’s the kind of aroma that makes everyone wander into the kitchen, spoons in hand, hoping for a stray crumb.
I’ll be honest, my first few attempts at this recipe were a bit of a disaster. I once used way too much peppermint extract and the whole thing ended up tasting like a tube of toothpaste not exactly the festive vibe I was going for.
I also struggled with cake layers that would sink in the middle, leaving me with a chocolate crater. But after dozens of batches and a few deep dives into baking science, I finally cracked the code to getting that reliable, towering structure and the right balance of flavors.
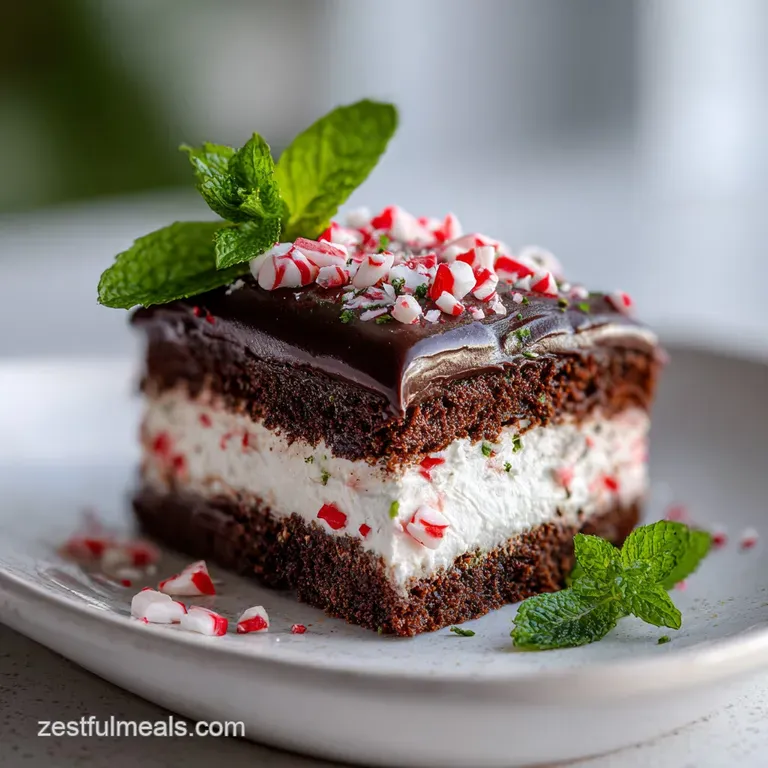
What we are making here is a triple threat dessert. You have a sponge that is so moist it almost borders on a brownie, a peppermint frosting that is light as a winter cloud, and a dark chocolate ganache that provides a luxurious, bittersweet finish.
It’s a bit of a project, but I’ve broken down every fail point I’ve encountered so you can sail right through it. Trust me, once you see that ganache dripping down the sides, you’ll know it was worth every second.
The Science of Fudgy Crumbs
The secret to this chocolate peppermint dream cake lies in a process called "blooming" the cocoa. When you pour 1 cup (240ml) of boiling water over 3/4 cup (75g) of Dutch processed cocoa powder, you dissolve the solids and release flavor compounds that otherwise stay trapped.
This simple step ensures the chocolate notes are front and center rather than hidden behind the flour.
- Thermal Reaction
- Boiling water hydrates the cocoa starch immediately, resulting in a smoother batter and more intense flavor.
- Acid Base Balance
- Dutch processed cocoa is neutralized, so we use 2 tsp of baking soda to react with the milk’s acidity for a reliable rise.
- Fat Suspension
- Using 1/2 cup (120ml) of vegetable oil instead of butter keeps the cake soft even when it’s cold from the fridge.
- Moisture Retention
- The high sugar to flour ratio creates a hygroscopic effect, meaning the cake literally pulls moisture from the air to stay tender.
| Method | Time | Texture | Best For |
|---|---|---|---|
| Scratch Recipe | 1 hour | Silky, dense, rich | Dinner parties and gifts |
| Box Mix Shortcut | 45 mins | Light, airy, spongy | Last minute kids' parties |
| No Bake Version | 30 mins | Creamy, mousse like | Hot summer holidays |
Choosing the scratch method for your peppermint dream cake ensures you control the depth of the chocolate and the quality of the peppermint extract. While shortcuts are fine for a Tuesday night, the scratch version provides a density that supports the heavy ganache and crushed candy canes much better.
Selecting high-quality Baking Elements
To get that professional result, we need to talk about what's actually going into your bowl. I always reach for Dutch processed cocoa powder because it has a darker, more mellow profile compared to natural cocoa. If you swap it for natural cocoa, your cake will be lighter in color and have a slightly more acidic tang.
| Ingredient | Science Role | Pro Secret |
|---|---|---|
| Dutch Processed Cocoa | Flavor & Color | Sift it twice to avoid "cocoa bombs" of dry powder in the batter. |
| Pure Peppermint Extract | Aromatic Kick | Always use "Pure" over "Artificial" to avoid a chemical aftertaste. |
| Boiling Water | Starch Gelatinization | Add it last to "melt" the sugar and create a glossy, thin batter. |
| Candy Canes | Texture Contrast | Crush them just before serving so they don't dissolve into the frosting. |
For the frosting, I highly recommend using unsalted butter that is cool to the touch but leaves an indentation when pressed. If your butter is too warm, your frosting will turn into a greasy soup. If you find yourself in a pinch and need a different frosting base, you might consider the stability tips in this Cool Whip Frosting Pudding recipe, which can be adapted with peppermint for a lighter alternative.
Standard Kitchen Tools for Success
You don't need a professional bakery setup to pull this off, but a few specific tools make the process much smoother. A stand mixer is your best friend for the frosting because you really need to whip air into that butter and sugar to get the "cloud" texture.
If you're using a hand mixer, just be prepared to double your mixing time.
- Two 8 inch round cake pans: These provide the best height to width ratio for a dramatic drip cake.
- Offset spatula: This is non negotiable for getting that smooth finish on the peppermint frosting.
- Whisk and fine mesh sieve: Essential for removing lumps from your 2 cups (250g) of flour and 4 cups (500g) of confectioners' sugar.
- Kitchen scale: For the most reliable results, I always weigh my ingredients in grams.
Chef's Tip: Freeze your cake pans for 10 minutes after greasing them. This creates a "cold barrier" that prevents the edges of the cake from overcooking before the center is set, giving you a much flatter top.
step-by-step Assembly Guide
- Preheat and Prep. Set your oven to 350°F (175°C). Grease two 8 inch pans and line the bottoms with parchment paper. Note: This ensures your cake never sticks.
- Combine Dry Ingredients. Whisk 2 cups (250g) flour, 2 cups (400g) sugar, 3/4 cup (75g) cocoa, 2 tsp baking soda, 1 tsp baking powder, and 1 tsp salt. Until no clumps remain.
- Mix Wet Ingredients. Add 1 cup (240ml) milk, 1/2 cup (120ml) oil, 2 eggs, and 1 tsp vanilla extract to the dry mix. Whisk until smooth and thick.
- Bloom the Cocoa. Carefully pour in 1 cup (240ml) boiling water. Note: The batter will be very thin; this is normal.
- Bake the Layers. Divide batter evenly and bake for 30-35 minutes until a toothpick comes out with just a few moist crumbs.
- Cool Completely. Let the cakes rest in the pans for 15 minutes, then move to a wire rack. Until cold to the touch.
- Whip the Frosting. Beat 1.5 cups (340g) butter with 4 cups (500g) confectioners' sugar, 1/4 cup (60ml) cream, and 1.5 tsp peppermint extract. Until fluffy and pale.
- Assemble the Cake. Place one layer down, spread a thick layer of frosting, and top with the second cake. Crumb coat and chill for 20 minutes.
- Prepare the Ganache. Heat 1/2 cup (120ml) cream and 1 tbsp corn syrup, pour over 4 oz (115g) chopped chocolate. Let sit 5 minutes, then stir until glossy.
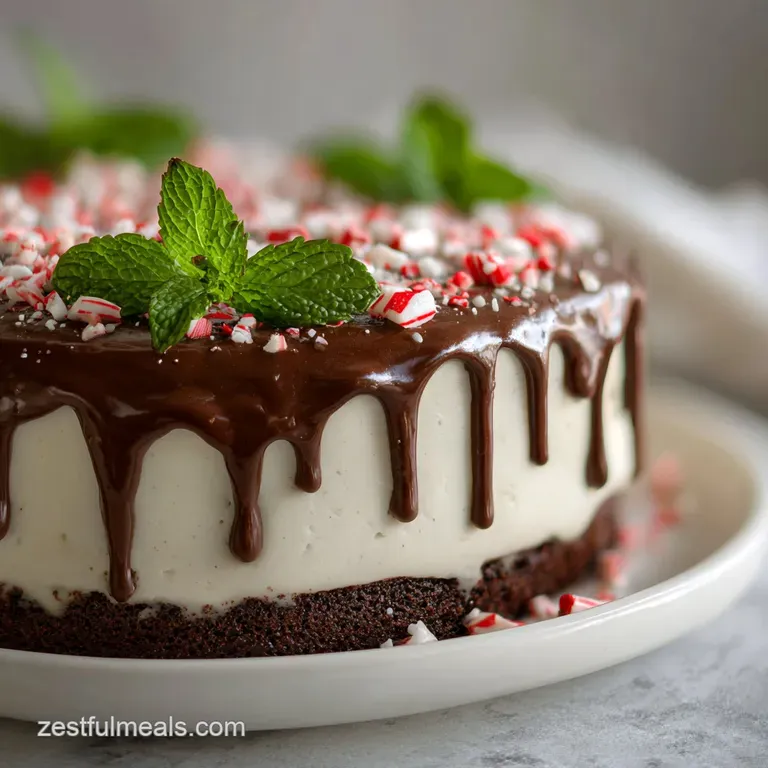
- The Final Drip. Pour ganache over the chilled cake, let it run down the sides, and top with 1/2 cup (140g) crushed candy canes. Until the ganache sets slightly.
Fixing Common Baking Failure Points
Why Your Frosting Is Grainy
If your peppermint frosting feels like sand on your tongue, it’s usually because the confectioners' sugar wasn't sifted or the butter was too cold. Cold butter won't emulsify with the sugar properly, leaving tiny clumps.
To fix this, you can microwave about 2 tablespoons of the frosting for 5 seconds and whip it back into the main bowl to gently warm the mixture.
Why Your Cake Layers Domed
A large dome in the center makes stacking a nightmare. This happens when the outside of the cake sets too fast while the inside is still rising. You can trim the tops with a serrated knife, but next time, try using "cake strips" or damp strips of a towel wrapped around the outside of the pan to keep the temperature even.
| Problem | Root Cause | Solution |
|---|---|---|
| Sunken Center | Oven door opened too early | Keep the door shut until at least 25 minutes have passed. |
| Tough Crumb | Over mixing the flour | Stop whisking as soon as the white streaks of flour disappear. |
| Runny Ganache | Cream was too hot | Let the ganache sit at room temperature until it reaches the consistency of honey. |
Common Mistakes Checklist
- ✓ Check your baking soda expiration date (it loses power after 6 months).
- ✓ Use room temperature eggs to ensure a smooth, emulsified batter.
- ✓ Tap the filled cake pans hard on the counter to pop trapped air bubbles.
- ✓ Ensure the cake is completely cold before applying the peppermint frosting.
- ✓ Chop the bittersweet chocolate into very fine pieces for the ganache to avoid lumps.
Flavor and Texture Customization Ideas
If you want to deviate from the classic chocolate peppermint dream cake, there are plenty of ways to play with the profile. I sometimes swap the bittersweet chocolate ganache for a white chocolate version to make it look even more like a winter wonderland. You can also add a layer of crushed chocolate cookies between the cakes for an extra crunch, similar to the texture in my favorite Chocolate Chip Cookies recipe.
- Adjusting for half (1 cake): Use a single 8 inch pan, reduce bake time by 5 minutes, and use exactly half of all ingredients (beat 1 egg and use 2 tbsp).
- Doubling for a crowd: Bake in four 8 inch pans or two 9x13 pans. Increase baking time by 10-15 minutes for the larger pans and reduce the salt by 25% to avoid over seasoning.
- Baking at altitude: Increase flour by 2 tbsp and reduce sugar by 2 tbsp to help the structure hold up in thinner air.
| Feature | Fresh Version | Shortcut Version |
|---|---|---|
| Crumb Texture | Fudgy/Dense | Spongy/Springy |
| Mint Intensity | Bold/Customizable | Mild/Pre mixed |
| Stability | High (stacks well) | Medium (can be crumbly) |
If you're looking for a tangier twist, replacing the butter in the frosting with cream cheese creates a beautiful "red velvet" style vibe. You can see how that base works in this Philadelphia Cream Cheese recipe, which offers a great guide on achieving that iconic silky texture.
Preserving Freshness and Moisture Levels
Keeping a chocolate cake moist is all about the airtight seal. Because this recipe uses oil, it stays softer in the fridge than an all-butter cake would. I recommend storing the cake in a dedicated cake carrier or under a large overturned bowl.
- Fridge Storage: The cake will stay velvety and fresh for up to 4 days.
- Freezing Guidelines: You can freeze the entire decorated cake for 1 month, or individual slices wrapped in plastic and foil for 2 months.
- Zero Waste Tip: If you have leftover cake scraps from leveling the tops, crumble them up and mix with a spoonful of frosting to make peppermint cake truffles. Dip them in the leftover ganache for a bite sized treat.
Ideal Serving and Pairing Suggestions
This cake is quite rich, so it benefits from being served with something that cuts through the sugar. A sharp, hot cup of black coffee or a glass of cold whole milk is the classic way to go. If you're serving this at a party, a side of fresh raspberries adds a nice tartness that complements the peppermint perfectly.
Debunking Kitchen MythsMyth: You must use hot water to activate baking soda. Truth: Baking soda reacts with acid (the milk and cocoa). The hot water is purely for blooming the cocoa and dissolving sugar; the leavening happens regardless of temperature.
Myth: Peppermint extract loses flavor in the oven. Truth: While some aromatics evaporate, peppermint is quite stable. However, adding a bit of extract to the frosting after it's whipped ensures that "cool" sensation hits the palate first.
When you're ready to slice into your chocolate peppermint dream cake, use a long, thin knife dipped in hot water and wiped dry between every cut. This ensures the ganache doesn't smear into the white frosting, keeping those beautiful, clean layers visible for your guests.
It’s a small extra step, but when you see that perfect slice sitting on the plate, you’ll be so glad you did it!

Recipe FAQs
Do peppermint and chocolate go well together?
Yes, they are a classic pairing. The deep, rich flavor of chocolate is beautifully complemented by the sharp, refreshing coolness of peppermint, creating a delightful contrast.
What exactly is a "dream cake"?
"Dream cake" implies an exceptionally decadent and perfectly executed cake. It suggests a dessert that is so delicious and satisfying, it feels like a fantasy realized, often featuring rich flavors and luxurious textures.
Which is the most delicious cake in the world?
Taste is subjective, but this chocolate peppermint dream cake is a strong contender for many. Its combination of fudgy chocolate, cool mint, and rich ganache offers a complex and satisfying flavor profile that appeals to a wide range of palates.
What is the lowest calorie cake you can eat?
This chocolate peppermint dream cake is not designed to be low-calorie. For a lighter option, consider a simple sponge cake with fruit or a recipe specifically formulated with reduced sugar and fat, like a simple Quick Banana Bread Recipe: Velvety Crumb.
Can I make this cake ahead of time?
Yes, absolutely. The cake layers can be baked and frozen for up to two weeks. This makes assembling the cake on the day of your event much quicker and ensures it's perfectly moist.
Why is my cake batter so thin?
A thin batter is intentional for this recipe, especially after adding the boiling water to bloom the cocoa. This step is crucial for unlocking deep chocolate flavor and creating a moist crumb, so don't worry if it seems very liquidy.
How do I get a smooth ganache drip?
Ensure your cake is well chilled before applying the ganache. Allow the ganache to cool to a thick but pourable consistency, similar to honey, and pour it around the edges of the cake, letting gravity do the work.
Chocolate Peppermint Dream Cake

Ingredients:
Instructions:
Nutrition Facts:
| Calories | 796 kcal |
|---|---|
| Protein | 6.2 g |
| Fat | 42.5 g |
| Carbs | 104.2 g |
| Fiber | 2.1 g |
| Sugar | 84.8 g |
| Sodium | 452 mg |
