French Vanilla Ice Cream: Custard Base
- Time: Active 15 minutes, Passive 30 mins, Total 45 mins
- Flavor/Texture Hook: Velvety custard with floral vanilla notes
- Perfect for: Dinner parties or an upgraded weekend treat
- Mastering the Classic French Vanilla Ice Cream
- Why This Custard Base Works
- Essential Recipe Specifications
- Selecting the Best Ingredients
- Tools for Silky Results
- Creating the Perfect Batch
- Solving Common Texture Issues
- Tasty Flavor Variations
- Storing Your Homemade Treat
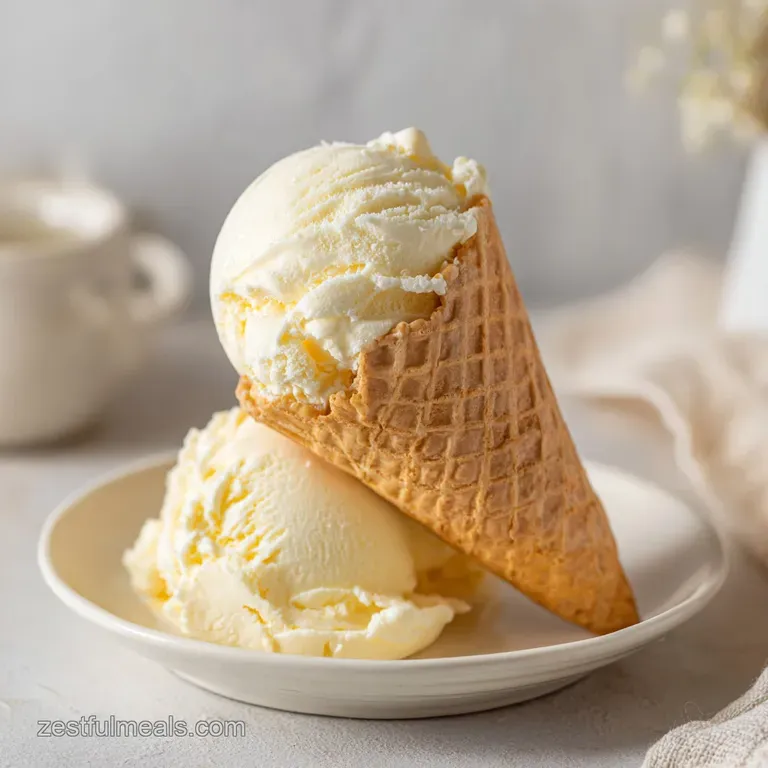
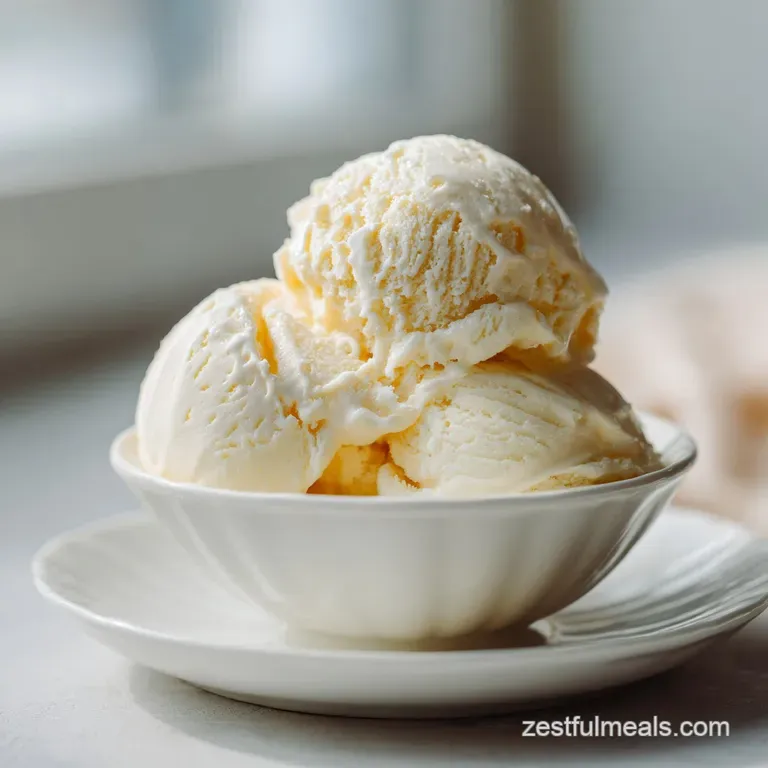
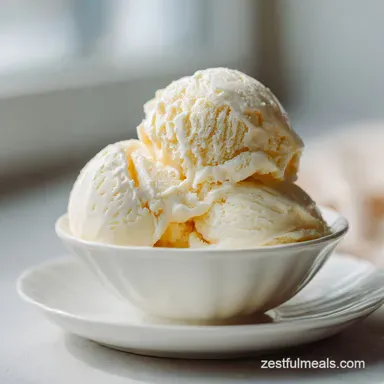
- Serving and Garnishing Ideas
- Recipe FAQs
- 📝 Recipe Card
Mastering the Classic French Vanilla Ice Cream
I still remember the first time I sliced open a real Madagascar vanilla bean. I was standing in my tiny first kitchen, hovering over a pot of steaming milk, and that aroma hit me like a physical wave. It wasn't the fake, sugary scent from a bottle, it was earthy, floral, and deep.
When those tiny black seeds swirled into the cream, I knew I could never go back to the plain white stuff from the grocery store.
You've probably noticed that some vanilla ice cream is bright white and airy, while the "French" version is rich, golden, and incredibly dense. That difference comes down to the yolks. My early attempts were a disaster, I once scrambled the eggs because I was too impatient to temper them properly.
Now, I've figured out the shortcuts that actually work without sacrificing that professional, "shatter on-the tongue" coldness.
We are going for a texture that is so smooth it feels like frozen silk. This isn't just a quick snack, it's a project that rewards your patience with the most decadent spoonful you've ever had. Trust me, once you see those beautiful vanilla flecks at the bottom of your bowl, you'll be just as obsessed as I am.
Why This Custard Base Works
Fat Stabilization: The high fat content from 2 cups organic heavy whipping cream prevents large ice crystals from forming, ensuring a velvety mouthfeel.
Emulsification: Lecithin found in the 5 large pasture raised egg yolks binds the water and fat molecules together, creating a stable structure that doesn't melt instantly.
Cryoprotection: The 0.75 cup organic cane sugar acts as an anti freeze by lowering the freezing point of the water in the milk, keeping the scoop soft enough to handle.
Infusion Depth: Steeped vanilla bean pods release vanillin over time, which provides a more complex flavor profile than extract alone can achieve.
| Churn Stage | Temp Target | Time Estimate | Visual Cue |
|---|---|---|---|
| Custard Thickening | 170°F | 8-12 mins | Coats back of spoon |
| Initial Chill | 40°F | 4-12 hours | Cold to the touch |
| Machine Churn | -5°F | 20-30 mins | Soft serve consistency |
The cooling process is where most people fail because they try to rush the machine. If your base isn't cold enough to start, the machine will just spin liquid forever. This is similar to the patience needed for my En Glaze Recipe, where temperature control makes or breaks the sauce.
Essential Recipe Specifications
When we talk about French Vanilla Ice Cream, we are looking at a specific ratio of dairy to egg. This isn't a light dessert. It is a high fat, high reward treat that relies on the quality of your ingredients. Because we are using minimal tools, the way you handle the heat is your most important skill.
| Component | Science Role | Pro Secret |
|---|---|---|
| Egg Yolks | Emulsifier | Use room temp yolks to prevent thermal shock |
| Cane Sugar | Texture softener | Whisk with yolks until pale to dissolve crystals |
| Vanilla Bean | Aromatic core | Rub the seeds into the sugar to distribute oils |
Before you start, make sure your freezer bowl has been in the back of the freezer for at least 24 hours. If it doesn't sound like a solid block of ice when you shake it, your ice cream will never set.
I've made that mistake more times than I care to admit, and ending up with vanilla soup is heartbreaking.
Selecting the Best Ingredients
- 2 cups organic heavy whipping cream: This provides the primary fat structure. Why this? Higher fat prevents iciness.
- Substitute: Double cream for an even richer result.
- 1 cup organic whole milk: Thins the cream just enough to make it pourable. Why this? Provides the water content needed for the sugar to dissolve.
- Substitute: 2% milk (result will be slightly less creamy).
- 0.75 cup organic cane sugar: Sweetens and keeps it soft. Why this? Organic cane sugar has a cleaner finish than beet sugar.
- Substitute: Honey (use 1/2 cup), but it will change the flavor significantly.
- 1 whole Madagascar vanilla bean: The star of the show. Why this? Provides authentic flavor and visual flecks.
- Substitute: 1 tbsp vanilla bean paste.
- 0.25 tsp fine sea salt: Sharpens the sweetness. Why this? Fine grains dissolve instantly in cold dairy.
- Substitute: Kosher salt (use 1/2 tsp).
- 5 large pasture raised egg yolks: For that signature yellow color and richness. Why this? Pasture raised yolks are darker and more flavorful.
- Substitute: 4 extra large yolks.
- 2 tsp pure vanilla extract: Added at the end for a bright finish. Why this? Heat kills some vanilla notes, so we add this cold.
- Substitute: Bourbon if you want a smoky undertone.
Tools for Silky Results
You don't need a thousand gadgets, but a few specific items will save your sanity. A heavy bottomed saucepan is non negotiable. Thin pots create hot spots that will scorch your milk before it even gets warm. I prefer using a stainless steel pot so I can see the color of the custard as it changes.
You also need a fine mesh strainer. No matter how careful you are, there might be a tiny bit of cooked egg or a piece of vanilla pod that escapes. Straining the mixture into your chilling bowl ensures that every bite is perfectly smooth. If you are into coffee flavored treats, you might find the same need for precision in my Brown Sugar Creamer recipe, which also uses a gentle heat method.
Creating the Perfect Batch
Phase 1: The Aromatic Infusion
- Split the Madagascar vanilla bean lengthwise with a sharp knife and scrape out the seeds. Note: Use the back of the knife to get every last bit.
- Combine the heavy cream, whole milk, half of the cane sugar, salt, and the vanilla bean (seeds and pod) in a saucepan.
- Heat over medium until small bubbles form around the edges. Do not let it reach a rolling boil.
Phase 2: Tempering the Yolks
- Whisk the 5 egg yolks and the remaining sugar in a medium bowl until the mixture turns pale yellow and thick.
- Slowly drizzle one ladle of the hot cream into the yolks while whisking constantly. Note: This warms the eggs slowly so they don't scramble.
- Repeat with two more ladles of cream until the yolk mixture is warm to the touch.
Phase 3: Thickening the Custard
- Pour the yolk mixture back into the saucepan with the remaining cream.
- Cook over medium low heat, stirring constantly with a wooden spoon, until the liquid coats the back of the spoon.
- Run your finger through the coating on the spoon; if the line stays clean, it's done.
Phase 4: The Chill and Churn
- Strain the custard through a fine mesh sieve into a clean bowl and stir in the vanilla extract.
- Cover with plastic wrap, pressing it directly onto the surface to prevent a skin from forming.
- Chill in the fridge for at least 4 hours until completely cold.
- Churn in your ice cream machine according to the manufacturer's directions until it looks like thick soft serve.
Solving Common Texture Issues
Why Your Ice Cream Grains
If you notice a sandy or grainy texture, it usually means the custard was cooked too fast or not strained. The "sandiness" is often tiny bits of overcooked egg. Even if it looks fine in the pot, those proteins will harden once frozen. Always use a low flame once the eggs are added back to the pot.
| Problem | Root Cause | Solution |
|---|---|---|
| Scrambled bits | Added eggs too fast | Pour through a fine mesh strainer immediately |
| Icy texture | Base was too warm | Chill the custard for a full 12 hours before churning |
| Greasy film | Over churned cream | Stop the machine as soon as it reaches soft serve stage |
Common Mistakes Checklist
- ✓ Freeze your churning bowl for at least 24 hours (48 is even better).
- ✓ Never skip the straining step, it catches undissolved sugar and egg bits.
- ✓ Don't boil the custard after adding the yolks, or the emulsion will break.
- ✓ Keep the vanilla pod in the cream while it chills for maximum flavor.
- ✓ Use a storage container with a tight lid to prevent freezer burn.
Tasty Flavor Variations
While the classic version is hard to beat, you can easily tweak this base. If you want a deeper, almost toasted flavor, try browning the butter before adding it to the dairy. It adds a nutty complexity that pairs beautifully with the vanilla.
For those who want a bit of crunch, fold in crushed cookies or toasted pecans during the last 2 minutes of churning. If you have extra butter and sugar on hand, you could even mirror the flavors of a Butter Cookies Cookies recipe by crumbling shortbread into the mix.
Three Quick Modification Ideas
- For a Toasted Note: Steep the milk with a cinnamon stick along with the vanilla.
- For a Coffee Kick: Add 2 tablespoons of espresso powder to the hot milk.
- For a Salty Twist: Increase the sea salt to 1/2 teaspoon and add a ribbon of caramel.
Storing Your Homemade Treat
Homemade ice cream doesn't have the stabilizers that commercial brands use, so it gets hard faster. Store it in a shallow, insulated container rather than a deep bowl. This helps it freeze evenly and makes scooping much easier later on.
It will stay fresh for about 2 weeks, though the texture is best within the first 5 days.
Don't throw away those 5 egg whites! You can store them in an airtight container in the fridge for 4 days or freeze them for up to 3 months. They are perfect for making meringues, a healthy egg white omelet, or even a batch of homemade marshmallows to go on top of your ice cream.
Serving and Garnishing Ideas
To get that perfect "parlor" scoop, let the container sit on the counter for about 5 to 7 minutes before you try to dig in. Dip your scoop in warm water between every bowl. This creates a slight melt on the edges of the scoop, which helps it release cleanly and stay round.
I love serving this with a warm fruit compote or just a simple drizzle of high-quality olive oil and a pinch of flaky sea salt. It sounds weird, but the oil highlights the floral notes of the French Vanilla Ice Cream in a way that chocolate syrup just can't.
Whatever you do, serve it in a chilled bowl so you can savor every velvety bite before it turns back into custard.

Recipe FAQs
What makes French vanilla ice cream different?
Egg yolks make the difference. French vanilla utilizes a custard base made with egg yolks, giving it a rich, yellow color and a dense, velvety mouthfeel.
What's in French vanilla ice cream?
Heavy cream, milk, sugar, egg yolks, and vanilla. The essential components are the egg yolks which act as an emulsifier, and the use of real vanilla bean or paste for deep flavoring.
What tastes better, vanilla or French vanilla?
This is purely a matter of preference. French vanilla offers a richer, denser, custard like experience due to the eggs, while regular vanilla is lighter and relies solely on cream and air.
Is French vanilla the same as regular vanilla?
No, they are fundamentally different base recipes. Regular vanilla ice cream is a Philadelphia style base (no eggs), resulting in a brighter white color and lighter texture compared to the dense, yellow French style.
Why is my French vanilla ice cream not as yellow as expected?
You likely used pasteurized or low-quality egg yolks. Pasture raised egg yolks have deeper orange color due to their diet, which translates directly into the final yellow hue of the finished product.
How do I achieve the silky texture in homemade French vanilla?
Temper the egg yolks correctly and chill the base completely. Slow, careful tempering prevents scrambling, and ensuring the base is below 40°F before churning prevents large ice crystal formation.
Can I use vanilla extract instead of a bean?
Yes, but you sacrifice visual appeal and depth. Extract is fine, but steeping a real bean provides floral aromatics and the signature black specks that define premium French vanilla.
French Vanilla Ice Cream Custard
Ingredients:
Instructions:
Nutrition Facts:
| Calories | 214 kcal |
|---|---|
| Protein | 2.6 g |
| Fat | 15.9 g |
| Carbs | 14.8 g |
| Fiber | 0 g |
| Sugar | 14.5 g |
| Sodium | 64 mg |
