Soft Boiled Egg in Microwave
- Time: Active 2 minutes, Passive 4 minutes, Total 6 minutes
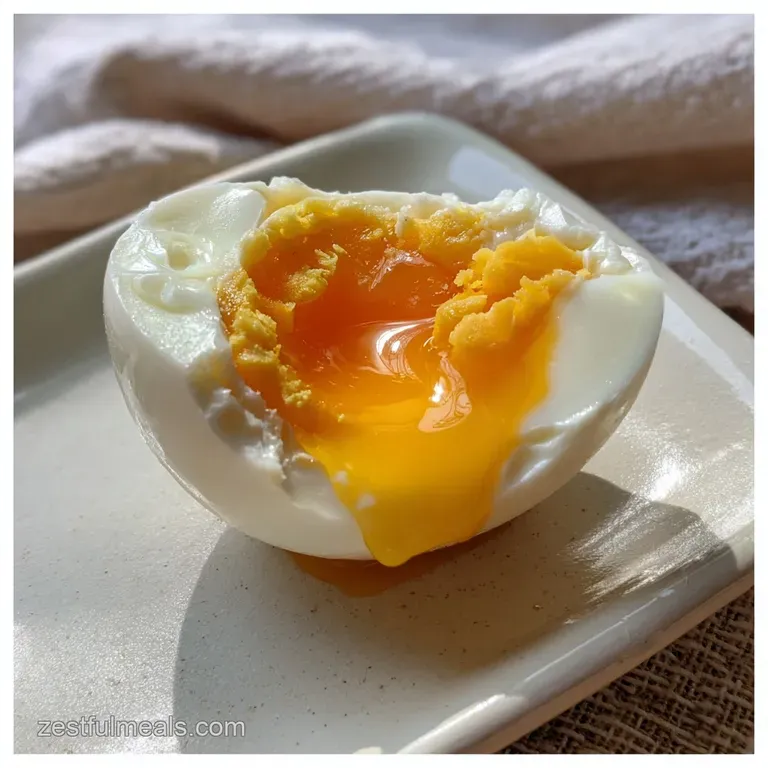
- Flavor/Texture Hook: Velvety, flowing yolk encased in a tender, fully set white
- Perfect for: Rapid weekday breakfasts or quick ramen toppings
- Achieve the Perfect Soft Boiled Egg in Microwave Every Morning
- Precise Measurements and Cook Times for Silky Microwave Eggs
- Essential Components for a Successful Morning Egg Result
- Tools for Making the Best Half Boiled Eggs
- Step by Step Walkthrough for Velvety Microwave Egg Results
- Fixing Texture Issues for a Better Egg Experience
- Savory Variations for Your Morning Microwave Breakfast Routine
- Keeping Your Eggs Fresh and Storing Leftover Portions
- Pairing Your Morning Egg with Delicious Brunch Favorites
- Recipe FAQs
- 📝 Recipe Card
Achieve the Perfect Soft Boiled Egg in Microwave Every Morning
There is a specific kind of morning joy that comes from cracking a warm shell and seeing a golden, liquid yolk spill across a piece of sourdough. For the longest time, I thought this luxury was reserved for slow weekends when I had time to watch a pot of water come to a boil.
I tried every "hack" in the book, including several messy experiments that ended with me scrubbing exploded egg bits off the ceiling of my microwave.
But then I learned the secret of the saltwater brine. It changed everything about my morning routine. Instead of a chaotic mess, I got a silky, consistent result every single time. We are talking about a total transformation from a risky gamble to a reliable kitchen staple.
This approach relies on physics rather than luck, creating a gentle environment for the egg to cook without the typical pressure buildup.
I love the contrast of textures here the firm, slightly bouncy white meeting that rich, buttery center. It is the ultimate morning person win. Whether you are prepping for a quick brunch or just need a protein hit before a meeting, this technique delivers a high end feel with minimal cleanup.
We’re going to skip the stovetop entirely and use science to get that "jammy" consistency we all crave.
Precise Measurements and Cook Times for Silky Microwave Eggs
Getting the timing right is about more than just the seconds on the clock; it is about how the heat moves through the water. We are not just "microwaving an egg," we are creating a micro environment that mimics a gentle simmer.
By adjusting the power and the submersion level, we control the thermal transfer to ensure the yolk stays liquid while the proteins in the white fully denature and set.
The Science of Why it Works Dissolved electrolytes in the saltwater create a protective shield that regulates how microwave energy reaches the egg. This prevents the rapid steam buildup inside the shell that usually causes a messy structural failure.
| Method | Time | Texture | Best For |
|---|---|---|---|
| Microwave Submersion | 4 minutes | Velvety and uniform | Rapid morning prep |
| Traditional Stovetop | 7 minutes | Firm but tender | Batch cooking 6+ eggs |
| Oven Roasting | 25 minutes | Dense and creamy | Large brunch crowds |
This table shows why the microwave is such a powerhouse for a single serving. It cuts the time significantly while maintaining the textural integrity of the egg. If you pair this with a quick side, like the Fingerling Potatoes in recipe, you have a balanced, hearty meal in under ten minutes. The efficiency here is honestly unmatched for a solo breakfast.
Essential Components for a Successful Morning Egg Result
The magic of this recipe for a soft boiled egg in microwave lies in the brine. We aren't just using plain water; we are building a solution that manages heat. The sea salt and baking soda aren't just for flavor; they are functional tools that help with heat distribution and the eventual peeling process.
| Component | Science Role | Pro Secret |
|---|---|---|
| 1 tsp Sea Salt | Ionic Conductivity | Increases boiling point for stability |
| 1/4 tsp Baking Soda | Alkaline Shift | Loosens the membrane for easy peeling |
| 1 cup Filtered Water | Thermal Mass | Absorbs excess energy to prevent hotspots |
The baking soda is a trick I learned after years of mangling my eggs while trying to peel them. By slightly raising the pH of the water, it helps the egg white pull away from the thin inner membrane. You get a smooth, crater free surface every time.
It’s those small details that separate a sad, torn egg from a masterpiece.
Tools for Making the Best Half Boiled Eggs
You don’t need much for this, but the quality of your vessel matters. Use a heavy duty, microwave safe ceramic mug or a glass Pyrex bowl. Avoid thin plastic, as it can warp or heat unevenly.
- 1 cup (240ml) filtered water: Why this? Clean water ensures no off flavors interfere with the delicate yolk.
- 1 tsp (6g) fine sea salt: Why this? Essential for preventing the egg from exploding in microwave.
- 1/4 tsp (1.5g) baking soda: Why this? Makes the shell slide right off the set white.
- 2 large eggs: Why this? Cold, straight from the fridge for better timing control.
If you’re looking to add a sweet contrast to this savory start, you might consider the Recipe for Fried Apples as a side dish. The cinnamon glazed apples provide a bright, tart counterpoint to the rich, salty eggs. It’s a classic flavor contrast that makes a simple breakfast feel like a full service brunch.
step-by-step Walkthrough for Velvety Microwave Egg Results
The key here is the "Interval Cook." We aren't just blasting the eggs on high for four minutes straight. We want to nudge the temperature up slowly so the whites firm up without the yolk reaching a hard boiled state.
- Dissolve solids. Stir the 1 tsp sea salt and 1/4 tsp baking soda into the 1 cup filtered water inside your microwave safe mug.
- Submerge eggs. Gently place the 2 large cold eggs into the water. Ensure they are fully covered by at least a centimeter of liquid.
- Initial heating. Microwave on 50% power for 2 minutes until the water is steaming but not vigorously boiling.
- Second interval. Cook for another 2 minutes at 50% power until tiny bubbles form on the egg shells. Note: 50% power is critical to prevent the yolk from overheating too fast.
- The rest. Let the mug sit inside the microwave (undisturbed) for 1 minute until carryover heat finishes the whites.
- Thermal shock. Carefully remove the mug and transfer the eggs into a bowl of ice water.
- Cool down. Leave them in the ice bath for 2 minutes until the shells feel cold to the touch.
- Crack gently. Tap the fat end of the egg first where the air pocket sits.
- Peel carefully. Remove the shell under the water or a slow running tap.
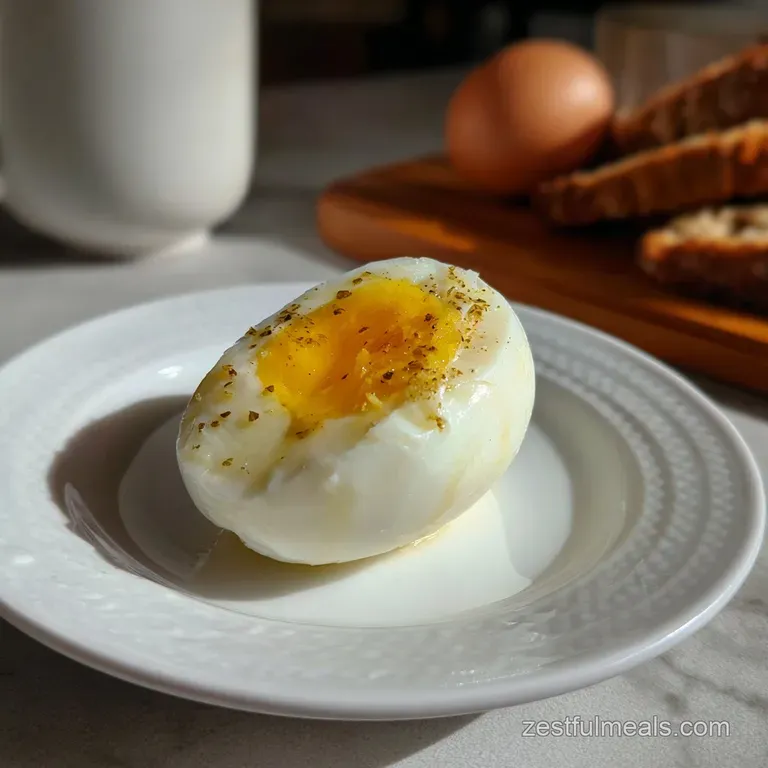
- Serve immediately. Slice in half and season with an extra pinch of salt or cracked pepper.
Chef's Tip: Use a safety pin to tiny prick the "fat" end of the egg shell before submerging. This releases the pressure from the internal air pocket, almost guaranteeing the shell won't crack during the cook.
Fixing Texture Issues for a Better Egg Experience
Even with a solid plan, microwaves can be fickle. Different wattages mean your "50% power" might be stronger or weaker than mine. If you find your whites are still a bit translucent, you likely need an extra 30 seconds of resting time rather than more active cooking.
Reasons for Adding Salt
The primary cause of the "microwave explosion" is the rapid heating of the fat and protein inside the egg, which creates steam that can't escape. Salt changes the way the water interacts with those waves. By creating an ionic solution, the water absorbs more of the energy, acting as a thermal buffer for the egg itself.
Benefits of Reduced Power Settings
Cooking at 100% power is like trying to toast bread with a blowtorch. The outside burns before the inside warms up. By using 50% power, the waves cycle on and off, allowing the heat to conduct naturally through the water and the egg white. This results in a tender, non rubbery texture.
| Problem | Root Cause | Solution |
|---|---|---|
| Exploding Shell | Lack of salt or power too high | Ensure full 1 tsp salt and use 50% power |
| Snotty Whites | Insufficient resting time | Let sit in hot water for extra 60 seconds |
| Stuck Shells | Fresh eggs or no baking soda | Use older eggs and don't skip the baking soda |
Common Mistakes Checklist - ✓ Never cook eggs in the microwave without water - they will definitely pop. - ✓ Avoid using 100% power; the rapid heat creates a tough, rubbery white. - ✓ Don't skip the ice bath; it stops the cooking instantly to preserve the runny yolk.
- ✓ Ensure the mug is deep enough so the eggs don't bob to the surface. - ✓ Use cold eggs; the timing is calibrated for fridge temperature ingredients.
Savory Variations for Your Morning Microwave Breakfast Routine
Once you master the base technique, you can start tweaking the flavors. While the standard brine is perfect for a classic egg, you can infuse the water with other ingredients to change the vibe of your soft boiled egg in microwave.
- Asian Inspired: Add a splash of soy sauce and a slice of ginger to the water before cooking. This is the perfect "quick fix" for a microwave soft boiled egg ramen bowl.
- Spiced Brine: Toss in a few peppercorns or a bay leaf. The subtle aromatics will permeate the shell slightly during the resting period.
- Keto Friendly: Serve the eggs over a bed of sautéed spinach with a heavy drizzle of olive oil.
If you are scaling this down to just one egg, use a smaller ramekin but keep the water level the same. If you are scaling up to 4 eggs, you'll need a larger bowl and about 2 cups of water.
For more than 4, I'd honestly recommend switching to the stovetop, as the microwave energy becomes too dispersed to give you a consistent soft boiled egg result.
Keeping Your Eggs Fresh and Storing Leftover Portions
Soft boiled eggs are best enjoyed immediately while the yolk is still warm and flowing. However, life happens. If you find yourself with an extra egg, you can store it in the fridge.
Storage Guidelines Keep unpeeled eggs in a sealed container in the fridge for up to 2 days. I do not recommend freezing soft boiled eggs, as the whites become incredibly tough and watery upon thawing.
To reheat, simply submerge the unpeeled egg in a bowl of very hot (but not boiling) tap water for 5 minutes. This gently warms the center without further cooking the yolk.
Zero Waste Tips Don't throw away those eggshells! Crush them up and add them to your garden soil or compost; they provide a fantastic calcium boost for your plants.
If you have leftover brine, you can actually use it to soak grains or seeds if you're planning to cook them later that day, as the salt and soda help soften outer husks.
Pairing Your Morning Egg with Delicious Brunch Favorites
This egg in microwave is the ultimate "lazy brunch" hero. My favorite way to serve it is on top of thick cut avocado toast with a heavy sprinkle of red pepper flakes and flaky sea salt. The creaminess of the avocado against the liquid yolk is a match made in heaven.
For a more substantial meal, these eggs are a game changer when dropped into a bowl of savory oatmeal or alongside some crispy bacon. If you're feeling fancy, try them with a side of Cool Whip Frosting Pudding recipe for a decadent brunch dessert contrast. The bright, savory egg followed by a silky, sweet treat is exactly how a weekend should start.
Remember, the goal is a stress free morning. Use these tricks to reclaim your time without sacrificing the quality of your breakfast. Once you see that first golden yolk run across your plate, you'll never go back to the stovetop again. Happy cooking!

Recipe FAQs
How do I soft boil an egg in the microwave?
Submerge eggs in a saltwater solution and cook at 50% power in intervals. Dissolve 1 tsp sea salt and 1/4 tsp baking soda in 1 cup water in a microwave safe mug, then add two cold eggs.
Microwave at 50% power for 2 minutes, then another 2 minutes, let rest for 1 minute, and plunge into an ice bath for 2 minutes before peeling.
How do you boil an egg in the microwave without it exploding?
Always use a saltwater brine and lower power settings. The salt acts as a thermal buffer, preventing the rapid steam buildup inside the egg that causes explosions. Cooking at 50% power allows heat to transfer more gently.
What is the quickest way to soft boil an egg?
The microwave method is the quickest. This technique takes a total of about 6 minutes, including prep and cooling time, significantly faster than stovetop boiling, making it ideal for speedy breakfasts or adding to dishes like Hawaiian Fried Rice with Pineapple & Ham.
How long does it take to boil eggs in a microwave?
Around 6 minutes total for a soft boiled egg. This includes 4 minutes of microwave cooking (split into intervals) and about 2 minutes for resting and cooling in an ice bath to achieve a perfectly jammy yolk.
Can I use a microwave to achieve a jammy yolk consistently?
Yes, with the correct saltwater method. The key is controlling heat transfer; the saltwater solution and interval cooking at 50% power prevent the yolk from overcooking, ensuring that desirable jammy consistency similar to how precise temperature control creates perfect textures in other recipes.
Is it safe to cook eggs in the microwave?
Yes, when done correctly with proper precautions. The main risk is explosion due to steam buildup; using a saltwater brine and cooking at reduced power mitigates this significantly, making it a safe and efficient method.
What water-to-egg ratio is best for microwave boiling?
Ensure eggs are fully submerged in about 1 cup of water for two eggs. The water acts as a cooking medium and a steam buffer; keeping the eggs completely covered by at least a centimeter of water is crucial for even cooking and preventing shell cracks.
Soft Boiled Egg Microwave

Ingredients:
Instructions:
Nutrition Facts:
| Calories | 72 kcal |
|---|---|
| Protein | 6.3 g |
| Fat | 4.8 g |
| Carbs | 0.4 g |
| Fiber | 0 g |
| Sugar | 0.2 g |
| Sodium | 95 mg |
