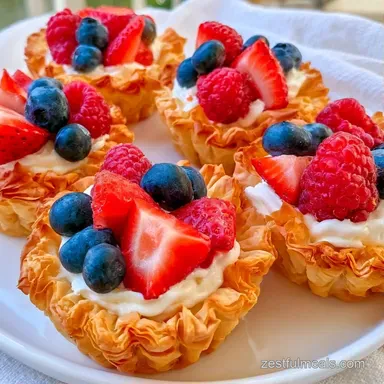
Failure-Proof Phyllo Fruit Cups
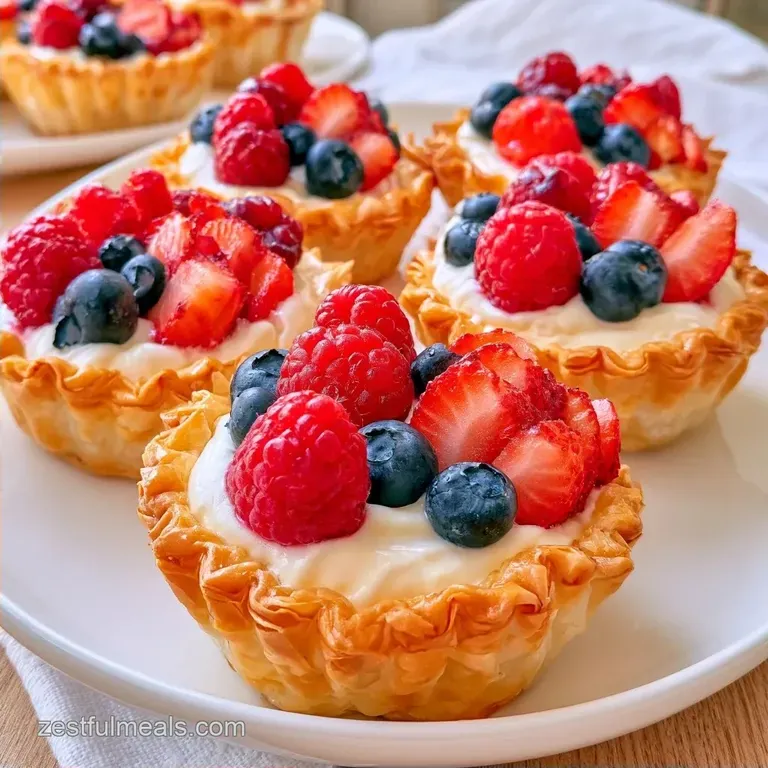
- Time: 10 min active + 5 min baking
- Flavor/Texture Hook: Shatter crispy shells with a silky cream center
- Perfect for: Baby showers, holiday parties, or a fancy brunch
Easy Phyllo Fruit Cups for Parties
Picture the buzz of a party in full gear. You have a platter of these elegant treats on the table, looking every bit as polished as if they were from a professional pastry shop. I once found this fragile pastry intimidating, but using pre-made shells makes the process effortless.
This recipe is all about maximum visual impact without spending three hours prepping. These Phyllo Fruit Cups combine a buttery, flaky crunch with a vibrant fruit center that's always the first to go. Trust me, once you see how simple the assembly is, these will be on your menu for every celebration.
Professional training isn't required to get the textures just right. The magic lies in the contrast of the toasted shell against the cool, airy whipped cream. It's an easy combination that feels upscale, ideal for those times you want to impress your guests while still enjoying the party.
Tools You'll Actually Use
Minimal equipment is required for this recipe. A standard medium bowl and a hand mixer handle the bulk of the work. To fill the shells, a piping bag is the neatest option, though a Ziploc bag with a clipped corner is a great substitute.
A small pastry brush is useful for applying the jam glaze, but a spoon works if you have a steady hand. I also recommend a sturdy baking sheet to ensure the shells stay in place while baking. Focus on the basics and don't worry too much about the gear.
Ingredients You'll Need
For the base, we're using pre made shells to save time. If you're feeling brave and want to try making the dough from scratch, my homemade phyllo dough is a great place to start, but for a 15 minute dessert, stick to the store-bought ones.
The List:
- 1 package pre made phyllo shells (approx. 15-20 shells)
- 8 oz cream cheese, softenedWhy this? Provides the structural base for the filling
- 1/4 cup powdered sugarWhy this? Dissolves faster than granulated sugar
- 1/2 tsp vanilla extract
- 2 tbsp heavy creamWhy this? Lightens the density of the cream cheese
- 1 cup mixed fresh berries (raspberries, blueberries)
- 1 tbsp apricot jamWhy this? Gives a glossy finish without being too sweet
Ingredient Swaps:
| Original Ingredient | Substitute | Why It Works |
|---|---|---|
| Apricot Jam | Raspberry Jam | Similar consistency. Note: Changes the flavor profile to be more tart |
| Heavy Cream | Full fat Greek Yogurt | Adds tang. Note: Filling will be slightly less airy |
| Mixed Berries | Diced Mango | Same freshness. Note: Heavier, so press in gently |
Quick Recipe Specs
Before we jump in, let's look at the basics. This recipe is designed for speed and reliability.
The Numbers:
- Prep time:10 minutes
- Cook time:5 minutes
- Total time:15 minutes
- Yield: 16-20 cups
Fresh vs Shortcut Comparison:
| Feature | Fresh Phyllo | Pre made Shells |
|---|---|---|
| Effort | High (layering/brushing) | Low (pop out of box) |
| Texture | Paper thin layers | Sturdier, cookie like |
| Time | 1 hour+ | 15 minutes |
Decision Shortcut:
| Goal | What to change |
|---|---|
| More Tart | Add lemon zest to cream |
| Extra Crunch | Bake shells 2 mins longer |
| Lighter Fill | Use whipped cream instead |
Putting it All Together
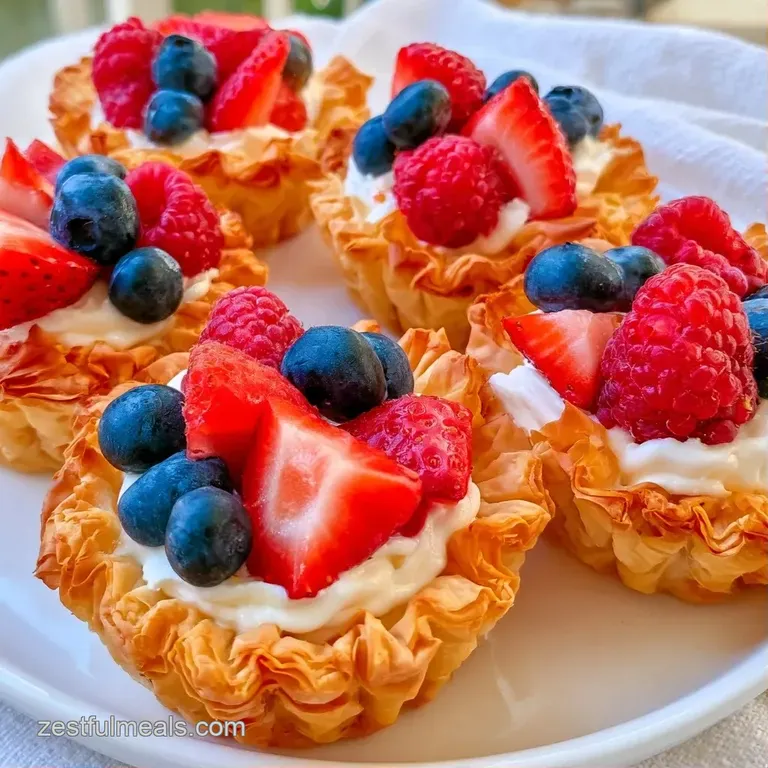
Let's get started. Follow these directions for the best results.
1. The Shell Refresh
Heat your oven to 350°F (175°C). Arrange the store-bought phyllo shells on a baking tray and bake for 4-6 minutes until they are slightly golden and smell nutty. Let them cool fully on the pan.
This step is vital because they develop a shatter crisp texture as they cool.
2. Mixing the Base
Using a medium bowl, whip together the softened cream cheese and powdered sugar. Stir until the mixture is creamy and completely smooth. If the cheese is too cold, it won't blend properly.
3. Aerating the Filling
Slowly whisk in the vanilla extract and heavy cream. Beat on medium high for 2 minutes until the filling is light and forms soft peaks. You are aiming for an airy consistency rather than something dense.
4. Filling the Cups
Transfer the cream into a piping bag or a Ziploc bag with a clipped corner. Pipe the mixture into each cooled shell, filling them about 3/4 of the way. Use a swirling motion to create a small indentation in the center of your Phyllo Fruit Cups.
5. Adding the Fruit
Gently press a single raspberry or a few blueberries into the center of the cream. Make sure they are secure so they don't slide off while serving.
6. The Final Glaze
Heat the apricot jam in the microwave for 10 seconds. Use a pastry brush to lightly coat the fruit with the jam. This provides that polished, bakery style shine.
Fixing Common Issues
Even straightforward recipes can have hiccups, and temperature is often the culprit.
Lumpy Filling This occurs if the cream cheese is too cold, as the sugar cannot properly break down the fat, resulting in tiny white dots. To fix this, microwave the cream cheese in 10-second bursts before you begin.
Soggy Shells Filling shells while they are still warm traps steam and moisture inside the pastry. Ensure they are completely cool before filling. Additionally, do not fill them more than 4 hours before serving.
Sliding Fruit This is typically caused by over whipped, soft cream or wet fruit. Use a paper towel to pat your berries dry before adding them to the Phyllo Fruit Cups.
| Problem | Root Cause | Solution |
|---|---|---|
| Lumpy Cream | Cold cream cheese | Soften to room temp first |
| Soft Shells | Filled too early | Toast shells and fill just before serving |
| Fruit Sinking | Filling too soft | Beat for exactly 2 minutes |
Storing Your Treats
These are best served immediately, but you can plan ahead if you're organized. Store the unfilled toasted shells in a sealed container at room temperature for 2 days. Keep the cream filling in a separate container in the cooler for up to 3 days.
Assemble the Phyllo Fruit Cups no more than a few hours before your guests arrive. If you must store assembled cups, keep them in a single layer in a container with a lid, but be aware that the shells will lose some of that snap.
To avoid waste, use any leftover apricot jam as a glaze for roasted carrots or stir it into your morning oatmeal. If you have extra cream filling, it makes a great dip for apple slices.
Fun Flavor Ideas
After mastering the foundation, feel free to experiment with your toppings. In the summer, I enjoy replacing berries with diced kiwi or mango. For a cozy winter version, pomegranate seeds and a splash of honey work beautifully.
If you're craving something richer, give my Cream Cheese Phyllo Cups a try. Alternatively, using a mascarpone blend instead of cream cheese creates a more Italian inspired tart.
To put a new spin on these, turn them into "mini cheesecakes" by mixing a pinch of lemon zest into the filling. The bright acidity balances the rich cream cheese and enhances the flavor of the fruit.
Serving and Plating
When it comes to Phyllo Fruit Cups, the presentation is half the fun. I suggest using a slate board or a white ceramic platter to make the colors of the berries stand out. Arrange them in a tight circle or a clean grid for a modern look.
Pair these with something bubbly, like a Prosecco or a sparkling cider. The bubbles cleanse the palate between the rich cream and the sweet fruit. If you're serving them at a brunch, they go great alongside a strong cup of coffee.
Since these are bite sized, you don't need forks. Just make sure the platter is accessible from all sides so guests can grab one and keep chatting. It's the ideal finger food because it's neat and doesn't leave a mess.
A quick note on myths: You might hear that you need to brush every single layer of phyllo with butter to get a crunch. That's true for handmade tarts, but for these pre made shells, the butter is already baked in. The only "secret" you actually need is that 5 minute oven toast to refresh the pastry.
Some people also think fresh fruit makes the shells soggy instantly. As long as you toast the shells and pat the fruit dry, they'll stay crisp for hours.
Recipe FAQs
Is it true you can fill phyllo cups without baking them first?
Actually, no. Pre-baking at 350°F for 4 6 minutes is essential for a nutty flavor and shatter crisp texture.
Tip: let them cool completely on the pan to ensure maximum crunch.
What can I fill phyllo cups with?
Use any sweetened cream cheese mixture topped with fresh berries.
Tip: if you enjoy the contrast of textures here, see how crispy cups work with savory fillings.
When do phyllo shells lose their crunch?
Shells begin to soften shortly after the cream filling is piped inside.
Tip: store unfilled toasted shells in a sealed container at room temperature for 2 days.
How to make the fruit topping look professional?
Lightly brush the berries with warmed apricot jam using a pastry brush.
Tip: use a swirling motion when piping cream to create a small divot for the fruit.
Phyllo Fruit Cups