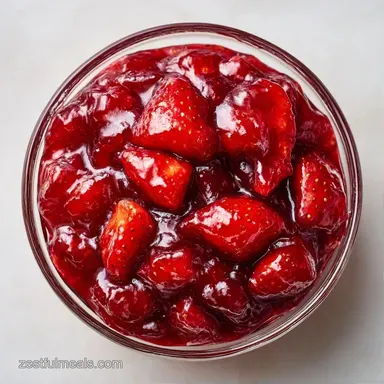
Small Batch Quick Jam: Glossy and Chunky
- Time: 10 min active + 20 min cook
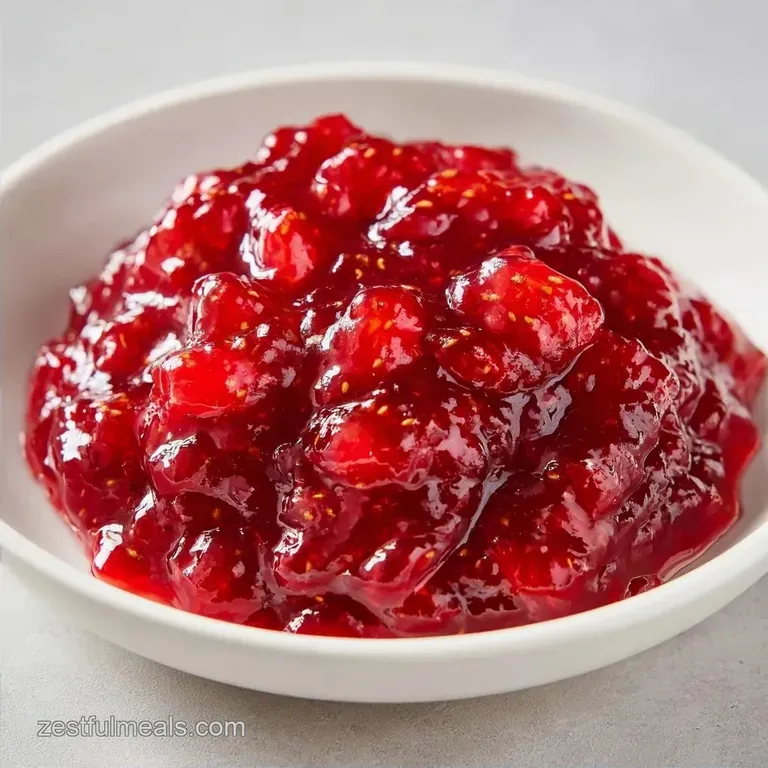
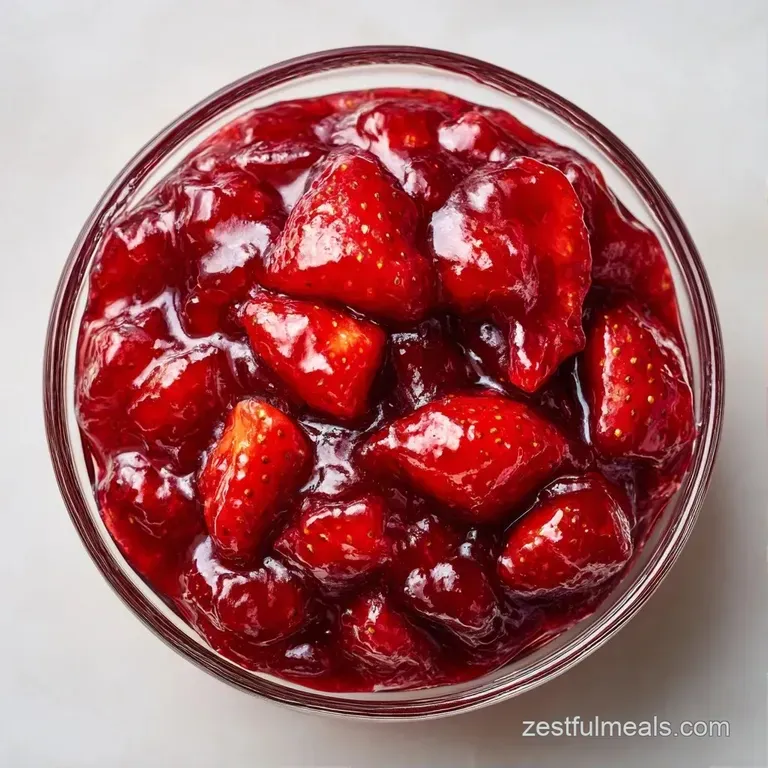
- Flavor/Texture Hook: Bright, glossy, and chunky
- Perfect for: Quick breakfasts or dessert toppings
- The Easiest Small Batch Quick Jam
- Why These Ingredients Work
- Component Analysis
- Gathering The Right Ingredients
- Your Essential Jam Toolkit
- Step By Step Jam Making
- Solving Common Jam Problems
- Troubleshooting Common Issues
- Adjusting Your Batch Size
- Common Jam Misconceptions
- Keeping Your Jam Fresh
- Tasty Ways To Serve
- Recipe FAQs
- 📝 Recipe Card
The Easiest Small Batch Quick Jam
That heavy, sweet scent of bubbling berries filling the kitchen is honestly one of my favorite smells. There is something about the way fresh strawberries break down into a thick, glossy syrup that just feels right. I remember the first time I tried to make a massive, traditional batch of jam.
I used a pot that was way too small for the amount of fruit, and the sugar scorched at the bottom, leaving the whole thing tasting like burnt toast. It was a total disaster.
Since then, I've shifted my focus to making things in smaller, manageable amounts. This approach takes away the stress of wondering if the pot will boil over or if the jam will ever actually set. It's a much more relaxed way to cook, and the results are often brighter because the fruit doesn't spend hours on the heat.
If you're looking for a way to use up those last few berries in the fridge, making a Quick Jam is way better than buying a store-bought jar full of corn syrup. You get that punchy, fresh fruit taste and a texture that feels like it came from a fancy farm stand. Let's get into how to do this without the stress.
Why These Ingredients Work
- Pectin Activation: Strawberries have some natural pectin, but the lemon juice triggers it to bond with the sugar and create a gel.
- Sugar Concentration: As the water evaporates, the sugar concentrates, which creates the thick, velvety consistency.
- Acid Balance: The lemon juice doesn't just help with the set, it cuts through the sweetness to keep the flavor bright.
- Fruit Mashing: Breaking some of the berries releases internal juices, which helps the mixture thicken faster.
| Method | Time | Texture | Best For |
|---|---|---|---|
| Stovetop | 30 mins | Glossy & Chunky | Immediate use |
| Oven/Slow | 4+ hours | Smooth & Dark | Large batches |
| Microwave | 10 mins | Syrupy | Tiny portions |
I've found that the stovetop is the only way to go for this specific recipe. The direct heat allows you to monitor the "rolling boil" closely, which is the secret to getting that right consistency. If you're curious about other fast versions, you can look into a Jam in 25 Minutes recipe for more fruit options.
Component Analysis
| Ingredient | Science Role | Pro Secret |
|---|---|---|
| Strawberries | Base & Pectin | Use slightly underripe berries for a firmer set |
| Sugar | Preservative/Binder | Granulated sugar provides the most consistent set |
| Lemon Juice | pH Regulator | Always use fresh lemon, not the bottled stuff |
Gathering The Right Ingredients
To get this right, you only need a few things. Don't bother with low quality sugar or pre cut fruit, as the water content can be off.
- 2 cups (300g) fresh strawberries, hulled and quartered Why this? Fresh berries provide the best natural pectin.
- Substitute: Raspberries or Blueberries (adjust sugar slightly)
- 1/3 cup (65g) granulated sugar Why this? Essential for the chemical bond that creates the gel.
- Substitute: Honey (will be slightly runnier)
- 1 tbsp (15ml) fresh lemon juice Why this? Lowers pH to activate the set.
- Substitute: Apple cider vinegar (more acidic, less fruity)
Your Essential Jam Toolkit
You don't need a professional lab for this, but a few specific tools make a huge difference.
- Heavy bottomed saucepan: This is non negotiable. Thin pans create hot spots that burn the sugar.
- Potato masher: Great for crushing berries without turning them into a complete puree.
- Chilled plate: A small plate kept in the freezer for the "set test."
- Silicone spatula: Perfect for scraping the sides so no sugar crystals burn.
Step by step Jam Making
Right then, let's get cooking. Keep your heat steady and stay close to the stove.
- Combine the quartered strawberries, granulated sugar, and fresh lemon juice in your heavy bottomed saucepan.
- Use a potato masher to crush about half of the berries. Note: This releases the juices needed for the Quick Jam to thicken.
- Place the pan over medium heat and stir constantly until the sugar has completely dissolved and the mixture looks liquid.
- Increase the heat to medium high. Bring the mixture to a rolling boil, stirring frequently to prevent scorching.
- Simmer for 10-15 minutes. Wait until the mixture thickens and appears glossy and the bubbles become slower and heavier.
- Prepare your set test by taking a dollop of the hot jam and placing it on the chilled freezer plate.
- Wait 30 seconds, then gently push the jam with your finger.
- If the jam wrinkles and holds its shape, remove it from the heat immediately. Note: Overcooking will make it rubbery.
- Let the jam cool slightly in the pan before transferring it to a jar.
Chef's Tip: To get an even faster set, freeze your butter for 10 mins before grating it into other recipes, but for jam, the "freezer plate" is your only real secret weapon.
Solving Common Jam Problems
Getting the set right can be tricky if you're new to this. If your Batch Quick Jam looks more like a syrup than a jam, don't panic. Most of these issues are just about heat and time.
Troubleshooting Common Issues
| Issue | Solution |
|---|---|
| Why Your Jam is Runny | Usually, this happens if the fruit was too ripe (low pectin) or the boil wasn't long enough. If it's too thin, just put it back on the heat for another 5 minutes. |
| Why Your Jam is Cloudy | Cloudiness usually comes from over mashing or using fruit that was too frozen. It doesn't affect the taste, just the look. |
| Why Your Jam is Burnt | If you see dark streaks, the sugar scorched. This happens in thin pans or when you stop stirring during the rolling boil. |
Mistakes Checklist
- ✓ Did I use a heavy bottomed pan to avoid scorching?
- ✓ Did I mash only half the berries to keep some texture?
- ✓ Did I use a chilled plate for the set test?
- ✓ Did I stir constantly during the rolling boil?
- ✓ Did I use fresh lemon juice for the acid hit?
Adjusting Your Batch Size
Scaling this recipe is pretty straightforward, but you can't just multiply everything and expect the same timing.
Scaling Down (Half Batch) Use a very small saucepan. Because there's less volume, the liquid evaporates much faster. Reduce your simmer time by about 20% and start checking the set test at the 8 minute mark.
Scaling Up (Double or Triple Batch) If you're making a larger Batch Quick Jam, be careful with the sugar. I suggest increasing the sugar to only 1.5x for a double batch to keep it from being cloying.
Work in batches if your pot is small, as overcrowding the pan slows down evaporation and results in a runnier jam.
Common Jam Misconceptions
A lot of people think you need store-bought pectin powder to make jam. That's just not true. While pectin speeds things up, the natural pectin in fruit combined with acid and sugar is plenty for a small batch.
Another myth is that you have to boil jam for hours to preserve it. For a refrigerator jam, a quick 20 minute boil is all you need. Long boiling actually destroys the fresh, bright flavor of the berries, making them taste "cooked" rather than "fresh."
Keeping Your Jam Fresh
Since we aren't doing a full canning process here, this is strictly a refrigerator jam. Store it in a clean glass jar in the fridge for up to 2 weeks. If you can't finish it by then, you can freeze it for up to 3 months.
Zero Waste Tip: Don't toss the strawberry hulls (the green tops). Toss them in a freezer bag, and when the bag is full, simmer them with a bit of water and sugar to make a simple, light strawberry syrup for cocktails or pancakes.
Tasty Ways To Serve
The best part of this Quick Jam is how versatile it is. It's absolutely brilliant on a toasted English muffin recipe with a thick slab of salted butter. The saltiness of the butter cuts right through the sweetness of the jam.
You can also swirl it into plain Greek yogurt or use it as a filling for thumbprint cookies. If you're feeling fancy, try it over a piece of brie cheese with some crackers. Trust me on this, the contrast between the creamy cheese and the tart berries is a winner every time.
It's a simple way to turn a few berries into something that feels like a treat.
Recipe FAQs
How to make this quick strawberry jam?
Combine strawberries, sugar, and lemon juice in a heavy bottomed saucepan. Mash half the fruit, dissolve sugar over medium heat, and boil on medium high for 10 15 minutes until glossy.
Is this a beginner friendly jam recipe?
Yes, it is very simple. It uses only three ingredients and takes about 30 minutes from start to finish.
How to tell if the jam has set correctly?
Place a small dollop on a chilled freezer plate. Wait 30 seconds and push it with your finger; it is done if it wrinkles and holds its shape.
Why is my jam too runny?
The fruit may have been too ripe or the boil was too short. Simmer the mixture for another 5 minutes to achieve a thicker consistency.
Is it true that I need to mash all the berries for the jam to thicken?
No, this is a common misconception. Only mash about half the fruit to release pectin while keeping some chunky pieces for better texture.
How to prevent the sugar from scorching?
Stir frequently during the rolling boil. Use a heavy bottomed saucepan to ensure even heat distribution and prevent dark streaks.
What can I serve this jam with?
It's excellent on toast, scones, or yogurt. If you enjoyed balancing these sweet and tart flavors, see how we use a similar acid balance in our Classic New York Cheesecake.
Small Batch Quick Jam